
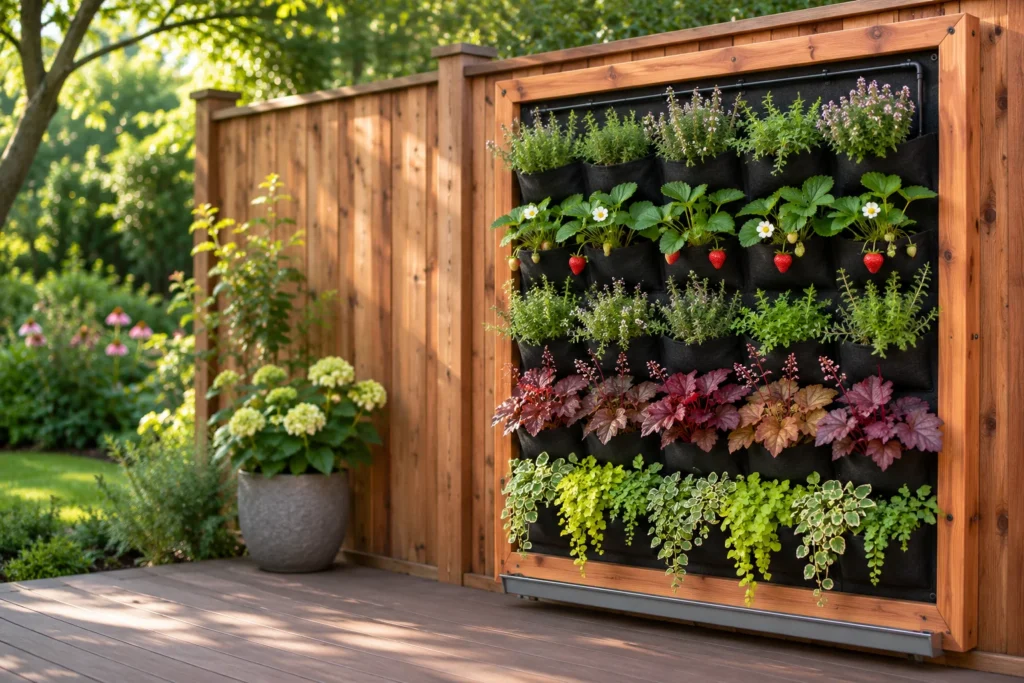
There’s a bare fence you walk past every day, a phone full of pocket walls dripping with strawberries and ferns, and one picture you can’t shake: a soggy panel that stains the siding, sags off its screws and dries out by the second month.
This guide covers how to build a vertical garden wall that avoids all three: a frame that carries the weight, a waterproof layer that keeps the wall dry, a drip line that waters from the top, and plants chosen by sun hours and checked for pets. If you rent and can’t drill, our no-drill vertical garden ideas for renters cover leaning frames and railing pocket strips instead.
Table of Contents
At a Glance
- Match the system to the wall: a felt pocket panel for a fence or sealed wall, framed boxes for a long-lasting wall, a stamped pallet on a budget, a freestanding frame when you can’t drill.
- Keep water off the wall with a waterproof backing, a gap on standoffs and a gutter at the base.
- Wet potting mix is heavy, so fasten into studs, masonry or the ground.
- Water from the top with a drip line; the top row dries first, so it gets the toughest plants.
- Plant by sun hours and check every plant on the ASPCA list if a cat or dog shares the space.
What You’ll Need
Most of the cost sits in the planter system and the potting mix.
Essentials:
- A planter system: a felt pocket panel (low-cost to mid-range), planter boxes (mid-range) or a heat-treated pallet (low-cost).
- Lumber: cedar and redwood resist decay and can last about 10 years outdoors. Copper-treated lumber rated for ground contact is the other long-life choice; today’s copper-based treatments contain no arsenic and are considered low in toxicity, and arsenic-based CCA lumber left the residential market in 2004.
- Exterior screws, plus lag screws for studs or sleeve anchors for brick and block.
- Waterproof backing: a rigid plastic sheet or pond liner.
- Standoffs: short PVC pipe lengths or wood spacer blocks.
- Soilless potting mix and a controlled-release fertilizer.
- Drill, level, tape measure, stud finder or masonry bit, gloves and eye protection.
Optional: a drip kit with timer (mid-range), a gutter or tray, exterior stain, a cut-end preservative for treated lumber, a French cleat for a box wall, and a grow light for an indoor wall.
Before You Start
Four checks decide whether this build works: the sun on that wall, what the wall is made of, how much weight it can carry, and where the water goes.
Sun. Count the hours of direct sun on the wall across one clear day. Most vegetables and flowers want 6 to 8 hours; herbs and cool-season greens get by on 3 to 5. South- and west-facing walls are the sunniest.
Wall type. A wood fence takes screws through its rails; siding and masonry need the frame to stand off the surface; drywall can’t carry a wet panel on its own, so the load has to reach the studs. A balcony wall is often shared property, so read the lease or HOA rules first.
Weight. Water weighs about 62 pounds per cubic foot, and a single 20-inch container with wet mix and plants can weigh around 100 pounds. Thirty pockets add up fast. On a high balcony, check the building rules on loads.
Water path. Decide now where the run-through goes: a gutter, a tray, a gravel strip or a bed at the base, and on a balcony, never the neighbor below. For yard builds, contact 811 a few business days before digging post holes so buried lines get marked; a freestanding structure may also need a permit.
Since it’s fall, build now and plant in two waves: cold-hardy perennials such as thyme, strawberries and coral bells now (find your zone by ZIP code on the USDA Plant Hardiness Zone Map), tender plants such as basil and impatiens in spring. If you’d rather grow climbers than fill pockets, our DIY trellis ideas for a small balcony are the cheaper route.
Grow if you own the wall or have permission and get 3 or more hours of direct sun; adjust with a freestanding frame and a tray on drywall or a shared balcony; skip the drill if you rent without permission.
Step-by-Step: How to Build a Vertical Garden Wall
The order is spot, system, frame, waterproofing, mounting, water, plants, settling in.
Step 1: Mark the Spot and Trace the Water Path
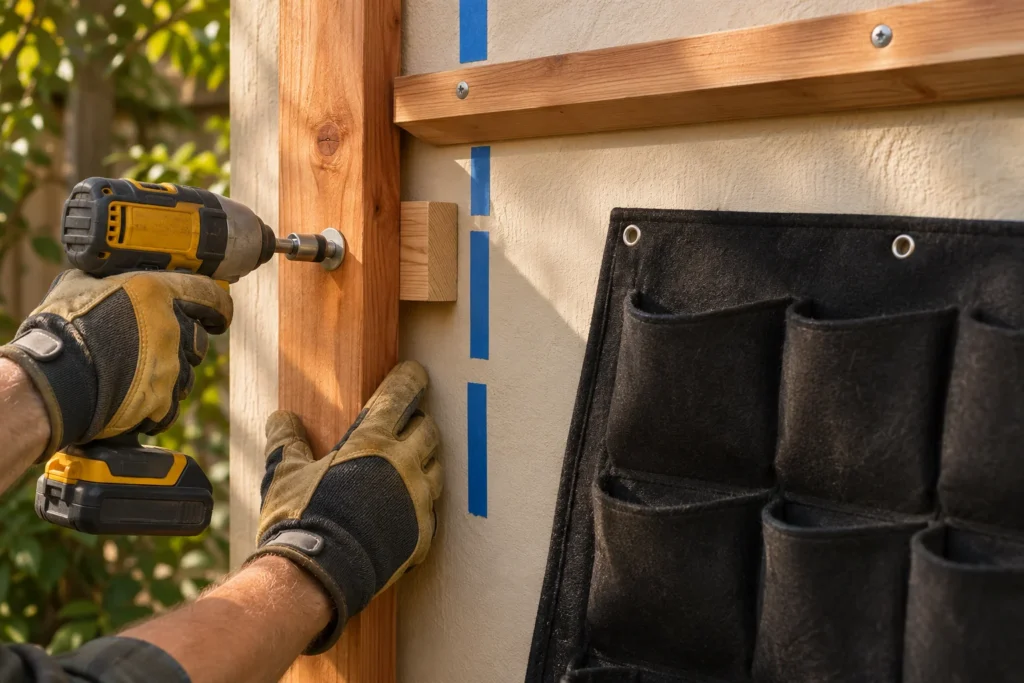
Tape the panel’s outline on the wall at a height you can reach without a ladder, marking where the drip line enters at the top and run-through leaves at the bottom. Then mark every stud with painter’s tape (mortar joints on masonry, rails on a fence).
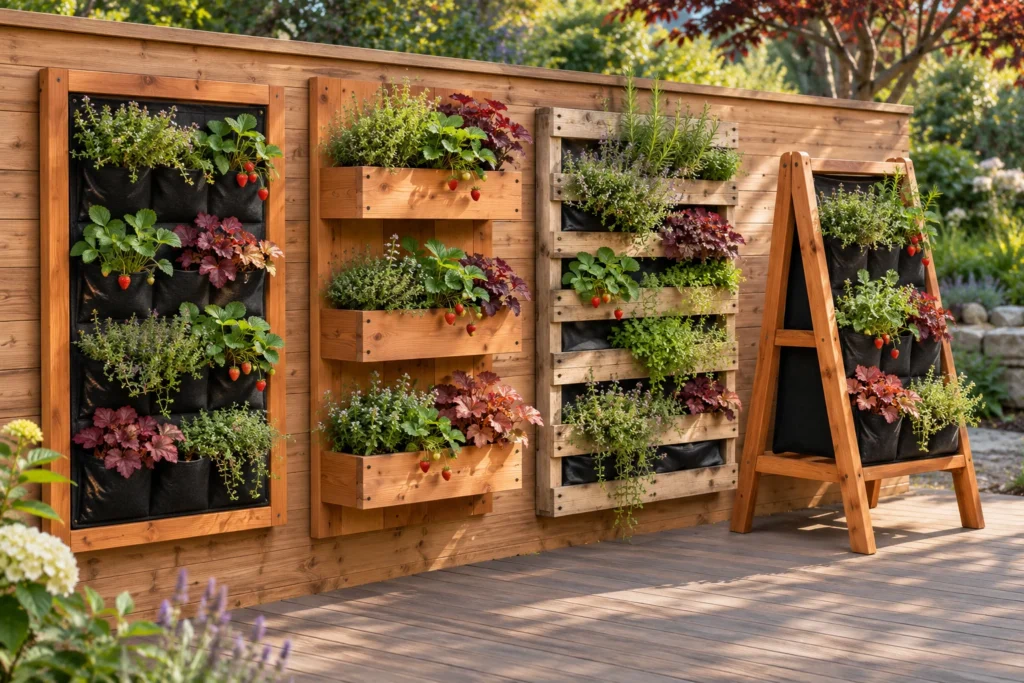
Step 2: Choose the System for Your Wall
Pick the system by the wall and the weight it can take.
| System | Best wall | Wet weight | Skill and tools | Drip line |
|---|---|---|---|---|
| Felt pocket panel in a frame | Fence, sealed siding, masonry, indoor wall with backing | Lowest; shallow pockets | Beginner; drill, level, screws | Easy: one line across the top row |
| Framed planter boxes | Fence, masonry, wall with studs | Highest; deep boxes | Intermediate; saw, drill, brackets | Easy: emitters in each box |
| Heat-treated pallet, fabric lined | Fence or yard wall | High; soil-filled cavity | Beginner; staple gun, fabric, screws | Harder: line runs behind the slats |
| Freestanding post or A-frame | Yard, patio, balcony floor, any wall you can’t drill | Any; the frame carries it | Intermediate; posts, braces, feet | Easy: same as the panel it holds |
For a pallet, find the IPPC stamp first: HT means heat-treated with no chemicals, MB means methyl bromide, a fumigant that rules it out, and an unmarked pallet might be old arsenic-treated wood, so keep it for flowers rather than food. Our wooden pallet planter ideas cover lining and planting.
For a first wall we’d start with one felt pocket panel in a simple frame, because its wet weight is the lowest of the four and a drip line can be added later.
Step 3: Build or Prepare the Frame
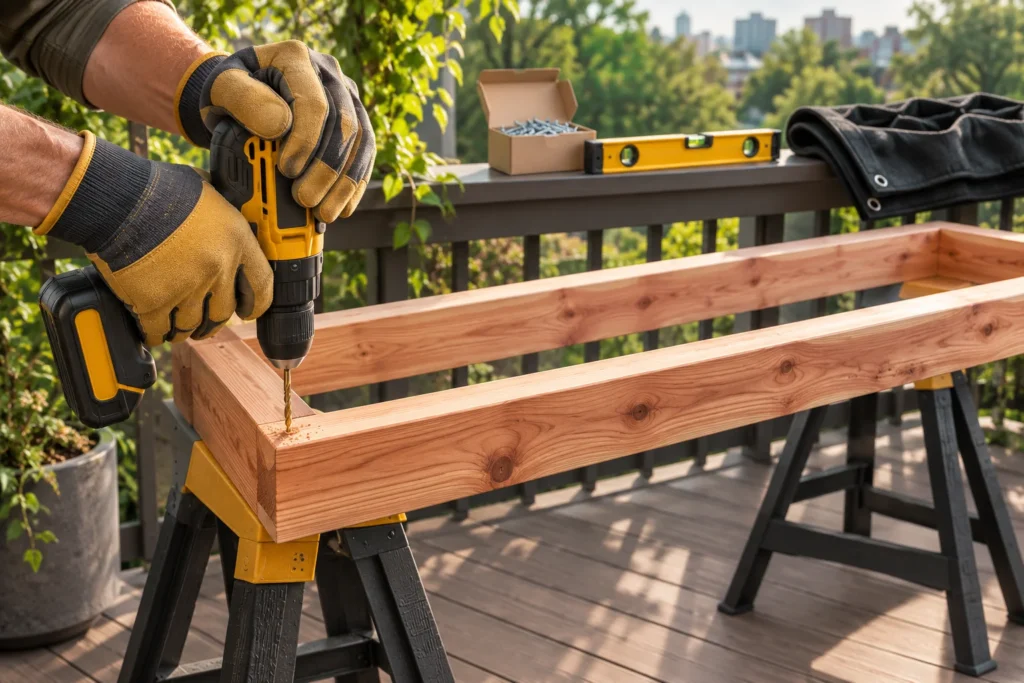
The frame is a rectangle a little larger than the panel: two uprights, two rails, and a middle rail if the panel is taller than about 4 feet. Pre-drill every hole and join the corners with exterior screws. For planter boxes, screw a backing board across the frame, fix each box to it, and drill drainage holes in every box; a gravel layer only raises the wet zone.
Finish the wood before it meets water: exterior stain or paint on cedar or pine, and the cut-end preservative on every fresh cut of treated lumber. For food in boxes of copper-treated wood, a four-year Oregon State University study found the copper stayed in the inch of soil touching the wood and didn’t rise in the vegetables.
Step 4: Add the Waterproof Layer and the Air Gap
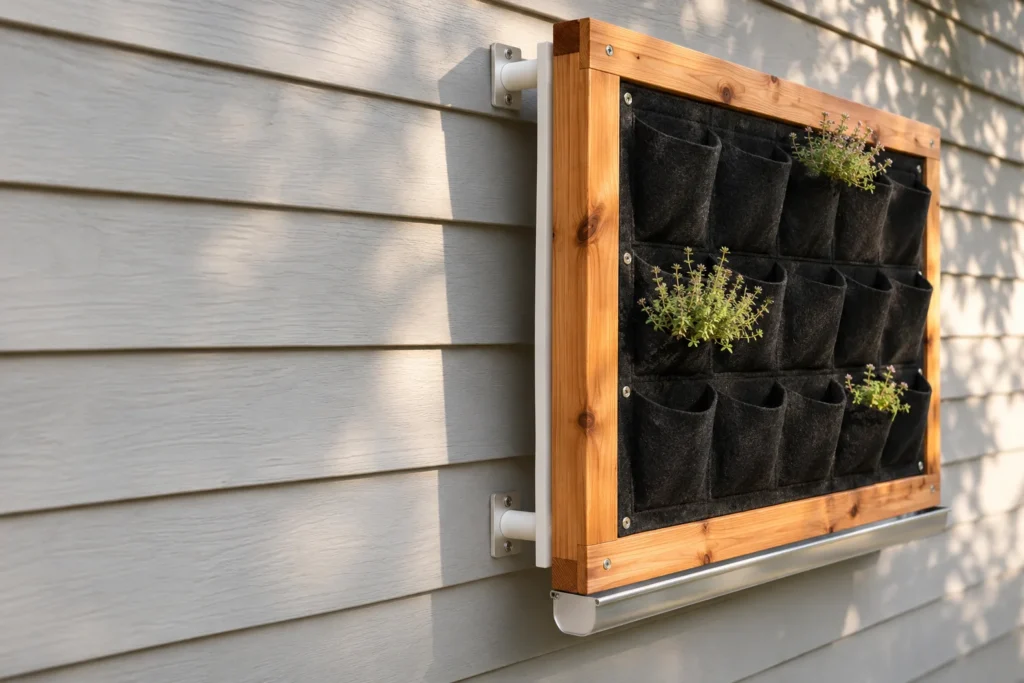
A wet panel pressed flat against a wall causes the stains and rot people fear. Fix the backing to the back of the frame so it covers the full footprint and overhangs the bottom rail by an inch. Mississippi State University Extension’s green wall guidance calls for a waterproof membrane on any frame attached to a building and a standoff of at least 6 to 8 inches for trellises so air moves behind them.
That full gap suits a box wall; a shallow felt panel does better on short spacer blocks at every screw point behind the backing. Finish with a short gutter or tray under the bottom rail, angled toward the drain point from Step 1.
Step 5: Mount It or Stand It Up
Every fastener has to end in solid structure: lag screws through the uprights and standoffs into the studs marked in Step 1, sleeve anchors in the mortar joints of brick or block, screws into the rails of a fence rather than the pickets. A box wall is heavy enough for a French cleat across two or more studs.
A freestanding frame skips the wall: set posts the way the post-base maker or local fence code specifies, after the 811 marks, or build an A-frame on wide feet for a patio or balcony floor. Indoors, our plant wall ideas for a small living room show the same idea scaled to a room.
Step 6: Set Up the Watering
A vertical wall is a stack of small containers, and small containers dry fast; by midsummer most need water at least once a day. For one panel, check with a finger 2 to 3 inches into the mix and hand-water row by row from the top until it runs through, then empty the tray.
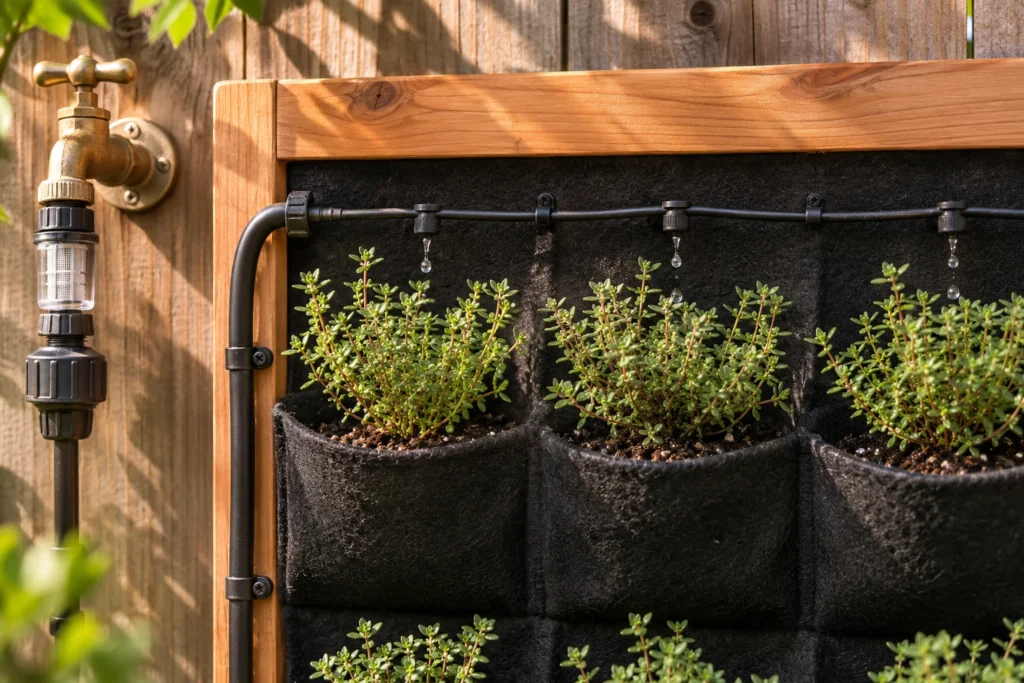
For anything bigger, use a drip line. From the tap, Colorado State University Extension’s drip guide lists a backflow preventer, a 150 to 200 mesh filter for city water, a pressure regulator, 1/2-inch mainline and 1/4-inch microtubes feeding emitters rated at 1/2, 1, 2 or 4 gallons per hour.
Run the mainline up one side of the frame, lay a microtube with 1/2 or 1 gph emitters along the top row only, and let gravity feed the pockets below; we’d add lower emitters only if the bottom stays dry after two weeks. Run it in the morning; before the first hard freeze, drain the line and bring the filter, regulator and timer indoors. A freestanding frame holding ordinary pots can run on a self-watering container you can build instead.
Step 7: Fill and Plant by Light
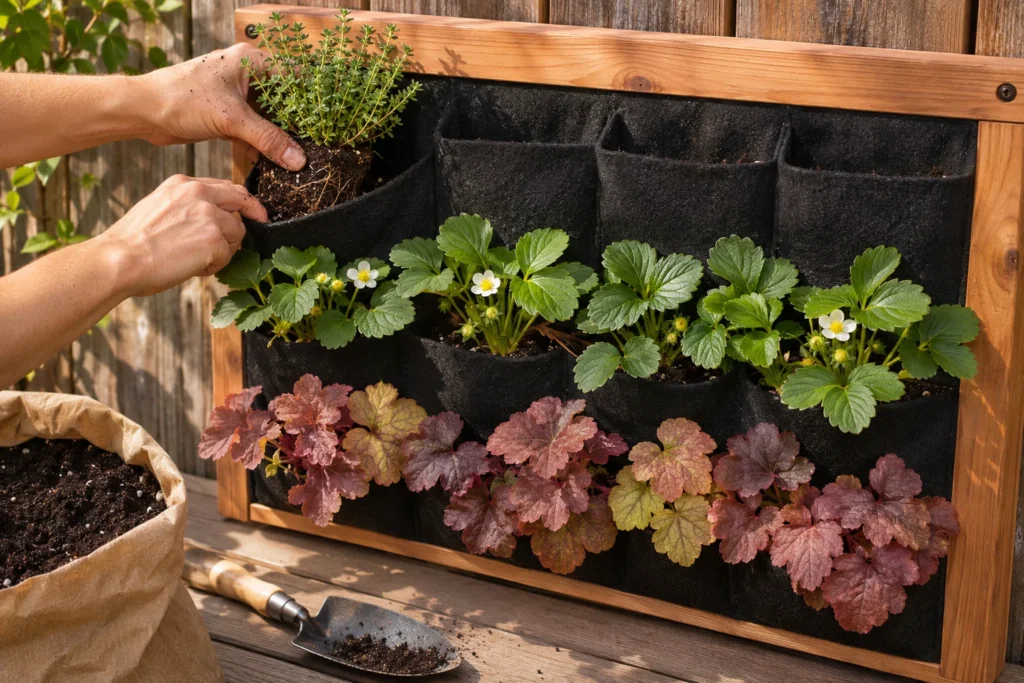
Fill every pocket or box with soilless potting mix (garden soil packs down and holds too much water) to about an inch below the lip, with controlled-release fertilizer at the label rate. Then plant by gravity: the top row dries first and gets the most sun, so it takes the drought-tolerant plants; the bottom row stays wettest and takes the moisture lovers; trailers go at the edges.
Every plant below was checked against the ASPCA list for cats and dogs. Golden pothos is the one toxic entry, kept because so many indoor walls use it: it carries insoluble calcium oxalates that cause mouth burning, drooling and vomiting in cats and dogs. Begonias (Begonia spp.) and coleus are on the same list and were left out; our guide to houseplants that are safe for cats and dogs has more choices. For more options sorted by light and row, see our 16 best plants for vertical wall garden pockets.
| Plant | Light | Cold hardiness | ASPCA, cats and dogs |
|---|---|---|---|
| Common thyme (Thymus vulgaris) | Full sun, 6 or more hours | Perennial, zones 5 to 9; top row | Non-toxic |
| Strawberry (Fragaria x ananassa) | Full sun to part shade | Perennial, zones 5 to 9; frequent water | Non-toxic |
| Sweet basil (Ocimum basilicum) | Full sun | Annual; plant after the last frost | Non-toxic |
| Coral bells (Heuchera sanguinea) | Part shade; takes full sun with water | Perennial, zones 3 to 8 | Non-toxic |
| Impatiens (Impatiens walleriana) | Part shade to shade | Annual outside zones 10 to 11 | Non-toxic |
| Boston fern (Nephrolepis exaltata) | Bright indirect light; shade outdoors | Indoors below zone 10; bottom row | Non-toxic |
| Spider plant (Chlorophytum comosum) | Medium light, no direct sun | Indoors below zone 9; cascading | Non-toxic |
| Baby rubber plant (Peperomia obtusifolia) | Bright indirect light | Indoors below zone 10; let the mix dry a little | Non-toxic |
| Golden pothos (Epipremnum aureum) | Bright indirect; tolerates low light | Indoors; trailing vine | Toxic |
In my own containers, pothos is the gap filler: it trails over the edge, keeps going in a spot with no direct sun, and I let its mix dry out between waterings. Mint, which I’ve kept in containers for years, would get its own pocket because it spreads; it stays off the table since mint is on the same toxic list, with vomiting and diarrhea after large ingestions.
Step 8: Water In, Feed and Settle It
Water each pocket until it runs out the bottom, then check behind the panel and in the tray. The first soaking is when the frame carries its true weight, so re-tighten every fastener once the mix has drained, and for two weeks check the mix daily and adjust the timer run.
At 8 to 10 weeks, reapply controlled-release fertilizer or switch to liquid feed at half strength once a week, because frequent watering washes nutrients out of small containers; a white crust on the mix means salts, so flush with plain water. Bring tender plants in once nights drop to about 55°F, moving them from sun to shade to indoors over a week. The hardy rows can stay; roots in containers freeze more easily than roots in the ground, so wrap an exposed panel in frost blanket during hard freezes and water on days above freezing.
Common Mistakes
- Garden soil in the pockets or a gravel layer in the boxes (Steps 3 and 7).
- Screwing a wet wall into drywall or siding without finding the studs (Step 5).
- Pressing the panel flat against the wall with no backing or gap (Step 4).
- Planting the same thing in every row (Step 7).
- Buying a pallet without checking the stamp (Step 2).
- A dark metal or black plastic system on a south-facing wall: dark containers heat up, dry the mix faster and can burn roots.
Troubleshooting
Top row crispy, bottom row soggy
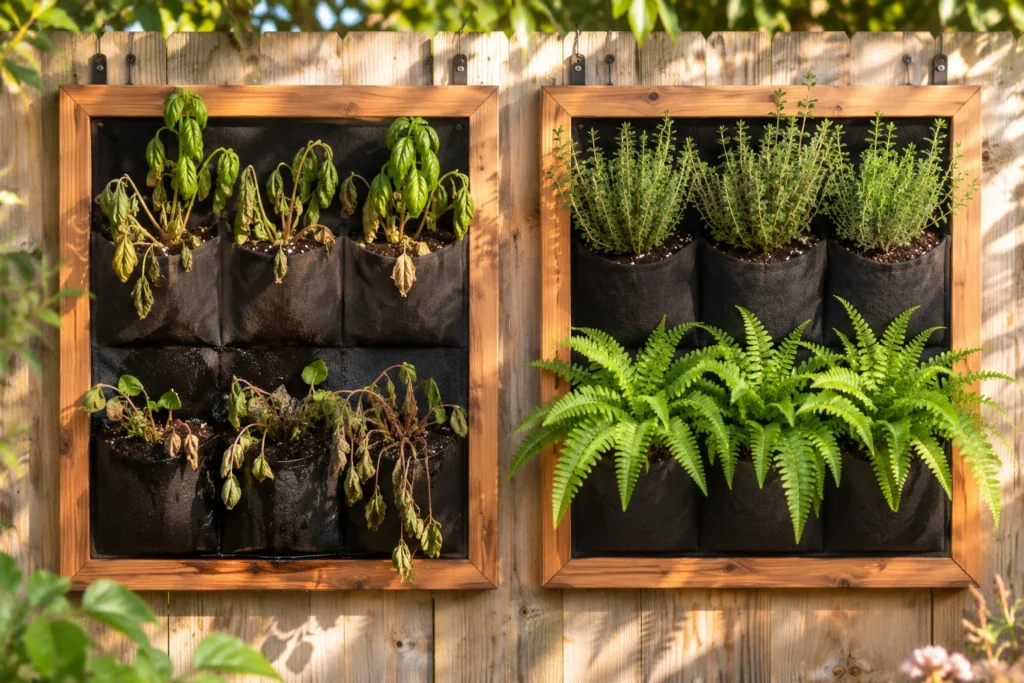
Upper plants wilt by afternoon while the bottom pockets stay wet: gravity moves water down, and the top gets the most sun and wind. Put the drought-tolerant plants from Step 7 on top, add a second emitter per top pocket, and move moisture lovers down a row.
Damp patch or stain on the wall behind
A dark line down the siding or a soft spot in drywall means the backing stops short, the standoffs are missing, or the tray overflows. Pull the panel, fix the layers as in Step 4, and let the wall dry fully before remounting.
Pockets sagging or screws working loose
The frame tilts forward or a gap opens at the top: the wall gained weight after watering and the fasteners ended in drywall or a picket. Remount into structure, or split one large wall into two smaller panels.
Leaves yellowing while the mix stays wet
Pale, limp leaves on the lower rows usually mean overwatering, but a blocked drainage hole or winter dormancy can look the same. Mushy brown roots mean rot and a shorter timer run; clean white roots in cold weather mean a resting plant that needs less water until spring.
Brown edges on indoor ferns and peperomia
Crisp leaf tips near a heat vent or in winter point to low humidity plus dry mix. Set a tray of wet pebbles under the fern rows and move the wall away from the vent.
Frequently Asked Questions
Can I grow vegetables in a vertical garden wall?
Yes, with the right crops. Salad greens and herbs are the best fit for pockets because the part you harvest grows above the mix, so picking doesn’t disturb the roots or the fabric, and both respond well to the regular watering a wall gets anyway. Give them the 3 to 5 hours of direct sun from Before You Start, and 6 to 8 hours for anything that fruits. Large fruiting crops need more root room than a pocket gives, so put those in a deep box on the bottom row or in a container on the floor beside the wall.
Which plants work in a vertical garden wall in full shade?
Impatiens, Boston fern and coral bells are the safest bets for a wall with under 2 hours of direct sun, and all three are non-toxic to cats and dogs on the ASPCA list. Impatiens (Impatiens walleriana) flower in part shade to full shade and come out when frost arrives; Boston fern (Nephrolepis exaltata) wants shade, high humidity and mix that never dries out, so it belongs on the bottom row; coral bells (Heuchera sanguinea) take dappled light and come back each year in zones 3 to 8. Expect fewer flowers and slower growth in deep shade, so plant fewer pockets and water more lightly.
Do I need a pressure regulator and filter on a drip line for a vertical wall?
Yes to both on any line fed from a hose tap. Household pressure is usually higher than drip parts are built for; the Colorado State University fact sheet in Sources puts typical drip operation at about 20 to 30 psi, and without a regulator emitters spray or pop off, which on a wall means water on the siding. A 150 to 200 mesh filter keeps grit out of the tiny emitters, which is what makes one pocket go dry while its neighbors stay wet. Fit a backflow preventer ahead of both to protect your drinking water.
How do I water a vertical garden wall in winter?
Less often, and only on days above freezing. Hardy perennials in the wall are dormant, so the mix dries slowly; check it with a finger and water when it’s dry a couple of inches down, which may be every week or two rather than daily. Indoor walls slow down too: spider plant and Boston fern take less water in winter, and soggy mix in a cool room is the quickest route to root rot. If you ran a drip line, it should already be drained and stored, so winter watering is by hand.
Can I build a vertical garden wall indoors away from a window?
Yes, with a grow light on a timer above the wall. Indoor light is usually far below what nursery-grown plants are used to, so a wall across the room from a window can’t run on daylight alone. Choose the plants that tolerate the least light: golden pothos survives long stretches of low light, spider plant tolerates deep shade, and baby rubber plant copes with low light for months, while ferns and flowering plants sulk. Keep the rigid backing and tray from Step 4; indoor drips are quieter than outdoor ones and no less damaging.
What Actually Matters
Knowing how to build a vertical garden wall comes down to the boring parts: water stays off the wall, weight goes into studs, masonry or the ground, and the drip line feeds the top row while gravity feeds the rest.
If you only fix one thing on a wall that’s already up, make it the backing and the air gap; every other problem is cheaper to live with than a rotted fence.
This week, count the sun hours on the wall, pick one system from the Step 2 table and buy a single panel’s worth of parts. If the drill is off the table where you live, the renter guide in the introduction gets you growing upward anyway.
Sources
- NC State Extension – Extension Gardener Handbook, Chapter 18: Plants Grown in Containers – containers, sun, watering, weight, fertilizer and winter care.
- USGS Water Science School – Water Density – the weight of water per cubic foot.
- Mississippi State University Extension – Plants for Green Walls – membrane, standoff and top-fed drip.
- Colorado State University Extension – Drip Irrigation for Home Gardens, Fact Sheet 4.702 – drip components, pressure and emitter rates.
- University of Maryland Extension – The Safety of Materials Used for Building Raised Beds – treated lumber and CCA.
- Oregon State University Extension – Pressure-treated wood for raised bed construction in Oregon (EM 9879) – the copper study.
- UC ANR, The Backyard Gardener – Picking Pallets for Raised Beds – pallet codes.
- UC ANR, Napa Master Gardener Column – Vertical Gardening – pocket, pallet and gutter systems.
- Common Ground Alliance – 811 Before You Dig – calling before digging.
- USDA Agricultural Research Service – 2023 USDA Plant Hardiness Zone Map – zones.
- NC State Extension Plant Toolbox – the page for each species in the Step 7 table – light, zones and water.
- ASPCA Animal Poison Control – Toxic and Non-Toxic Plants pages for each plant in the Step 7 table, plus begonia, coleus and mint.