


The pallet was leaning behind the hardware store with a “free” sign taped to it, pale boards, solid corners, and almost exactly as wide as the bare wall on your balcony. You could already picture basil spilling out between the slats. Then, somewhere on the walk home, the questions started.
Is that wood safe to grow salad in? Will it be too heavy once it’s soaked? Where does the water go when it drains, and will the neighbor downstairs notice?
These DIY wooden pallet planter ideas balcony renters can actually build answer those questions in the order you’ll meet them: the stamp on the wood first, then lining, filling, anchoring without a drill, and finally what to plant in each pocket this spring.
The whole guide is written for small spaces and rented walls. If you’re new to growing in containers, our guide to balcony container basics covers pots, mix and drainage in general, so this one can stay focused on the pallet.
Table of Contents
At a Glance
If you only read one section, make it this one: the stamp decides whether the pallet is safe, and the lining and anchoring decide whether it survives a balcony.
- Use only a pallet stamped with the IPPC logo and “HT” (heat treated). Pass on anything marked “MB,” anything stained or painted, and anything unmarked if you plan to grow food.
- Line the back, bottom and sides with landscape fabric, fill with moist soilless potting mix while the pallet lies flat, plant through the slats, and give it a few days to settle before standing it up.
- Build it where it will live, because a filled, watered pallet is heavy. Renters can lean it against a wall and strap it instead of drilling.
- Shallow pockets dry out fast, so check moisture daily in warm or windy weather and plan to replace the mix each spring.
- Basil, rosemary, thyme and strawberries are listed as non-toxic to dogs and cats; mint is listed as toxic, so leave it out if a pet nibbles.
This project suits a balcony wall with at least 6 hours of sun for herbs (greens manage with less) and a renter who wants a movable herb or salad wall. Skip it if your lease or HOA bans items against shared walls, if your balcony hangs directly over a neighbor’s with no way to catch drips, or if you can’t find an HT-stamped pallet; one of these cheap DIY planter ideas will serve you better.
What You’ll Need for a DIY Wooden Pallet Planter Ideas Balcony Build
Almost everything here is free or low-cost except the potting mix, which is the one item worth buying new. The pallet itself matters most, so check the stamp before you carry anything home.
Reading the Pallet Stamp
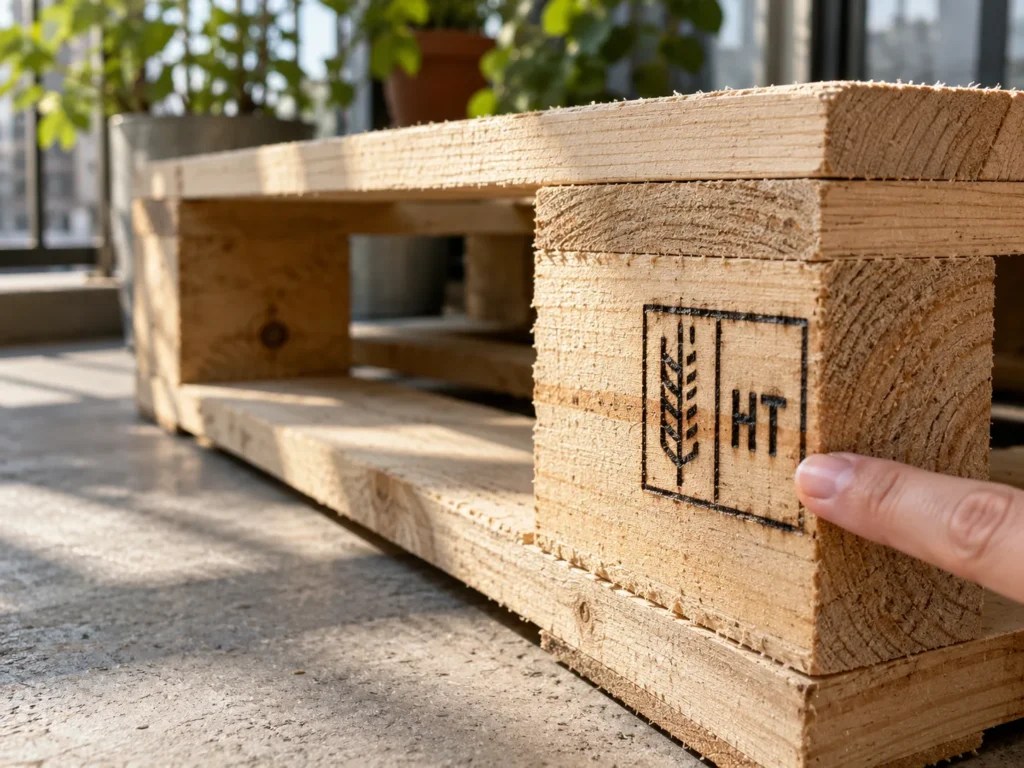
Pallets used in international shipping carry a stamp under a standard called ISPM 15. Look for the IPPC logo (a small wheat-ear symbol), a country code and a treatment code. That stamp is a shipping rule rather than a food-safety label: it records how pests in the wood were killed, which happens to be exactly what you need to know for a planter.
| Code | What it means | OK for a food planter? | What to do |
|---|---|---|---|
| HT | Heat treated: the wood core reached 56°C (132°F) for at least 30 minutes | Yes | Use it once the boards pass inspection |
| KD | Kiln dried to below 19% moisture | Yes, ideally alongside HT | Use it once the boards pass inspection |
| DB | Debarked; appears next to a treatment code | Depends on the treatment code | Read the rest of the stamp |
| MB | Fumigated with methyl bromide | No | Leave it, and keep it out of compost |
| No stamp, stained or painted | Origin and treatment unknown | No | Skip it for edibles; reject any with spills or stains |
Methyl bromide-treated pallets aren’t considered safe for gardens or compost, and because its use began phasing out in 2010, older pallets are the ones most likely to carry it. Color tells you nothing reliable about treatment, so go by the letters. An unmarked pallet tells you nothing at all, which is why the University of Maryland Extension advises rejecting any pallet without origin and treatment information.
Once the stamp passes, inspect the wood itself. Pass on boards with dark spills, oily patches, a chemical smell, a green tint or paint, and note any loose or cracked slats. For repairs, skip pressure-treated lumber: wood treated before January 2004 was usually CCA, and extension guides recommend keeping treated wood out of edible containers altogether. If you’d rather not grow food in reclaimed wood at all, use the pallet for flowers and foliage and keep your edibles in pots.
| Item | Cost level | Why it matters |
|---|---|---|
| HT-stamped pallet | Free to low-cost | The frame; a half pallet works too |
| Landscape fabric | Low-cost | Holds mix in while letting water drain |
| Heavy-duty staples | Low-cost | Keeps the fabric tight |
| Soilless potting mix | Mid-range | Lighter than garden soil and free of soil pests |
| Spare boards and exterior screws | Low-cost | Gives each pocket a floor |
| Ratchet strap or sturdy rope | Low-cost | Anchors the pallet without drilling |
| Drip tray or boot tray | Low-cost | Catches runoff before it reaches the unit below |
| All-purpose fertilizer | Low-cost | Soilless mix needs regular feeding |
| Drip irrigation kit (optional) | Mid-range | Even watering for shallow pockets |
For tools, gather a staple gun, utility knife or scissors, sandpaper or a sander, a hammer or pry bar, a drill/driver, work gloves, eye protection and a dust mask for sanding.
Step-by-Step: Build the Pallet Planter
The build takes one afternoon plus a short wait before you stand it up. Work in the order below, and give the lining more care than any other step.
Step 1: Check the Stamp and Inspect the Wood
Find the stamp, usually burned or printed on the side blocks or the long boards underneath, and match it against the table in What You’ll Need. Then press on every slat. Anything that flexes, cracks or splinters gets replaced or screwed down now, because it’s far harder to fix once the pallet is full.
A quick pass/fail: HT on the stamp, no stains, no chemical smell, every slat solid. If any of those fails, keep looking; free pallets are rarely scarce.
Step 2: Clean, Sand and Remove Stray Nails
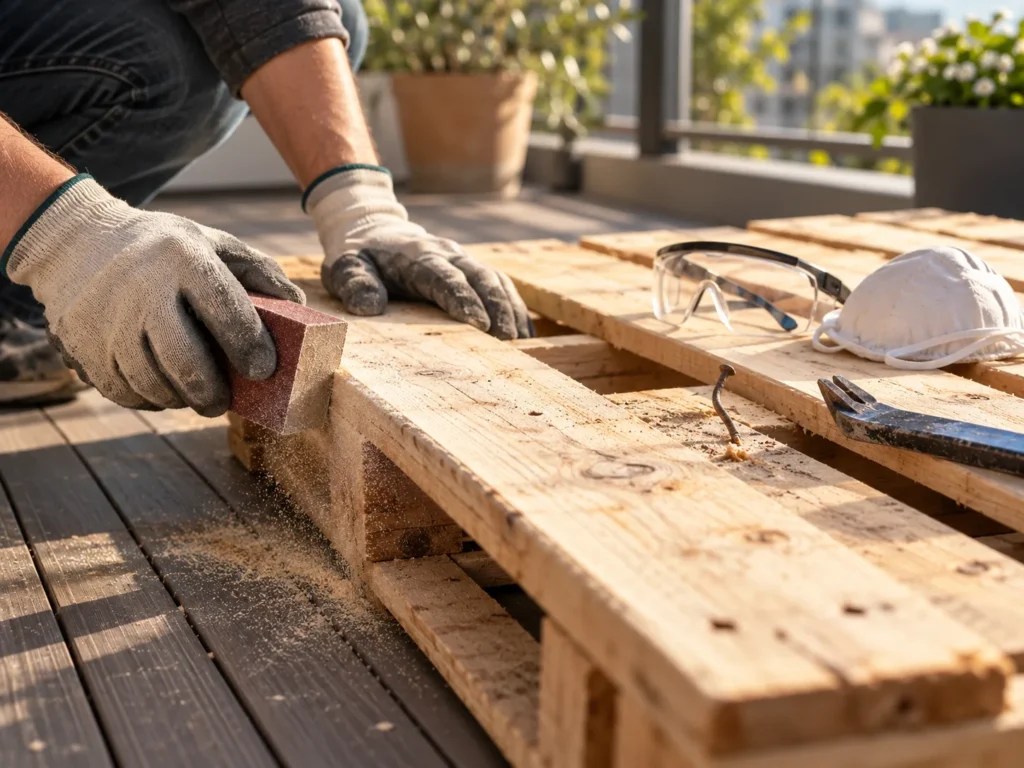
Brush off loose dirt, scrub the boards with water and a stiff brush, and let the pallet dry in the sun. Skip harsh cleaners on wood that will hold edible plants; water and elbow grease are enough.
Sand the front edges and any spot your hands or the fabric will touch, wearing gloves, eye protection and a dust mask. Then turn the pallet over and run a hand (gloved) across the back. Pull any protruding nail with a pry bar or hammer it flush, since one raised nail head will tear the landscape fabric the first time the pallet shifts.
Step 3: Decide the Orientation and Close the Pockets
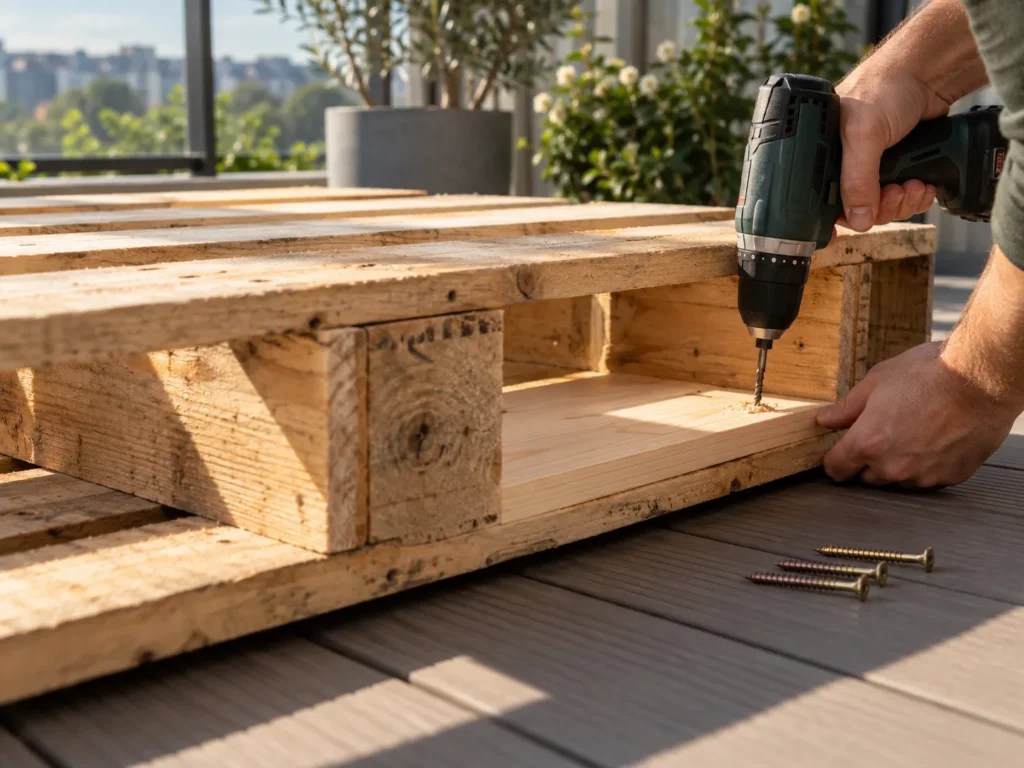
Stand the pallet up in your mind and choose the face with the most slats as the front; the gaps between those slats become your planting pockets. The open sides and back get covered with fabric in the next step, but each pocket also needs a solid floor or the mix will slide straight down inside the pallet.
Cut boards from a second pallet or scrap wood to fit across the bottom of each pocket, then screw them in place with exterior screws. Pre-drill every hole slightly narrower than the screw, because old, dry pallet wood splits easily. If you’re short on boards, close only the very bottom; the fabric and the plants’ roots will hold the upper pockets once things settle.
Step 4: Line the Back, Bottom and Sides with Landscape Fabric
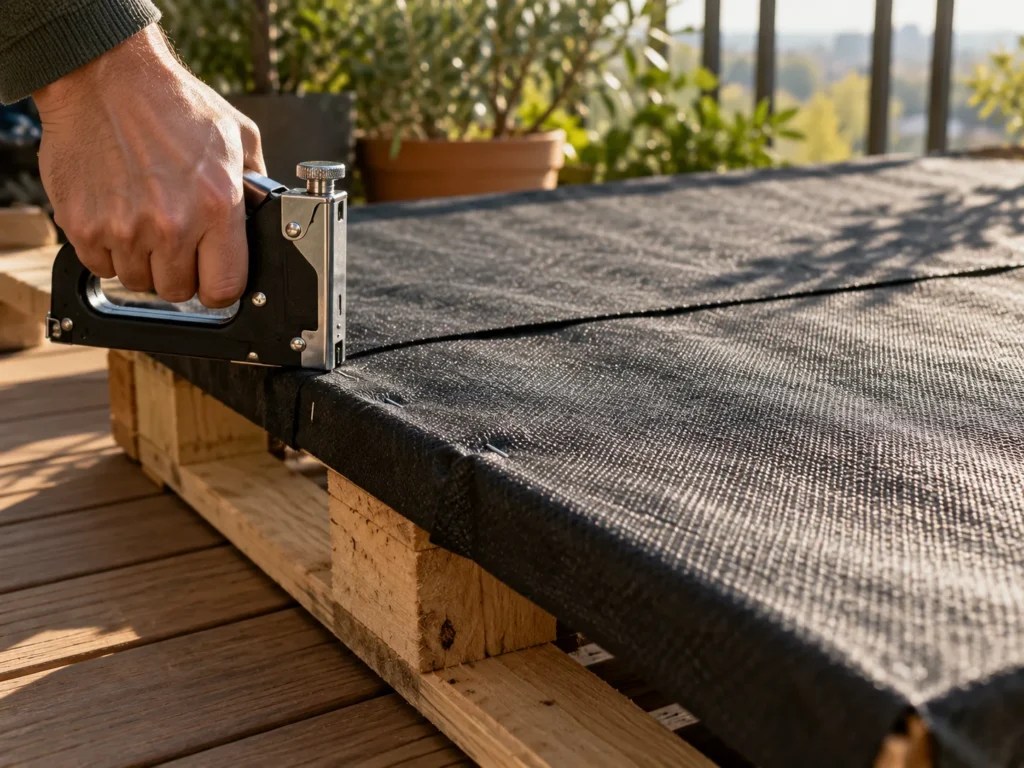
Lay the pallet face-down and cut landscape fabric to cover the whole back and bottom, plus about 4 inches (10 cm) extra on each side to wrap around the edges. Where you need more than one piece, overlap them by 4 to 6 inches (10 to 15 cm) so no seam opens when the mix gets heavy and wet.
Pull the fabric taut and staple it closely along every edge and across the middle boards, then wrap the extra around the sides and staple again. Leave the top open for filling. If the pallet will lean against a painted wall, a sheet of plastic stapled behind the fabric on the back keeps damp off the wall and slows rot in the back boards; leave the bottom as fabric only so water can still drain.
Before moving on, press along each seam with your fingers. Any spot where you can feel a gap is where mix will leak later.
Step 5: Add Drip Irrigation if You Want It
This step is optional, but it has to happen now, before the mix goes in. Shallow pockets dry out unevenly, and a small drip kit with an emitter in each pocket delivers water slowly where the roots are instead of letting it race down the face of the pallet.
Run the main line up one side, add a short branch along each row of pockets, and place one emitter per pocket. A simple timer is handy if you travel or work long days. If drip feels like too much for a first build, skip it; you can water by hand and add a kit next spring when you replace the mix.
Step 6: Fill with Moist Soilless Mix and Plant Lying Flat
Use soilless potting mix, never garden soil, which is too heavy for containers and packs down in narrow pockets. Pour the mix into a tub and add water a little at a time until it feels like a wrung-out sponge; dry mix repels water and then slumps when it finally gets wet.
With the pallet lying face-up, fill each pocket about three-quarters full and firm the mix gently. Slide transplants in through the slats row by row, roots first, tucking them snugly so the slat holds the root ball in place. Top up around each plant, press lightly, and water slowly until the mix is evenly damp. Leave the top row for later, since that pocket will be planted once the pallet stands.
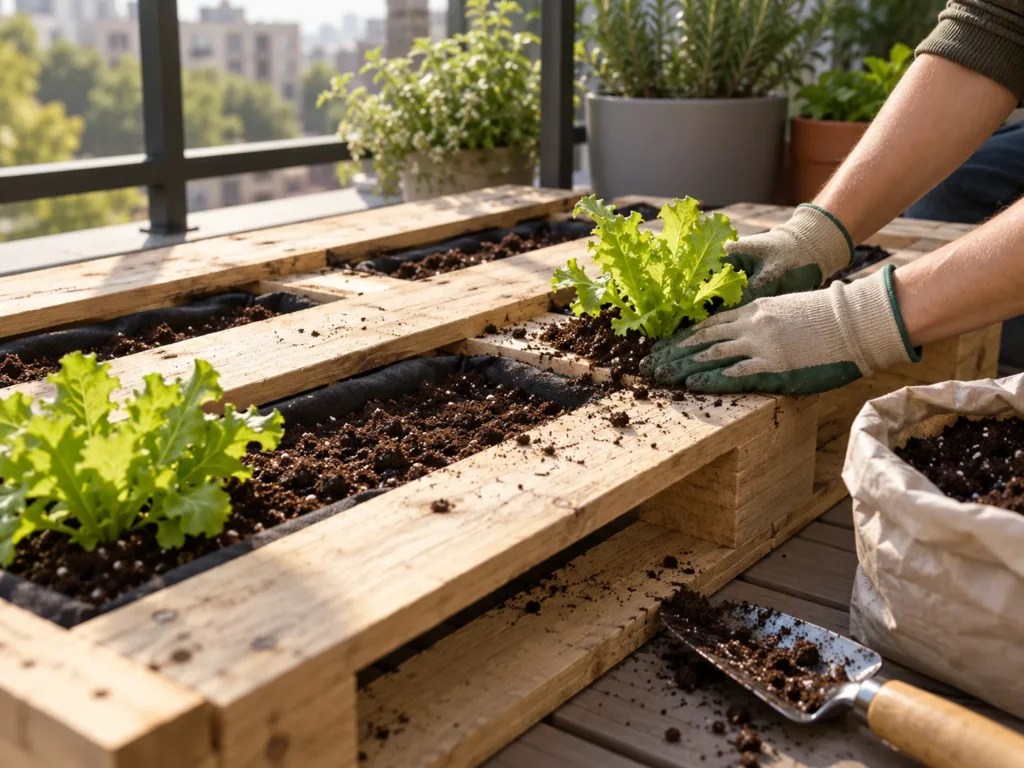
Step 7: Wait, Then Stand It Up and Secure It Without Drilling
Leave the planted pallet lying flat for 2 to 3 days, keeping the mix moist, so the roots start gripping before gravity gets involved. Ideally, do all of this right where the planter will stand, because once it’s filled and watered it’s too heavy to carry far. Even a single container holding 5 gallons of mix gets heavy when wet, and a pallet holds far more than that.
Lift it upright with a second person, bending your knees, and lean it at a slight angle against a solid wall. Then secure it: loop a ratchet strap or sturdy rope around the pallet and a railing post, a heavy fixed planter or another anchor that won’t move. The railing alone shouldn’t carry the weight; the wall and floor take the load, and the strap only stops the pallet from tipping forward or sliding.
For a rental, we’d lean and strap every time, because a ratchet strap costs less than a repair bill and moves with you when your lease ends. If you own the place and can drill into masonry or studs, heavy exterior-rated hardware is an option. If the wall is off-limits entirely, see the lay-flat version in Variations.
Wind matters more the higher you live, and containers with tall plants are the ones most likely to blow over. Pick the most sheltered stretch of wall you have. Finally, set a drip tray under the base before the first full watering, and check your lease or HOA rules on balcony items if you haven’t already.
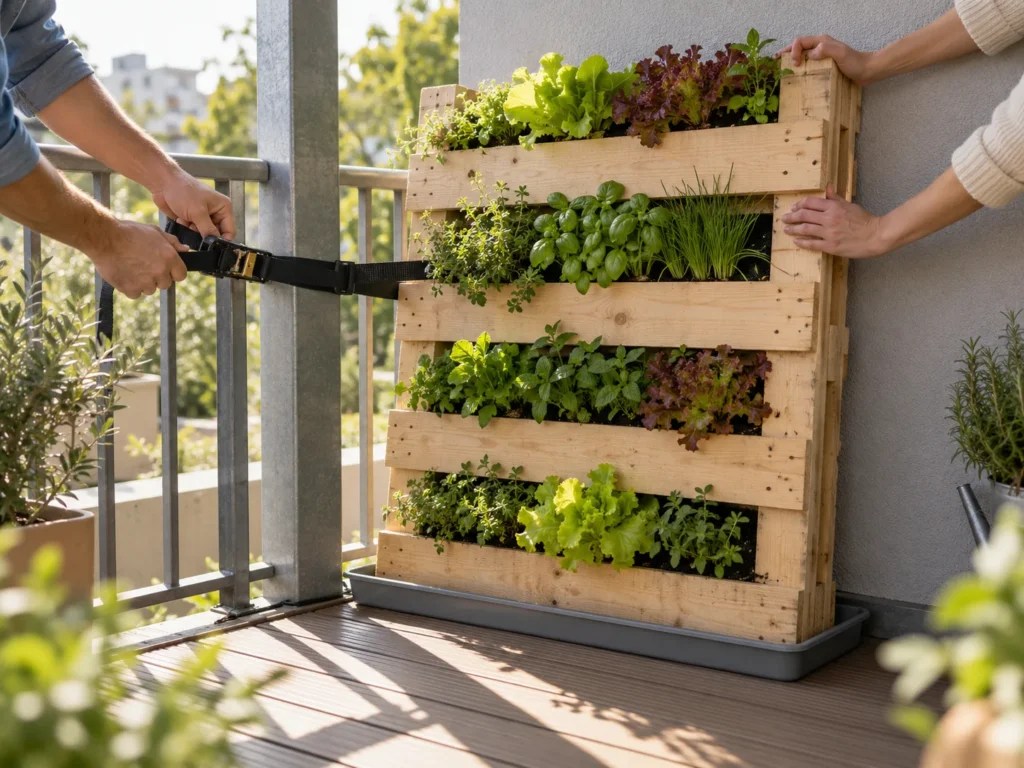
Step 8: Plant the Top Row and Water Everything In
Now plant the top pocket, which gets the most sun and wind and dries out first. That makes it the right home for plants that like to dry between drinks; the full pocket-by-pocket plan is in How to Use It. Strawberries go in a middle row where they can trail down, and our guide to growing strawberries in pots covers their care in more detail.
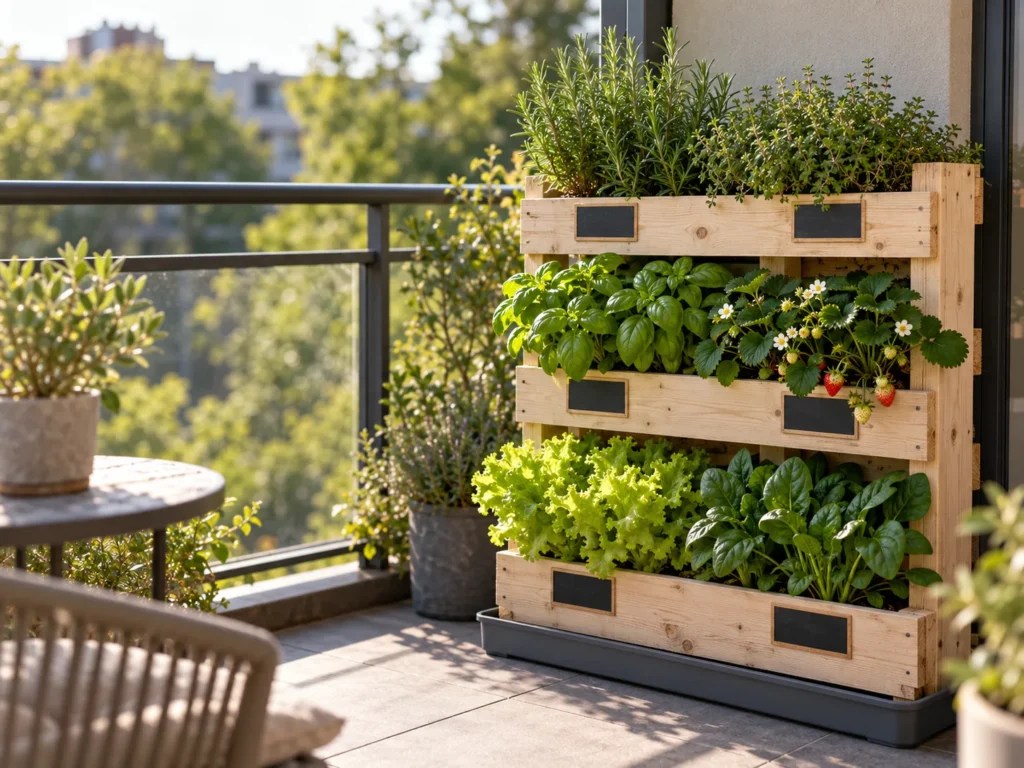
Water each pocket separately, slowly, starting at the top, until a little runs into the tray. A pocket that soaks it up instantly needed it; one that floods right away is already damp. If you like a tidy look, a strip of chalkboard paint on a slat under each row makes easy, wipeable plant labels.
How to Use It: Planting, Watering and Spring Care
A pallet planter is a row of very shallow pots stacked on their sides, so it grows what shallow pots grow and dries out the way shallow pots do. Treat it like that and most of the care falls into place.
What to Plant in Each Pocket
Water runs downhill inside the pallet, so the top stays driest and the bottom stays damp longest. Match plants to that gradient and to your real sun hours.
| Conditions | Good choices | Light | |
|---|---|---|---|
| Top row | Driest, most exposed | Rosemary (Rosmarinus officinalis), thyme (Thymus vulgaris) | At least 6 hours |
| Middle rows | Moderate moisture | Basil (Ocimum basilicum), day-neutral strawberries (Fragaria × ananassa) | 6 to 8 hours |
| Bottom row | Stays moist longest | Leaf lettuce (Lactuca sativa), spinach (Spinacia oleracea), arugula (Eruca vesicaria) | Tolerates under 6 hours |
Fruiting plants like strawberries want 6 to 8 hours of direct sun, herbs do best with at least 6, and leafy greens cope with less. Under 6 hours, lean toward lettuce, spinach and foliage. On a hot, west-facing balcony, the top row may need tougher plants; our list of full-sun balcony plants that handle heat has options. Leave out tomatoes, squash and root vegetables, which need more depth than a pallet pocket offers.
Basil, rosemary, thyme and strawberry are all listed by the ASPCA as non-toxic to dogs and cats. Mint is listed as toxic to both, with vomiting and diarrhea possible if a pet eats a lot, so it stays off a pet household’s wall. Non-toxic doesn’t mean a pet can graze freely without an upset stomach, and for the greens or anything not named here, look up the exact plant in the ASPCA database before buying.
Timing follows the plants. Put cool-season greens in first, as soon as your local spring weather allows, and hold basil until temperatures stay around 59°F (15°C) or warmer. Your local frost date sets the exact window.
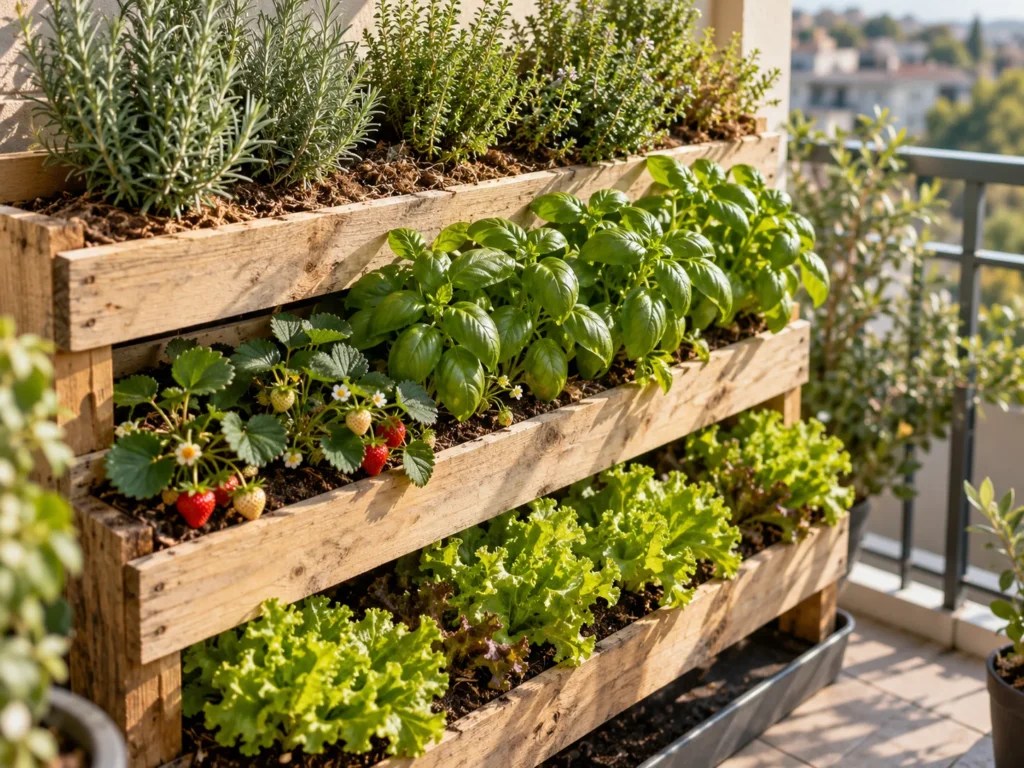
Watering is where pallet planters succeed or fail. Push a finger into each pocket every day and water when the mix is dry about an inch below the surface, slowly, until a little drains out. In hot, dry, windy weather, containers can need water up to three times a day, and an upper-floor, south- or west-facing balcony is exactly that situation, so plan on a drip kit or a second check there.
Soilless mix starts lean and frequent watering rinses nutrients out. About 3 to 4 weeks after planting, begin a weekly dilute liquid feed, such as 1 ounce of 20-20-20 water-soluble fertilizer in 4 gallons of water or 1 to 2 tablespoons of fish emulsion per gallon. Or mix a slow-release fertilizer in once at the label rate. Either way, follow the label and choose a product approved for edible crops.
Troubleshooting
Mix washes out between the slats. A pile under one spot points to a gap in the fabric; mix splashed out everywhere points to watering too hard. Re-staple with the overlap from Step 4, and water gently in short passes.
Top pockets wilt while the bottom stays soggy. Water is running down inside the pallet instead of soaking each pocket, and the top is losing extra moisture to sun and wind. Finger-test each row, water pockets one at a time, and keep drought-tolerant herbs on top. A drip kit fixes this most reliably.
Water drips onto the balcony below. Usually there’s no tray, or it overflows. Add a tray or boot tray, water in the morning in small amounts, and stop as soon as a trickle appears.
The pallet shifts or leans in wind. The strap may be loose, the anchor may be moving, or tall plants on top may be catching gusts. Tighten or re-anchor the strap, keep the top row low, and consider a lattice panel or screen nearby to break the wind.
Boards grey, soften or loosen after a season. Untreated wood in constant contact with damp mix ages; that’s maintenance rather than failure. Replace soft boards each spring, and add the plastic backing from Step 4 if it’s missing.
Plants grow but stay small. Check sun hours first, then feeding, then the crop itself. Deep-rooted crops stay stunted in shallow pockets, so swap them for greens or herbs.
Season Checklist
- Spring: inspect boards, re-staple or replace torn fabric, replace the mix with fresh soilless mix, then plant greens first and warm-season herbs later.
- Summer: daily moisture checks, weekly feeding, and harvesting outer lettuce leaves so plants keep producing.
- Fall: decide whether to keep strawberries for next year or start fresh. In cold-winter areas, rosemary often won’t survive outdoors, so bring it in before frost or move herbs to a kitchen window for winter.
- Winter: empty the pallet or move it somewhere sheltered from rain and snow.
- Building outside spring: the build steps don’t change; only the plant list does, so choose what suits the season you’re in.
Variations
Choose a variation by your biggest limit: a tiny balcony, curious pets, a shady wall or a wall you can’t lean anything against.
Half-Pallet Planter for a Tiny Balcony
Cut a pallet across its width just below a row of front slats, using a circular saw or handsaw, then screw a board across the open end so the new bottom pocket has a floor. Some suppliers also sell smaller “mini” pallets; check for the HT stamp the same way. A half pallet holds two or three rows, is light enough to lift without help, and needs a shorter strap.
It’s ideal for a row of lettuce under a row of thyme, or a single trailing row of strawberries. For berries, keep the planting row at least 24 inches long, the minimum suggested for rectangular strawberry containers, and choose day-neutral varieties, which fruit through the season and are the easiest to grow in containers.
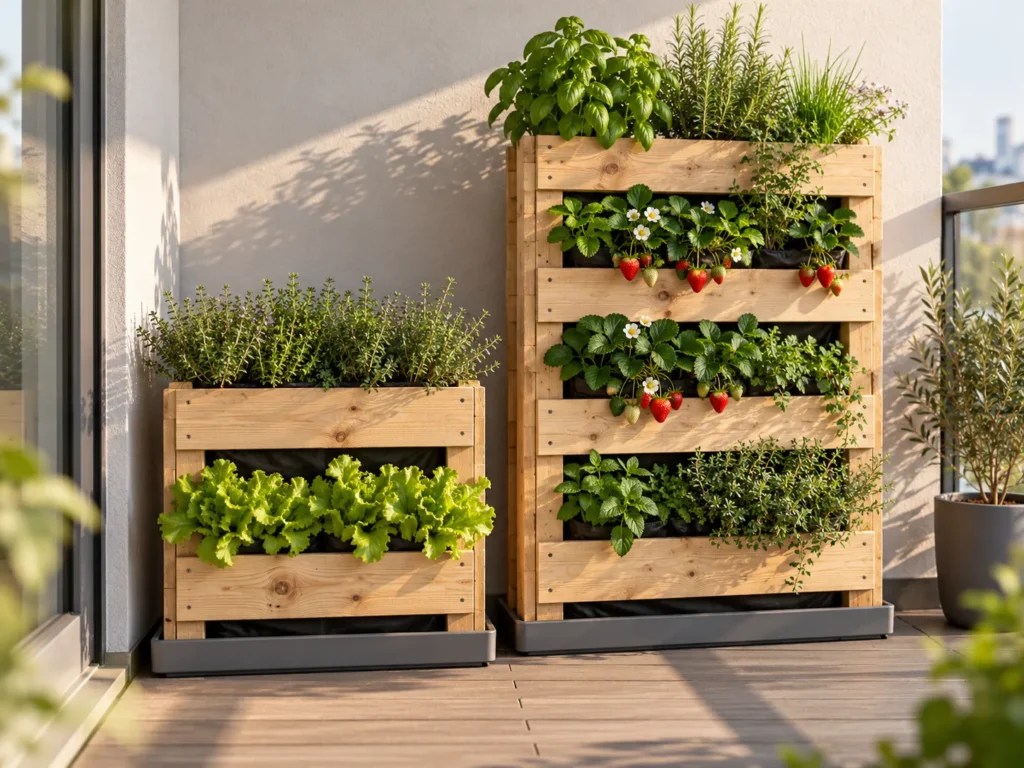
Pet-Safe Herb and Strawberry Wall
In my apartment, with a cat and a dog sharing the space, anything new gets sniffed and investigated before I’ve finished setting it up. That’s why the plant list comes before the design here.
If a dog or cat shares your balcony, we’d build this wall from basil, rosemary, thyme and strawberries and leave mint out entirely, for the reasons covered in How to Use It. Place the pallet where a cat can’t use it as a ladder to the railing, and keep the strap tight so a dog leaning on it can’t tip it. Fallen leaves and spilled mix are easier to manage with a tray that’s wider than the pallet’s base.
Shade-Side Greens and Foliage Wall
A north-facing balcony or one shaded by the building above won’t give herbs the 6 hours they want, but leaf lettuce, spinach and arugula still do well in a pallet in spring. Plant them in every row, harvest outer leaves often, and expect slower, more tender growth.
For a purely ornamental wall, browse our list of low-light outdoor plants for a shaded balcony, and run any choice past the ASPCA list first if you have pets.
Lay It Flat as a Shallow Bed
When the wall is off-limits, or the lease forbids leaning anything against it, line the pallet as in Step 4 and lay it face-up on a large tray on the balcony floor. It becomes a shallow raised bed for greens and herbs, with no strap needed. It still drains, so keep the tray under it, water in small amounts, and don’t let it sit in standing water.
Frequently Asked Questions
Can I use an unmarked pallet if I only grow flowers?
Flowers are a lower-stakes use, but the unknowns stay the same. Without a stamp you can’t rule out methyl bromide, so the safer call is still to pass on any pallet with no origin or treatment information. If you go ahead with one for flowers only, choose clean boards with no stains, smell or paint, wear gloves and a dust mask when sanding, and set it where pets can’t chew the wood.
Can I hang a pallet planter from my balcony railing?
Not a full pallet. A single 5-gallon container is already heavy when wet, and a planted pallet holds far more, so let the floor and wall carry the load and use the railing only as a strap anchor, as described in the build steps. If you want something on the railing itself, pick a lightweight planter made to hook over rails and check your lease or HOA rules first.
Will a pallet planter stain or damage my balcony floor?
It can if water keeps pooling underneath. A tray wider than the base catches runoff and loose mix, so empty it after watering and the wood and floor won’t sit wet for days. On wood or composite decking, lift the tray now and then to check for trapped moisture, and sweep up spilled mix promptly, since damp soil left against a surface can mark it.
Should I plant seeds or transplants in the side pockets?
Transplants are the better choice for the side pockets. The build depends on roots gripping the mix during the 2 to 3 days the pallet lies flat, and a seedling with an established root ball can do that while seeds can’t. If you’d like to sow, use the open top pocket, where lettuce or arugula seed won’t wash out sideways, and keep it evenly moist until the seedlings are up.
Can I add mint if I don’t have pets?
Yes, if no dog or cat ever reaches the balcony; mint’s toxic listing concerns animals, and it’s a common kitchen herb. Give it a pot of its own beside the pallet, because it spreads quickly by runners and would crowd the neighboring pockets. If a pet visits even occasionally, put the pot somewhere it can’t reach, or leave mint out.
What Actually Matters
An HT stamp, tightly stapled fabric and a strap to a solid anchor cover the parts that are hard to fix later. Plant choice and feeding are easy to adjust as the season goes on.
After that, keep up the daily finger check, because shallow pockets dry out fastest on a hot, windy afternoon.
For a first build, we’d start with a half pallet of lettuce and thyme, because it’s light enough to lift alone and easy to move if the first spot gets too much wind or too little sun. This week, check a few pallets for the HT stamp; of all these DIY wooden pallet planter ideas balcony gardeners try, the one built from the right wood is the one that lasts.
Sources
- USDA APHIS – Wood Packaging Material – ISPM 15 heat treatment (56°C core for 30 minutes) and stamp codes
- Kentucky State University Cooperative Extension – What Wood is Safe to Use in My Garden? – HT versus MB pallets, stains, treated lumber, CCA before 2004
- University of Maryland Extension HGIC (Ask Extension) – Pallet wood safety answer – KD below 19% moisture, rejecting unmarked pallets
- University of Washington Elisabeth C. Miller Library – Safety of wooden pallets for vegetable gardens – methyl bromide phase-out from 2010, color not a reliable guide
- University of Saskatchewan, Grow with USask – Pallet Gardens – build steps, fabric overlap, fill depth, settle time, crop choice, herb temperature, yearly mix replacement, winter storage
- University of Wisconsin-Extension – Container Gardening (A3382) – watering frequency, soilless mix, container weight and wind
- UNH Extension – Growing Vegetables in Containers – sun hours, feeding rates, avoiding treated wood
- UNH Extension – Growing Herbs in Containers – herb sun needs, rosemary’s drier preference
- University of Maryland Extension – Growing Herbs in Containers and Indoors – overwintering rosemary, thyme watering
- University of Wisconsin-Madison Extension – Growing Strawberries in Containers – day-neutral varieties, 24-inch rectangular minimum
- UConn Home and Garden Education Center – Container Gardening – wind protection for containers
- ASPCA – Toxic and Non-Toxic Plants: basil, rosemary, thyme, strawberry, mint – pet toxicity
