

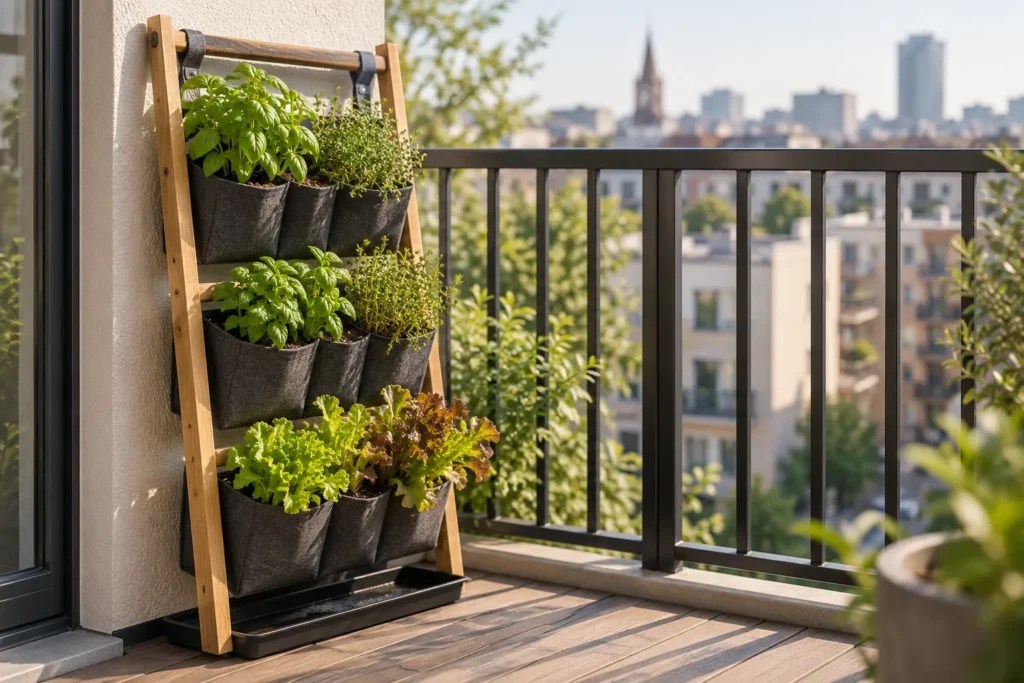
You’re out on the balcony with your morning coffee, looking at a blank stretch of wall, a bare railing and maybe three square feet of floor. Your Pinterest board is full of pallet gardens spilling over with herbs, and every one of them seems to start with a drill. Your lease, meanwhile, has a whole paragraph about holes in exterior walls.
Most vertical gardens can lean, stand or strap on instead of screwing in. These DIY vertical garden wall ideas for small spaces renters can actually build start with one no-drill pocket wall, then branch into pallet, gutter, tower, railing and indoor versions. If you’d like a wider menu first, browse our no-drill balcony ideas for renters.
Below you’ll find a materials list with cost levels, seven build steps, a planting plan by sun and container depth, pet checks for cats and dogs, and fixes for the problems that tend to show up in the first weeks. Plan on an afternoon for most people, plus a few minutes of watering most days once it’s growing.
Table of Contents
At a Glance
The easiest vertical garden wall for a small space is a leaning frame or freestanding shelf that holds fabric pockets or hooked pots, secured to the railing so the building wall stays untouched.
- Build: a leaning or freestanding frame with fabric pocket planters or hooked pots, removable on moving day.
- Cost level: low-cost with a repurposed ladder or shelf, mid-range with a new trellis panel and pocket set.
- Time: about an afternoon to build and plant, then daily water checks once the weather warms.
- Planting: salad greens on the lower, shadier tiers, herbs and sun lovers up top, everything checked for pet safety.
- Safety: keep the frame inside the railing, strap it against wind, and plan where the water drains.
This build suits renters with a railing or a corner and at least 3 hours of direct sun. If your lease bans anything tied to the railing, or the balcony gets almost no direct light, go with a freestanding shelf and shade-tolerant greens.
| Your balcony | Best structure | Cost level | Renter note |
|---|---|---|---|
| Railing only, almost no floor | Railing pocket strip or hooked pots | Low-cost | Hang on the inside of the rail |
| Blank wall plus some floor | Leaning ladder or trellis panel with pockets | Low-cost to mid-range | Strap to the railing, nothing in the wall |
| Windy upper floor | Low freestanding shelf or bucket tower | Mid-range | Keep it short and weighted at the base |
| Shaded or recessed | Freestanding shelf with pockets | Low-cost | Greens and shade plants only |
| Indoor, bright window | Shelf-based plant wall | Low-cost to mid-range | No water near the floor edge |
What You’ll Need
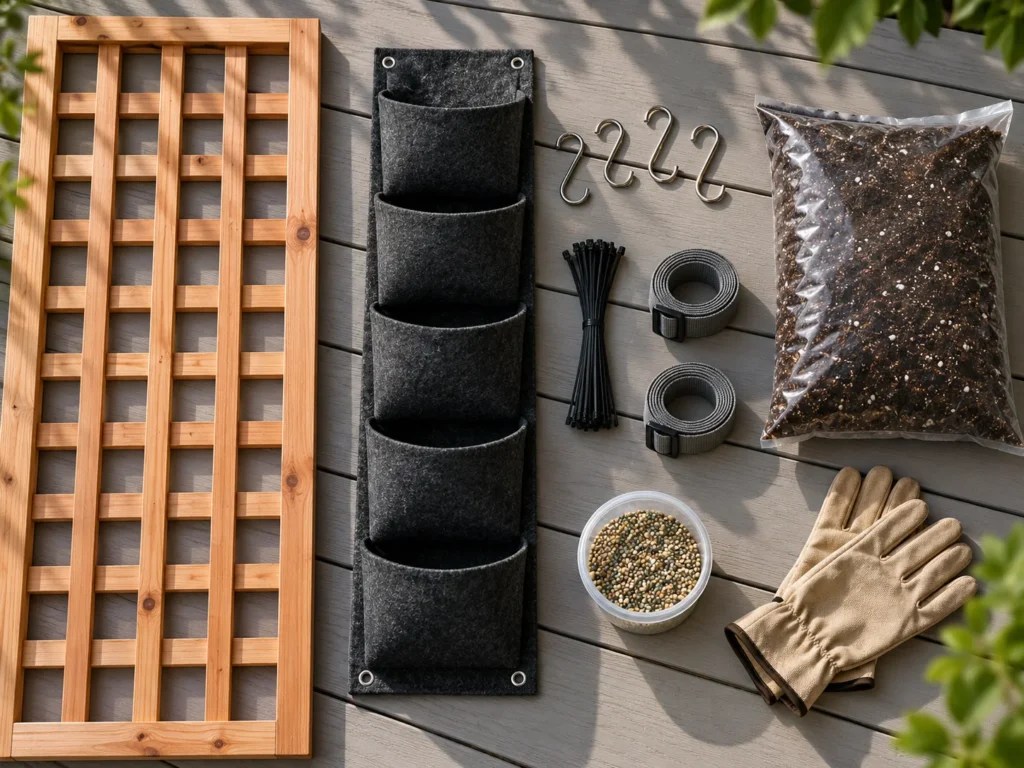
You need a frame that stands on its own, something to hold the plants, a way to secure it, and a bag of real potting mix. Most of the list can come from a hardware store or your own closet.
For the frame, a sturdy wooden ladder, a folding trellis panel or a small metal shelf all work. Fabric pocket planters are often sold as rows of several pockets, which makes them easy to hang from a rung. Hooked pots and S-hooks fill any gaps. If money is tight, our guide to budget-friendly small balcony setups has more ways to repurpose what you already own.
| Item | Purpose | Cost level | Renter or safety note |
|---|---|---|---|
| Ladder, trellis panel or shelf | The frame | Low-cost to mid-range | Sound, untreated or modern-treated wood |
| Fabric pocket rows or hooked pots | Hold the plants | Low-cost | Every one needs drainage |
| UV-rated zip ties, adjustable straps | Tie the frame to the railing | Low-cost | Cut free on moving day |
| Rubber feet or pads | Stop the base sliding | Low-cost | Protect the deck surface |
| Soilless potting mix | Growing medium | Low-cost to mid-range | Not garden soil |
| Slow-release fertilizer | Steady feeding | Low-cost | Use the label rate |
| Catch tray or saucers | Collect drips | Low-cost | Protects the neighbor below |
| Gloves, eye protection | Cutting and sanding | Low-cost | Wear them for wood and gutters |
An optional roll of landscape fabric is handy if you later try the pallet version. Skip anything heavy you’d struggle to carry back out of the apartment.
Step-by-Step
Work through these in order. The first two steps take the least time and save you from rebuilding later.
Step 1: Check Rules, Sun, Wind and Water
Start with your lease and any building rules about railings, balcony loads and items near the edge. Weight is the number that surprises most renters: a 20-inch container of moist mix and plants can weigh about 100 pounds. A wall of small pockets spreads the load far better than one big trough.
Next, count direct sun over a whole day. Warm-season crops and sun-loving annuals want 6 to 8 hours, lettuce and leafy greens get by on 3 to 5, and most herbs need at least 6. If you see under 3 hours, look at plants for a north-facing balcony before buying seeds.
On upper floors, wind dries planters fast and can push a leaning frame over, so read up on keeping plants steady on a windy high-rise balcony. Finally, decide where your water comes from and where the runoff will go.
Step 2: Choose and Prep the Frame
Pick a frame with solid joints and no wobble. Sand any rough wood so you don’t collect splinters every time you water, and wear gloves while you do it.
If the wood is pressure-treated and you plan to grow food, modern ACQ-treated lumber is the suggested choice; the older CCA treatment was restricted for residential use by the EPA in 2004, so pass on old treated wood of unknown age. Pallets need their own stamp check, covered in the pallet wall variation.
Step 3: Set It Up Without Drilling
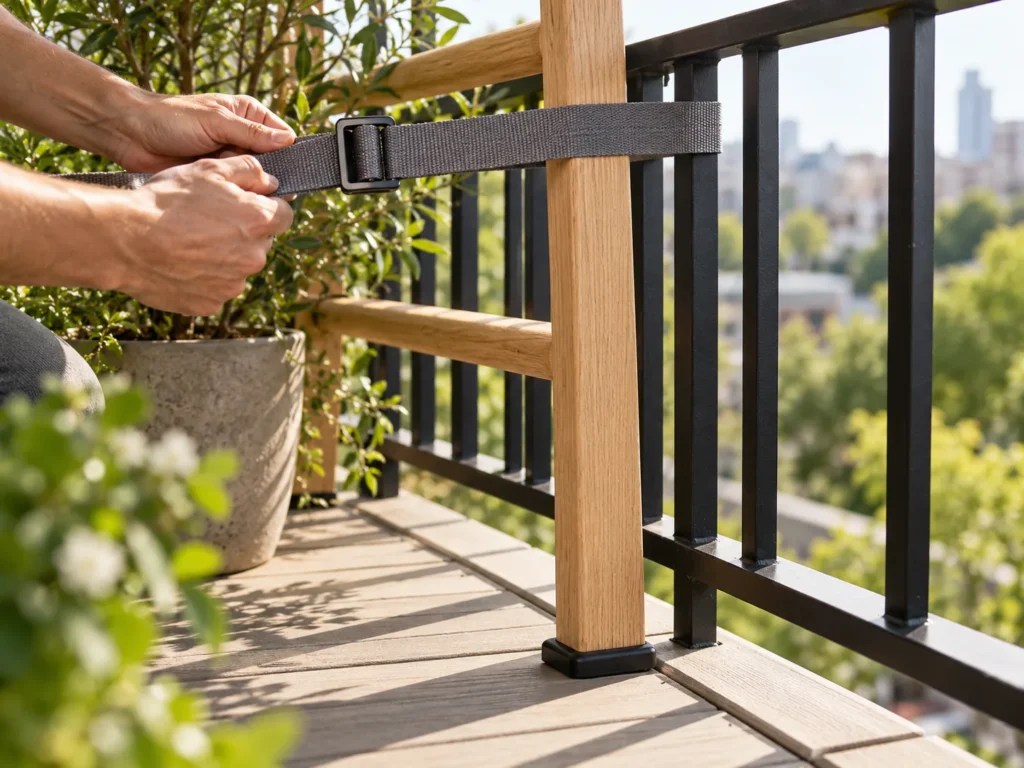
Stand the frame against the wall at a slight angle, with rubber pads under its feet. Then strap or zip-tie the top rail to the balcony railing, keeping every strap on the inside of the rail line.
For a freestanding shelf, push its back flush to the wall and tie it to the railing if it sits beside one. Either way, plan for the heaviest planters on the lowest rungs or shelves so the weight sits low.
Give the top a firm push sideways and toward the railing. If anything shifts, tighten the straps or move weight lower before a single plant goes in.
Step 4: Attach the Planters
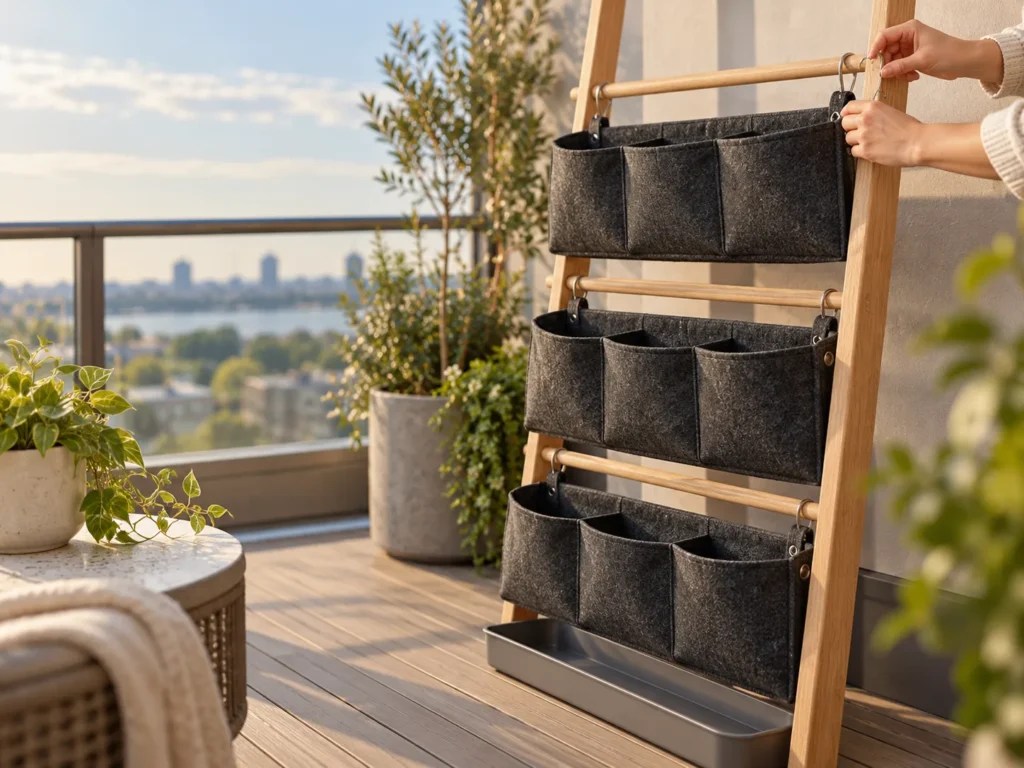
Hook or tie the pocket rows and pots onto the frame. Each planter needs drainage holes, because roots sitting in trapped water rot.
Stagger the rows so the upper pockets drain into the ones below. Set a catch tray or a row of saucers under the bottom tier so nothing drips onto the deck or the neighbor downstairs.
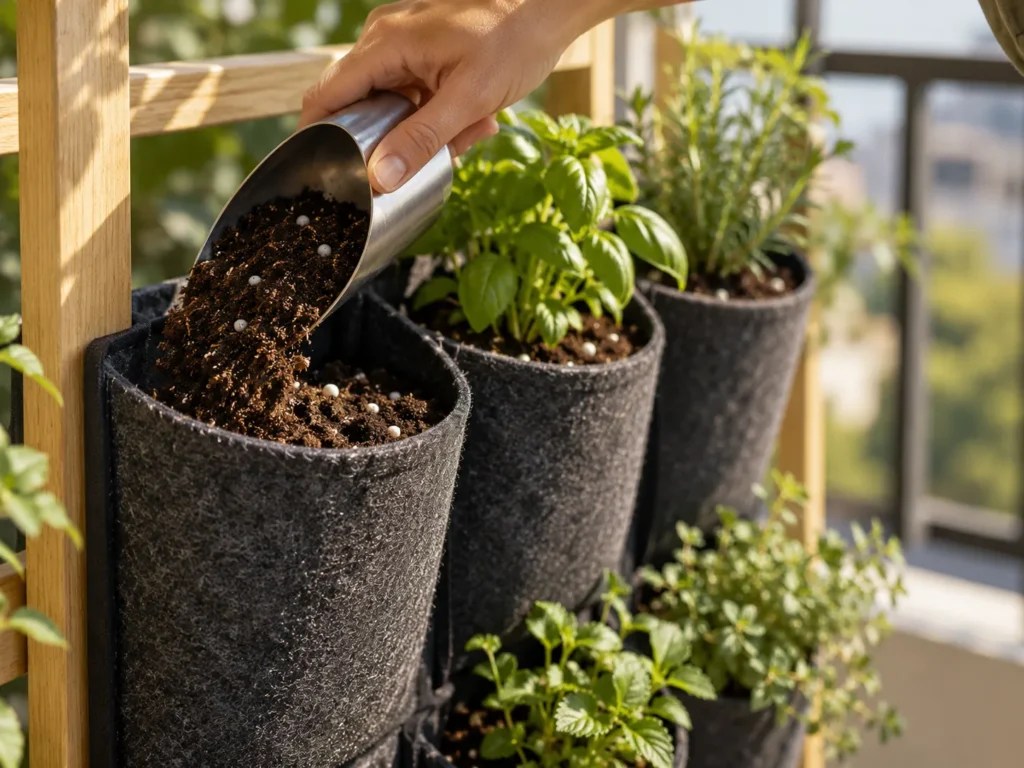
Step 5: Fill with Potting Mix and Fertilizer
Fill every pocket with soilless potting mix. Garden soil and a gravel layer at the bottom both slow drainage, so leave them out.
Mix a 3- to 4-month slow-release fertilizer into the potting mix at the label rate, then fill to about 1 inch below the rim. That gap gives water somewhere to sit and soak in.
Step 6: Plant by Sun and Depth
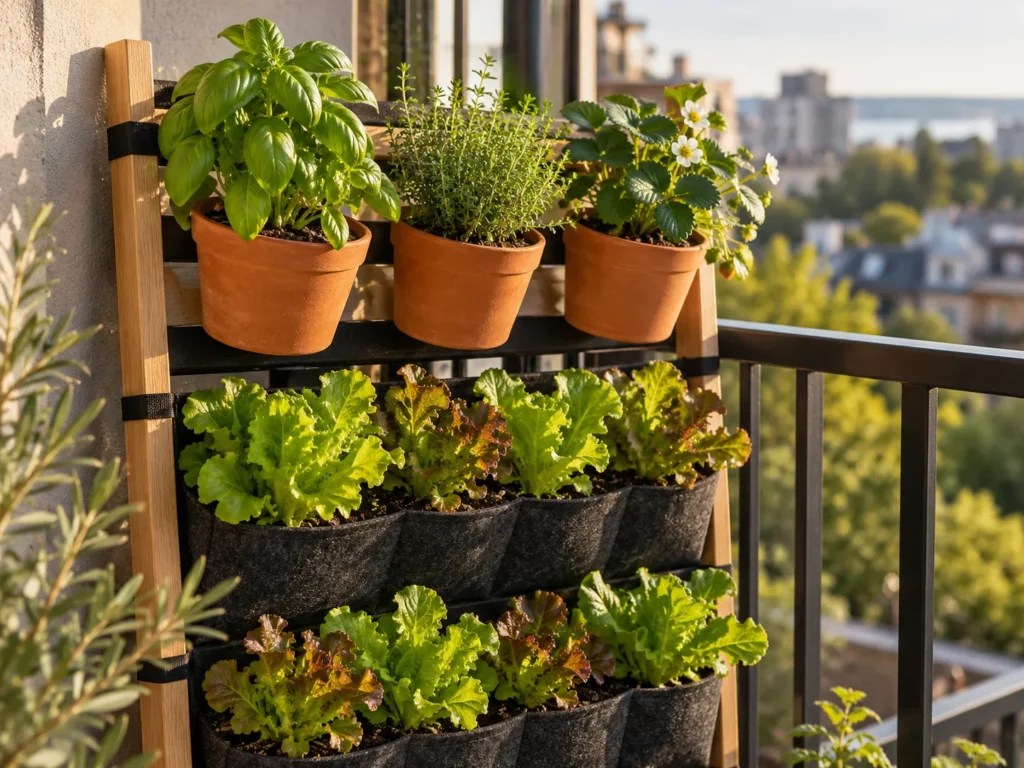
Plant by the container first and the seed catalog second. Shallow pockets and gutters suit lettuce and leafy greens, which do best in planters 6 to 8 inches deep with plants 4 to 6 inches apart. Deeper hooked pots suit herbs and strawberries.
Then match tiers to light. Greens go on the lower tiers, since they tolerate more shade in hot months, and herbs go where the sun lasts longest. Group plants with similar water needs in the same row so one pocket doesn’t drown while its neighbor dries out. In spring, set tender annuals out after your area’s average last frost date, which your local extension office can give you; cool-season greens such as lettuce can go in earlier.
Pets come next. I share a small apartment with a cat and a dog, and the bottom row of anything I set up is the row they investigate first, so that tier is for plants listed as non-toxic. Herb-wall favorites are a trap here: mint is listed as toxic to cats and dogs, and so are parsley, English ivy and golden pothos.
| Plant (botanical name) | ASPCA listing for cats and dogs | Where it fits on the wall |
|---|---|---|
| Basil (Ocimum basilicum) | Non-toxic | Sunny upper tier, deeper pot |
| Thyme (Thymus vulgaris) | Non-toxic | Sunny upper tier |
| Nasturtium (Tropaeolum majus) | Non-toxic | Pocket or trailing edge pot |
| Strawberry (Fragaria spp.) | Non-toxic | Deeper hooked pot or tower |
| Hens and chickens (Echeveria elegans) | Non-toxic | Pocket of its own, apart from thirsty plants |
| Mint (Mentha sp.) | Toxic | Skip if pets can reach the wall |
| Parsley (Petroselinum crispum) | Toxic | Skip if pets can reach the wall |
| English ivy (Hedera helix) | Toxic | Skip if pets can reach the wall |
Non-toxic doesn’t mean a plant is a snack, and nibbling can still upset a stomach. For anything not in the table, look it up on the ASPCA list before buying, or start from our ASPCA-checked plants that are safe for cats and dogs.
Step 7: Water In and Watch the First Week
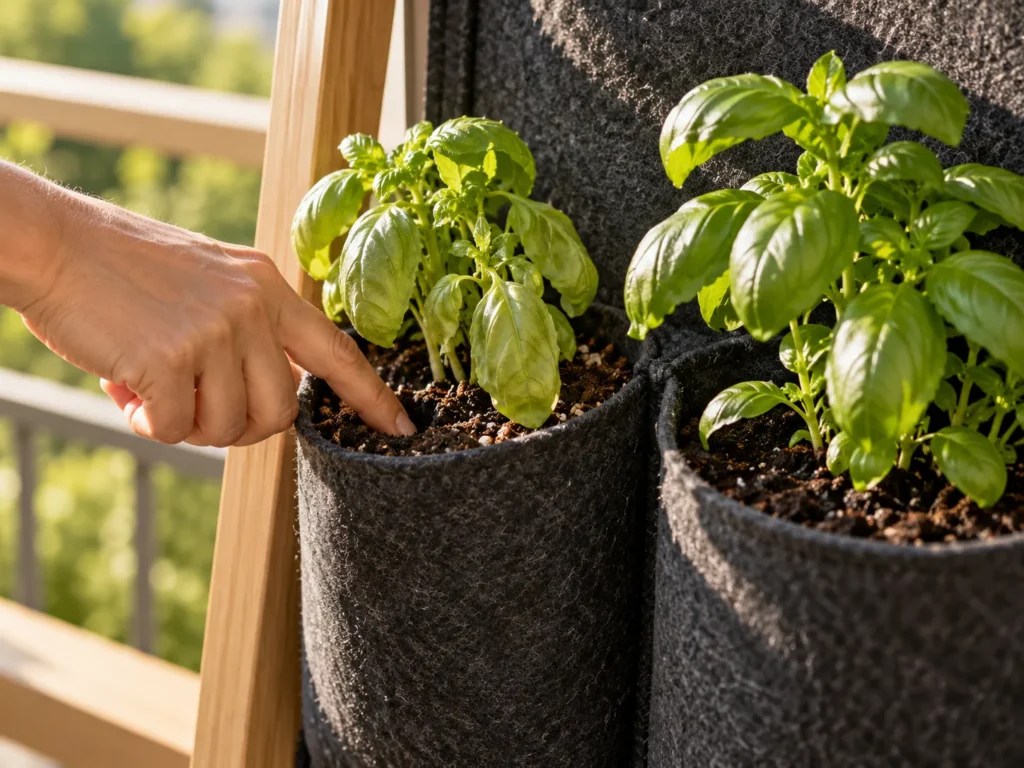
Water each pocket slowly until it runs from the bottom, starting at the top so the lower rows catch the overflow. For the first week, check every day, including after the first windy afternoon, when it’s worth re-testing the straps too. The routine from week two onward lives in How to Use It.
How to Use It
A vertical wall lives or dies by watering, so the first habit is a daily finger check in warm weather. Push a finger into the mix; if it’s dry to the first knuckle, water.
Containers dry far faster than garden beds. A 10-inch hanging container typically needs water every 1 to 2 days, smaller ones more often, and in hot weather that rises to once or twice a day. Sunny or windy days call for checking at least twice, and south- and west-facing walls next to brick or concrete run warmer still. Wilting sets growth back even when the plant recovers, so the short version is: smaller pocket, hotter wall, more often.
All that watering washes nutrients out. If plants look pale or slow halfway through summer, add a water-soluble fertilizer at the label rate. Harvest greens a few outer leaves at a time so the roots stay settled in the pocket.
A simple first-season rhythm:
- Build day: build, fill, plant and water in.
- Week one: daily checks and a strap test after wind.
- Summer: water daily or twice daily in heat, feed if growth lags, keep picking.
- Fall: bring tender plants inside, empty the pockets and store the frame.
Reading this in summer? Start with herbs on the sunny tier and add greens once nights cool down. In fall, build the frame now and plant it next spring.
Troubleshooting
- Plants wilt by afternoon, then recover overnight: small pockets drying out, or a hot, windy exposure. Dry mix at the knuckle means water morning and evening; wet mix with wilting points to roots struggling, so check drainage. Move the thirstiest plants lower or into larger pots.
- Mix stays soggy or water pools: blocked holes, a gravel layer or garden soil. Lift the pocket; if it’s still heavy and dripping hours later, clear the holes and replant in soilless mix.
- Lower leaves yellow, growth slows: washed-out nutrients or too little light. Check sun hours against Step 1 first; if light is fine, feed.
- Leggy, pale stems: not enough direct sun for that plant. Swap that tier to greens.
- Frame leans after wind: loose straps, weight too high or slipping feet. Redo Step 3.
- Drips land below: rows not staggered or no tray. Restagger and add a catch tray.
Variations: DIY Vertical Garden Wall Ideas for Small Spaces Renters Can Build
Once the pocket wall works, the same three rules carry over to every other version: secure it, drain it and plant by depth. A trellis panel frame can also support climbers grown in a deep pot at its base; see our guide to training cucumbers up a trellis.
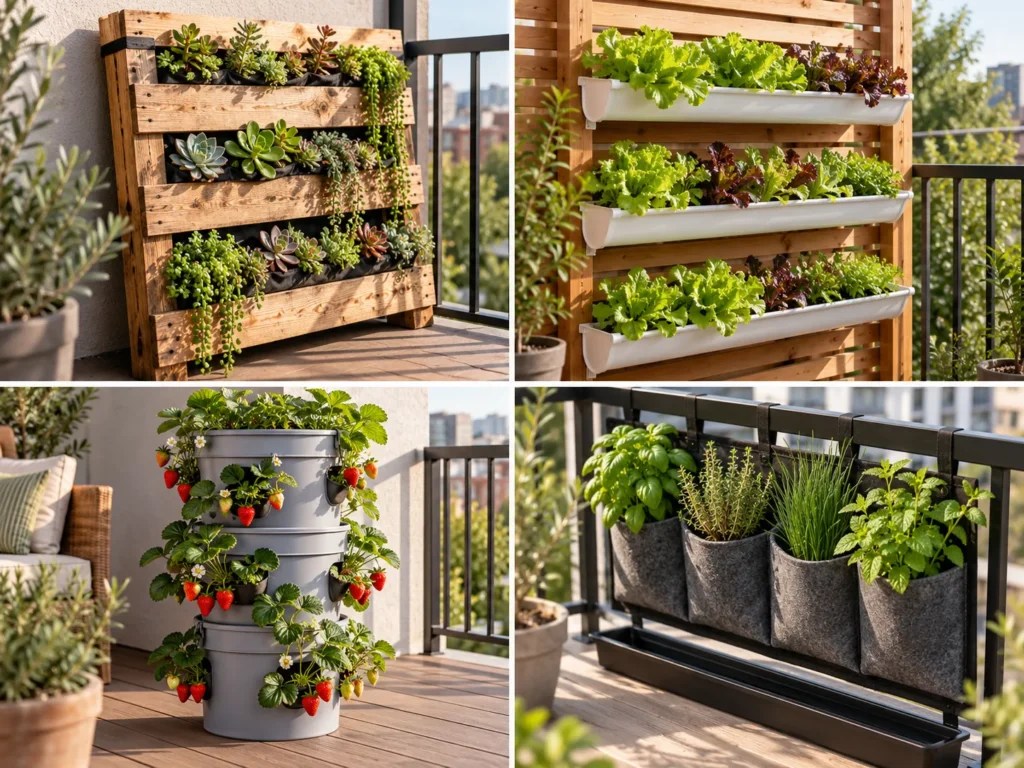
Pallet Wall (Stamped Pallets Only)
Before a pallet touches your balcony, find the stamp near the IPPC logo. HT, KD and DB stamps are listed as safe for vegetable gardens, while MB (methyl bromide) pallets should stay out of them. Pass on any pallet with no stamp, or one you can’t read.
Pull loose nails, sand the slats, and staple landscape fabric behind the openings to make planting pockets, with chicken wire behind wide slats. A planted pallet is heavy, so lean and strap it like the ladder in Step 3.
Gutter Garden on a Frame
Short vinyl gutter lengths with end caps and drainage holes can hang from a ladder or trellis panel in stacked rows so water flows down. Root room is limited, which makes gutters a good home for lettuce and small greens and a poor one for anything deep-rooted. Wear eye protection when cutting.
Stacked Bucket or Pot Tower
Stacked 5-gallon buckets with drainage holes and side openings make a compact tower for strawberries. It stands on the floor, so it suits windy balconies where a tall frame feels risky; keep it near the wall and away from the railing edge.
Railing Pocket Strip
On the tiniest balconies, hang a pocket row or hooked pots on the inside of the railing and set a tray beneath them. Check your building’s railing rules first.
Indoor Version by a Bright Window
A shelf-based plant wall works indoors with the same drainage rules. In my apartment, low light and dry winter air limit an indoor wall more than any shelf does, so keep it at your brightest window. Spider plant (Chlorophytum comosum) is listed as non-toxic for cats and dogs; golden pothos (Epipremnum aureum) is not.
| Variation | Cost level | Weight | Best plants | Renter note |
|---|---|---|---|---|
| Pallet wall | Low-cost | Heavy | Greens, flowers, succulents (stamped pallets only) | Lean and strap |
| Gutter garden | Low-cost to mid-range | Medium | Lettuce, small greens | Hang on a frame |
| Bucket tower | Low-cost | Heavy | Strawberries | Floor-standing |
| Railing strip | Low-cost | Light | Herbs, greens | Inside the rail |
| Indoor shelf | Low-cost to mid-range | Medium | Pet-safe houseplants | No balcony needed |
Frequently Asked Questions
Do I need my landlord’s permission for a vertical garden wall?
Ask first if anything touches the railing or the building. A freestanding shelf that carries its own weight is the easiest setup to clear, while straps on a railing or a frame leaning on an exterior wall can fall under lease clauses about alterations or balcony items. If the lease is vague, email a short description of the setup and keep the reply, so moving day brings no surprises.
Can I grow tomatoes or peppers on a vertical wall?
Not in the pockets. Tomatoes and peppers want 6 to 8 hours of direct sun and far more root room than a fabric pocket or gutter holds. If your balcony gets that much light, grow one plant in a large pot on the floor at the base of a trellis panel, tie tomato stems to the frame as they grow, and keep the pockets above for greens and herbs.
Can I reuse the potting mix next spring?
Yes, as long as last year’s plants had no disease, weed or insect problems; if they did, start with fresh mix, because pathogens can survive in old mix. For healthy pockets, loosen the old mix, blend in fresh potting mix and add slow-release fertilizer at the label rate, since used mix is more compacted and its nutrients are spent. Spare old mix can go into a compost pile.
Can I automate the watering?
Partly. Self-watering containers on the floor or lowest tier hold a water reservoir, which stretches the time between waterings on hot weeks. Drip kits with a timer need an outdoor faucet nearby, so without one, a watering can and the finger check in How to Use It remain the routine, plus a neighbor with a key when you travel.
Will a wet pocket wall stain the wall behind it?
It can, so keep wet fabric from resting against the wall. The slight lean from Step 3 leaves a gap behind the frame; hang pockets on the front of the rungs and wipe off splashes when you water. If dark marks or algae still appear, pull the frame’s feet out a little to widen the gap.
What Actually Matters
If you remember three things, make them secure, drain and water. A wall that’s strapped to the railing, drains into a tray and gets a daily finger check will forgive almost every other beginner slip.
For a first wall, we’d start with fabric pockets over a pallet, because pockets are light, cheap and drain on their own, while a pallet needs a stamp check and a strong lean. You can always graduate to the other DIY vertical garden wall ideas small space balconies allow once the first one is thriving.
This week, read your lease, count your sun hours and pick a frame. If the plan includes pets, run your plant list through the pet check in Step 6 before you shop.
Sources
- University of Maryland Extension – Growing Vegetables in Containers – sun hours, saturated container weight, daily watering, warm exposures
- University of New Hampshire Extension – Growing Herbs in Containers – herb sun hours, soilless mix, drainage holes
- Oregon State University Extension – Hanging Baskets (10-Minute University) – watering frequency, no garden soil or gravel, slow-release fertilizer, fill level, grouping plants
- UConn Home and Garden Education Center – Container Gardening – twice-daily checks, wilting and growth
- UC ANR Napa Master Gardeners – Vertical Gardening – pocket rows, staggered drainage, pallet lining, gutters, bucket towers, feeding
- Illinois Extension – Thinking Outside of the Garden Bed – pallet stamps, gutter root space
- University of Maryland Extension via Ask Extension – Planting in Pallets – HT, KD, DB and MB stamps, unmarked pallets
- Oregon State University Extension – Raised bed lumber, pressure treated safe? – ACQ and CCA lumber
- NC State Extension – Easy Container Vegetables And How to Grow Them – lettuce depth, spacing, shade tolerance
- Oklahoma State University Extension – Gardeners can reuse, recycle last year’s potting soil – reusing potting mix, when to start fresh
- ASPCA Animal Poison Control – Toxic and Non-Toxic Plants (plant pages for basil, thyme, nasturtium, strawberry, hens and chickens, spider plant, mint, parsley, English ivy, golden pothos) – pet toxicity
