
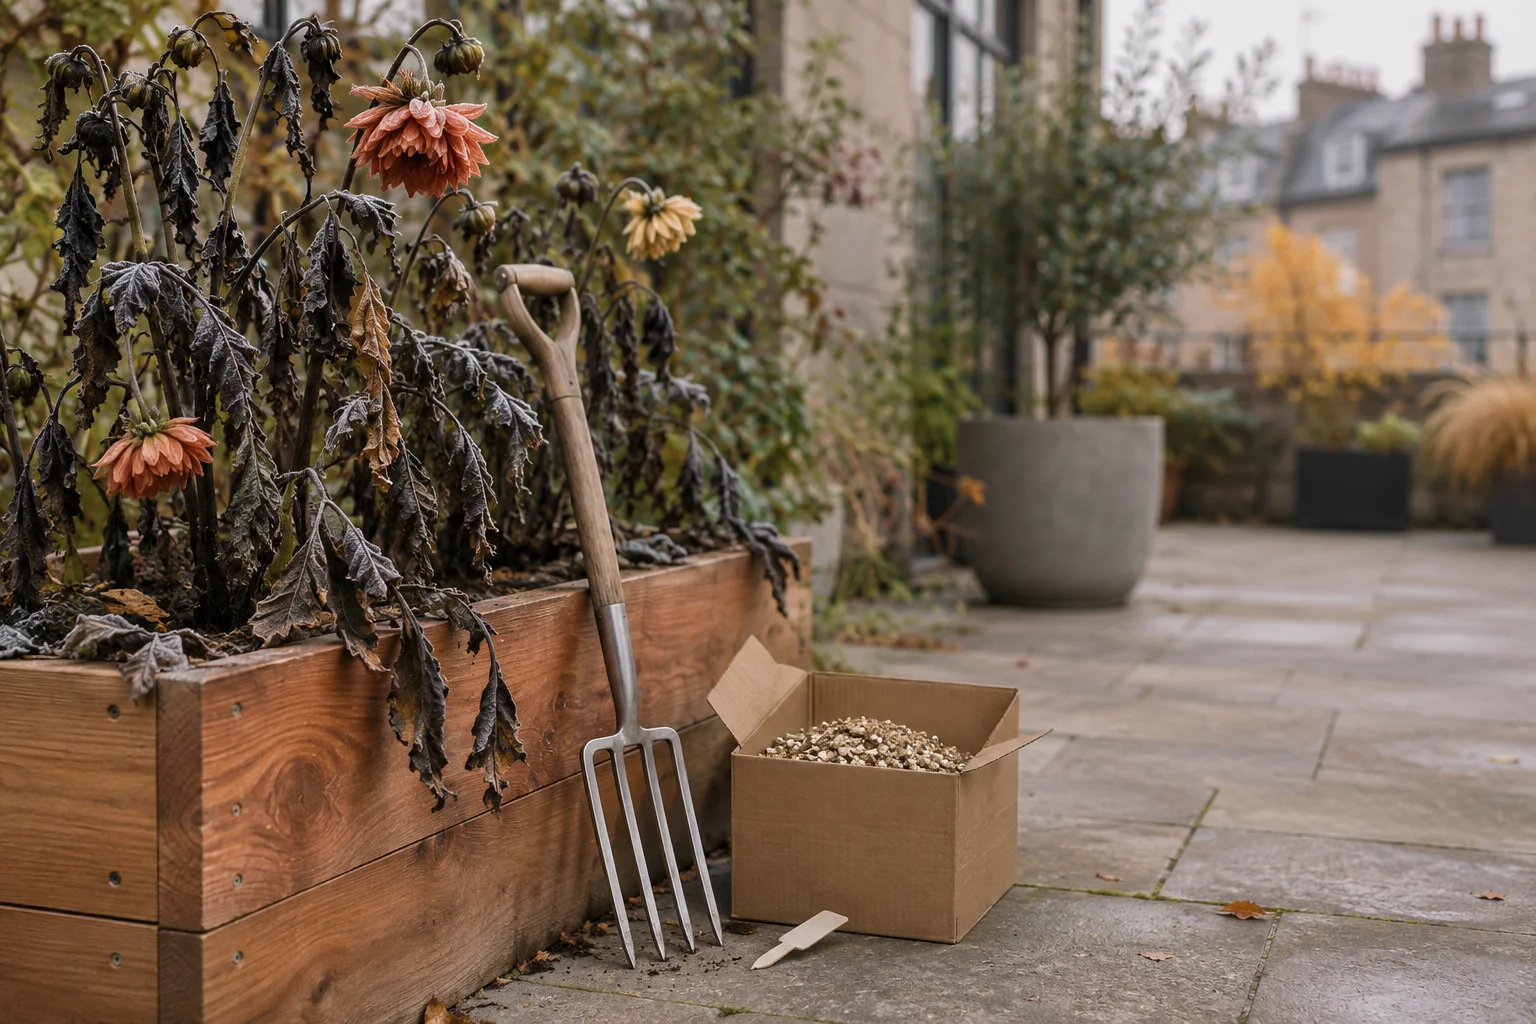
One cold morning you step outside and the dahlias that were glowing coral and butter yellow last week have turned black and limp overnight. Under that collapse sit the tubers, worth far more than the plant on top: the same clump can come back bigger next summer, with the flower you chose on purpose.
Learning how to overwinter dahlia tubers is mostly a matter of timing and one set of numbers: when to cut, how long to wait, how long to dry, and how cold to keep them. This guide walks through seven steps in order, with a path for dahlias grown in balcony pots (worth doing the same afternoon you are winterizing the rest of your balcony pots) and a simple way to decide whether your zone lets you skip the digging altogether.
Table of Contents
At a Glance
To overwinter dahlia tubers, lift them before the ground freezes, remove excess soil, let the surface dry, and pack them in a moisture-buffering material such as coarse vermiculite. Store at 40 to 50°F (4 to 10°C), keep them from freezing, and check monthly for rot or shrivelling.
- Dig after frost blackens the foliage, but before the ground freezes; lift sooner if prolonged cold or waterlogged soil threatens.
- Cut the stems to 2 to 6 inches, wait about a week only if conditions allow, then dig roughly 12 inches out from the stem.
- Rinse or gently brush off soil, inspect, and dry the clumps out of the sun, usually for 1 to 3 days.
- Pack them in vermiculite or wood shavings in a ventilated box kept at 40 to 50°F.
- Check every 3 to 4 weeks: lightly mist the packing medium if tubers shrivel, and isolate or discard rotting tubers.
Lift them in USDA zones 3 to 6 or wherever soil stays wet all winter. Zone 7 is borderline; lifting is the safer choice. In zones 8 to 10, mulching in place can work with sharp drainage and protection from severe freezes.
What You’ll Need
Essentials
- A digging fork or spade, plus pruners or loppers for the thick stems
- A hose with a spray nozzle, or a bucket and a soft brush
- Gloves, plant labels and a permanent marker
- A ventilated container: a cardboard box, shallow crate, or plastic bin with holes in the sides and the lid left loose
- Packing medium: coarse vermiculite, clean, untreated wood shavings, peat moss, sawdust, sand or coir
- A dark spot that stays 40 to 50°F all winter: an unfinished basement, a root cellar, or an unheated garage that doesn’t freeze
Optional
- Newspaper or a mesh tray for drying, a spray bottle for winter checks, and a minimum/maximum thermometer for the storage spot
- Household bleach for cleaning tools, and a sharp knife if you divide
- Kitchen foil to cap cut stems before a wet spell
For the box method below, coarse vermiculite is a straightforward starting point. Avoid wet potting soil and sealed tubs: excess moisture and condensation encourage rot. Other materials can work, but their moisture level needs the same attention.
Before You Start
Check your zone and your drainage before you pick up the fork; for some readers the right answer is winter protection in the bed rather than a box in the basement.
Garden dahlias (Dahlia hybrids, in the daisy family) have origins in Mexico and Central America. NC State Extension lists USDA zones 7a to 10b, but a zone number alone cannot tell you whether a particular bed will stay warm and dry enough. Tubers must be protected from freezing, and winter wet can cause losses even in milder zones.
Use this to decide:
- Lift and store in zones 3 to 6, in borderline zone 7, or if your bed or pot stays soggy through winter. This is also the more cautious choice for a variety you do not want to lose.
- Mulch in place where winters are mild, commonly zones 8 to 10, with fast-draining soil: cut the stems after frost and cover the crown with about 6 inches (15 cm) of insulating mulch, as the RHS recommends. A rain cover is an additional regional option, not a substitute for drainage. Pull mulch back as growth resumes in spring. If water pools there, lift instead.
- Pots can follow the lifting steps below; you tip the pot out instead of digging. You can also store the whole pot under cover if it stays dry and frost-free (see the pot-storage FAQ).
Two safety notes before the tubers come indoors. The ASPCA lists dahlias as toxic to dogs and cats, usually causing mild stomach upset and mild skin irritation, so dry and store the clumps where a curious dog can’t chew them. Repeated handling of the tubers can irritate skin too, which is why gloves are on the list.
Dahlias are among the higher-maintenance flowers in a front bed; several of these low maintenance front yard flower garden ideas skip the digging entirely, and you may still decide the color is worth an afternoon of lifting and a few winter checks.
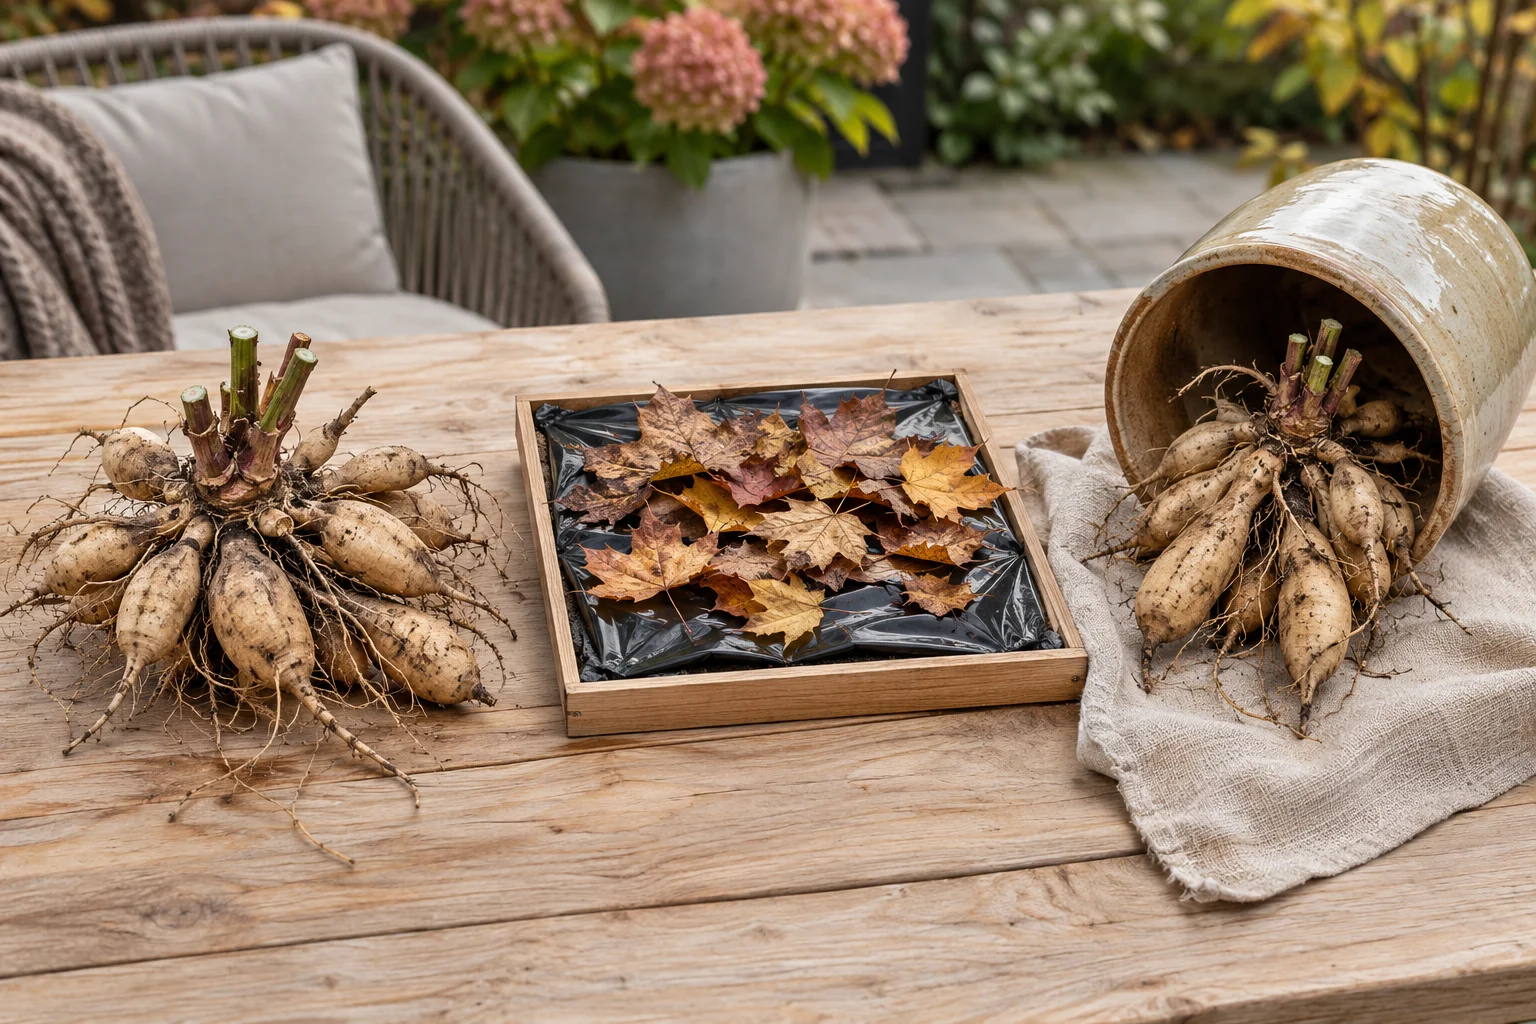
Step-by-Step: How to Overwinter Dahlia Tubers
Seven actions take you from blackened foliage to spring planting: lifting and drying in fall, packing and checking through winter, then preparing the tubers to grow again.
Step 1: Wait for the Frost, Then Cut the Stems
A frost that blackens the leaves is your signal to prepare for lifting. A light frost often leaves buried tubers unharmed, but do not wait if the ground is likely to freeze or prolonged wet weather is forecast.
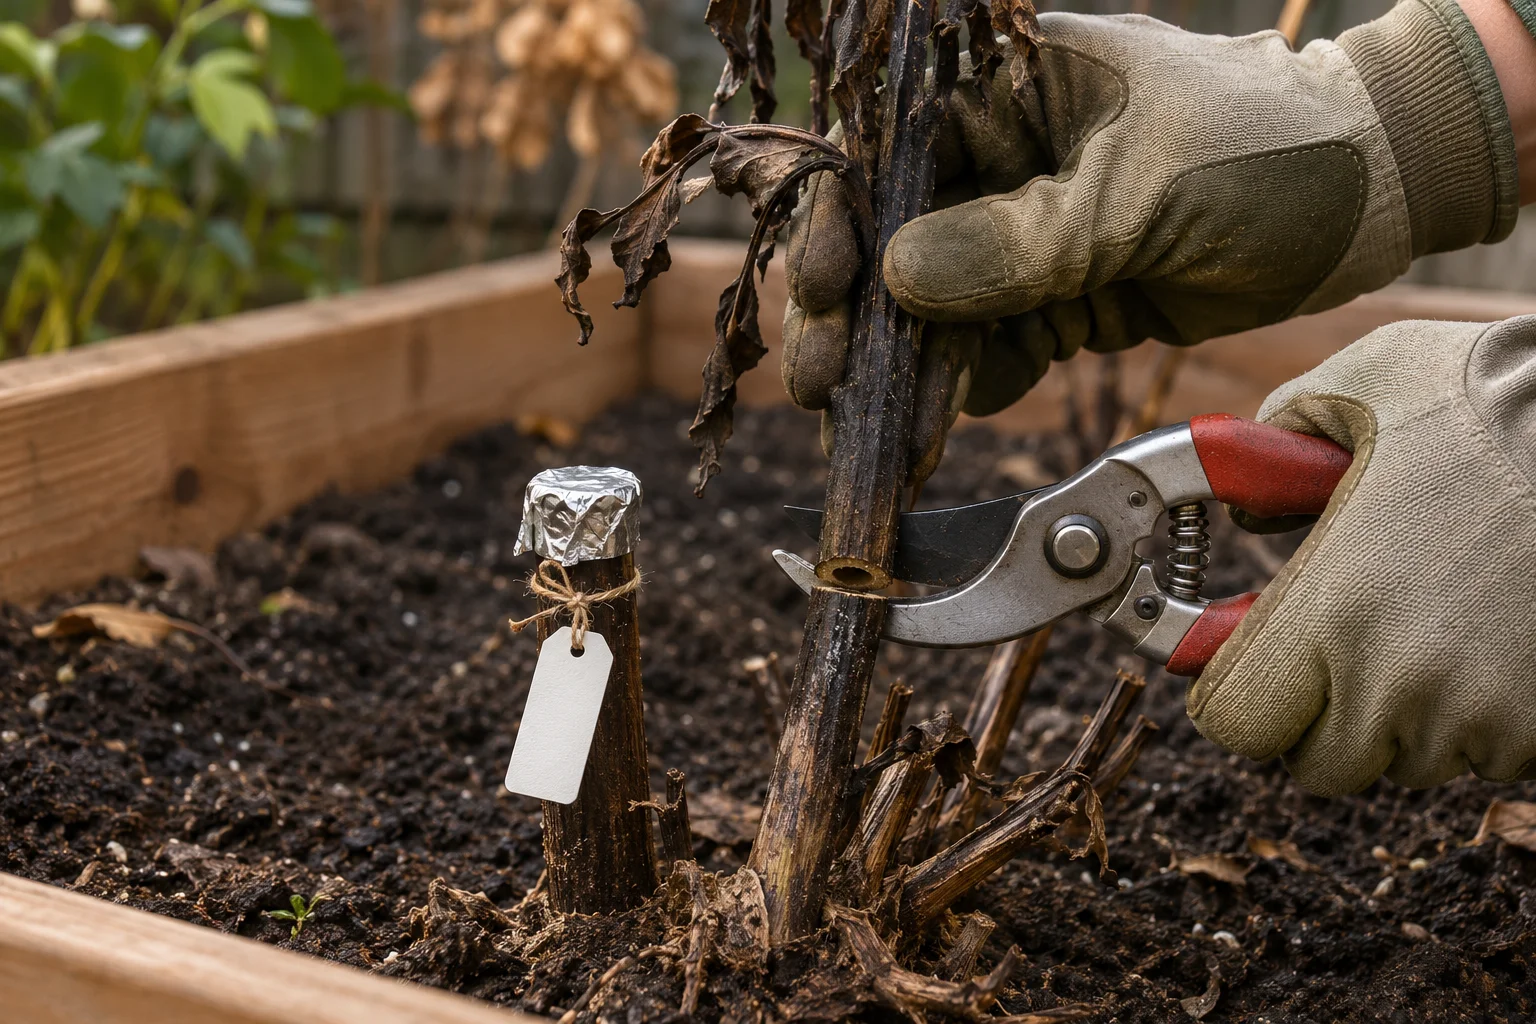
Within three or four days of a killing frost, cut the stems back to 2 to 4 inches, or up to about 6 inches for a labelled stub. If the soil is well drained and a hard freeze is not forecast, leave the clump in the soil for another six or seven days so the skins toughen. In a mild fall without frost, use local autumn conditions to choose your lifting date; mid-November is regional guidance, not a universal deadline.
Dahlia stems are hollow, and a cut stem standing in rain funnels water into the crown, where rot starts. Cut on a dry day, cap each stub with foil if a wet week is forecast, and tie a label to it while you still know which plant is which.
Step 2: Dig a Wide Circle and Lift the Clump
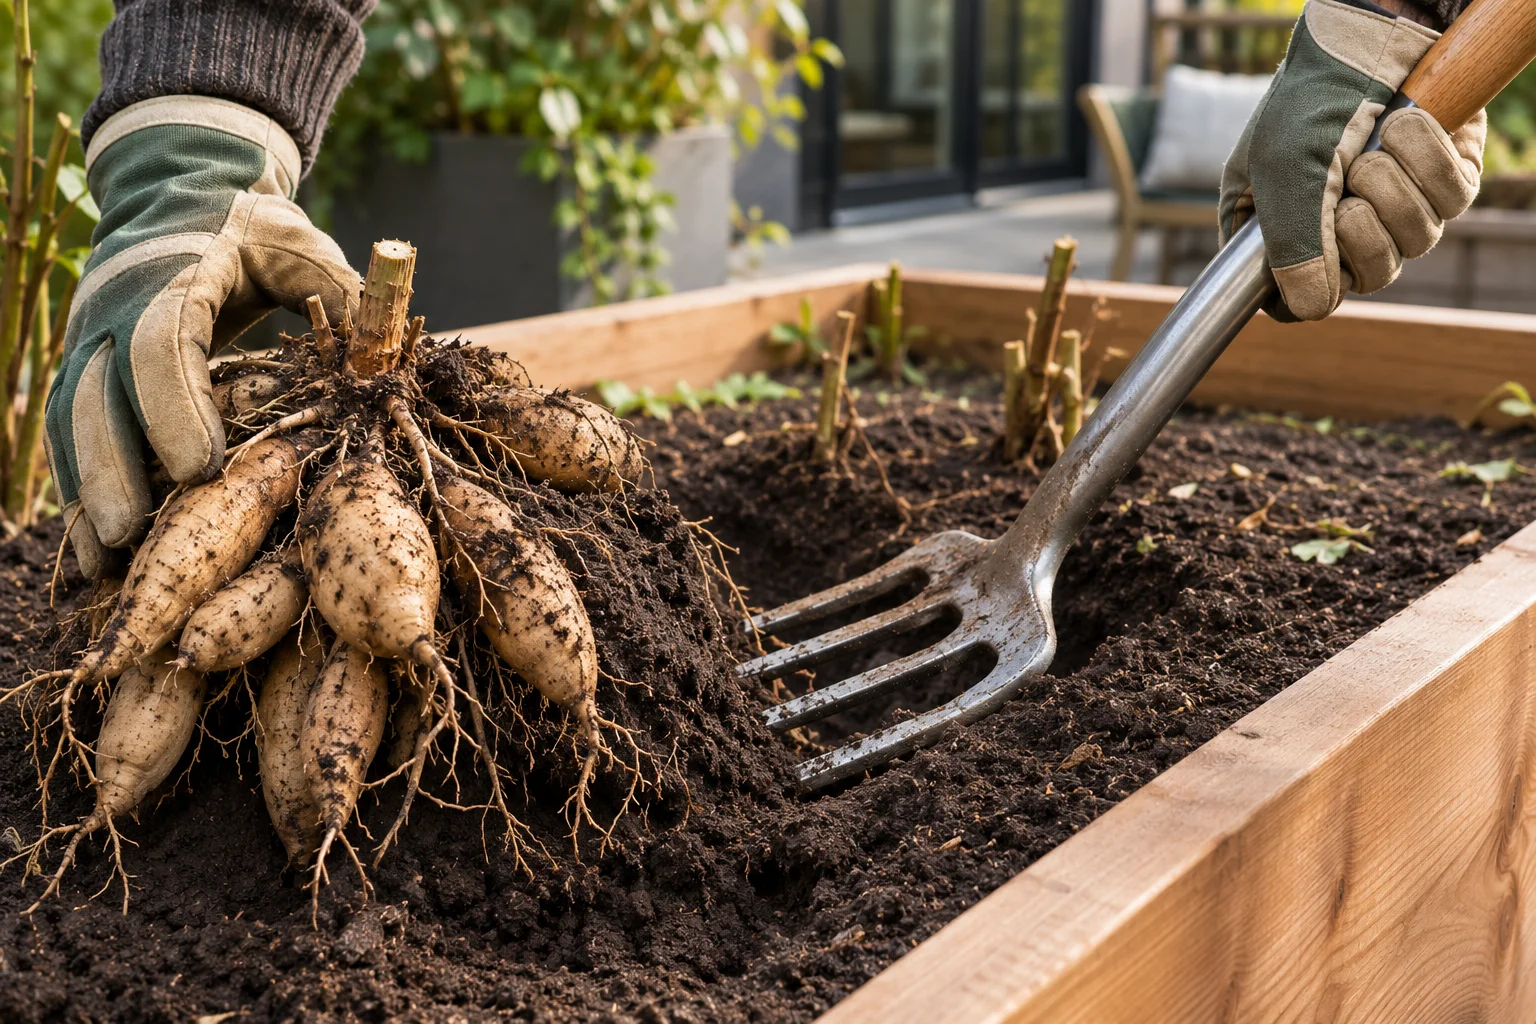
Start the fork about 12 inches out from the stem on all four sides and work inward, levering gently from below rather than pulling on the stem. The clump is usually far wider than the tuber you planted, and the necks that join each tuber to the crown snap easily; a tuber completely separated from its crown cannot produce a new shoot, so slow is faster here.
Once the clump is up, shake off the loose soil and stand it upside down for an hour or two so the stem drains. For a pot, stop watering once you cut the stems, let excess moisture drain under frost-free cover, then lay the pot on its side on a tarp, and slide the root ball out before teasing the soil away by hand.
Step 3: Rinse and Inspect
Rinse the clump with the hose on low until you can see every tuber, then look it over like a grocer checking fruit. Trim the thin feeder roots and inspect the crown and necks. A small damaged patch can be cut back to firm tissue; discard tubers that are extensively soft, mushy or rotten. Keep suspect clumps separate, and put diseased material in the trash rather than your home compost.
Clean soil and sap off blades before disinfecting between plants. For a household-bleach method, Iowa State Extension recommends one part bleach to nine parts water, a soak of at least ten minutes, then rinsing to prevent corrosion. Use gloves and never mix bleach with other cleaners. If you cannot dry washed clumps properly, gently brush off loose soil instead; do not scrape away the skin.
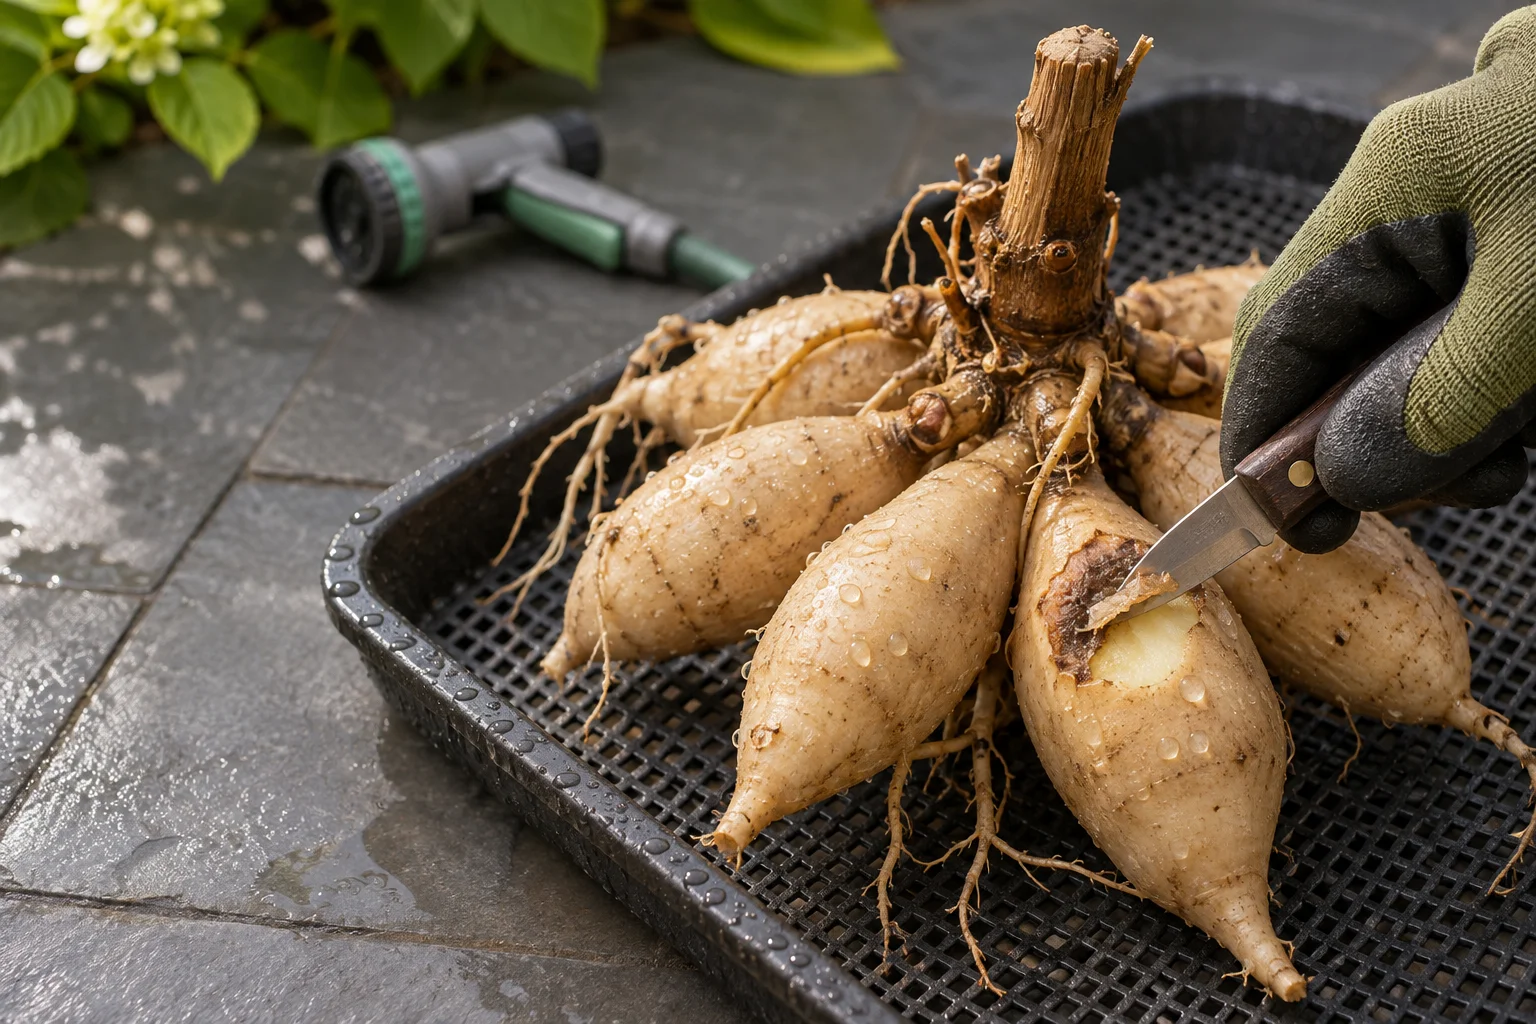
Step 4: Dry the Surface, Usually for One to Three Days
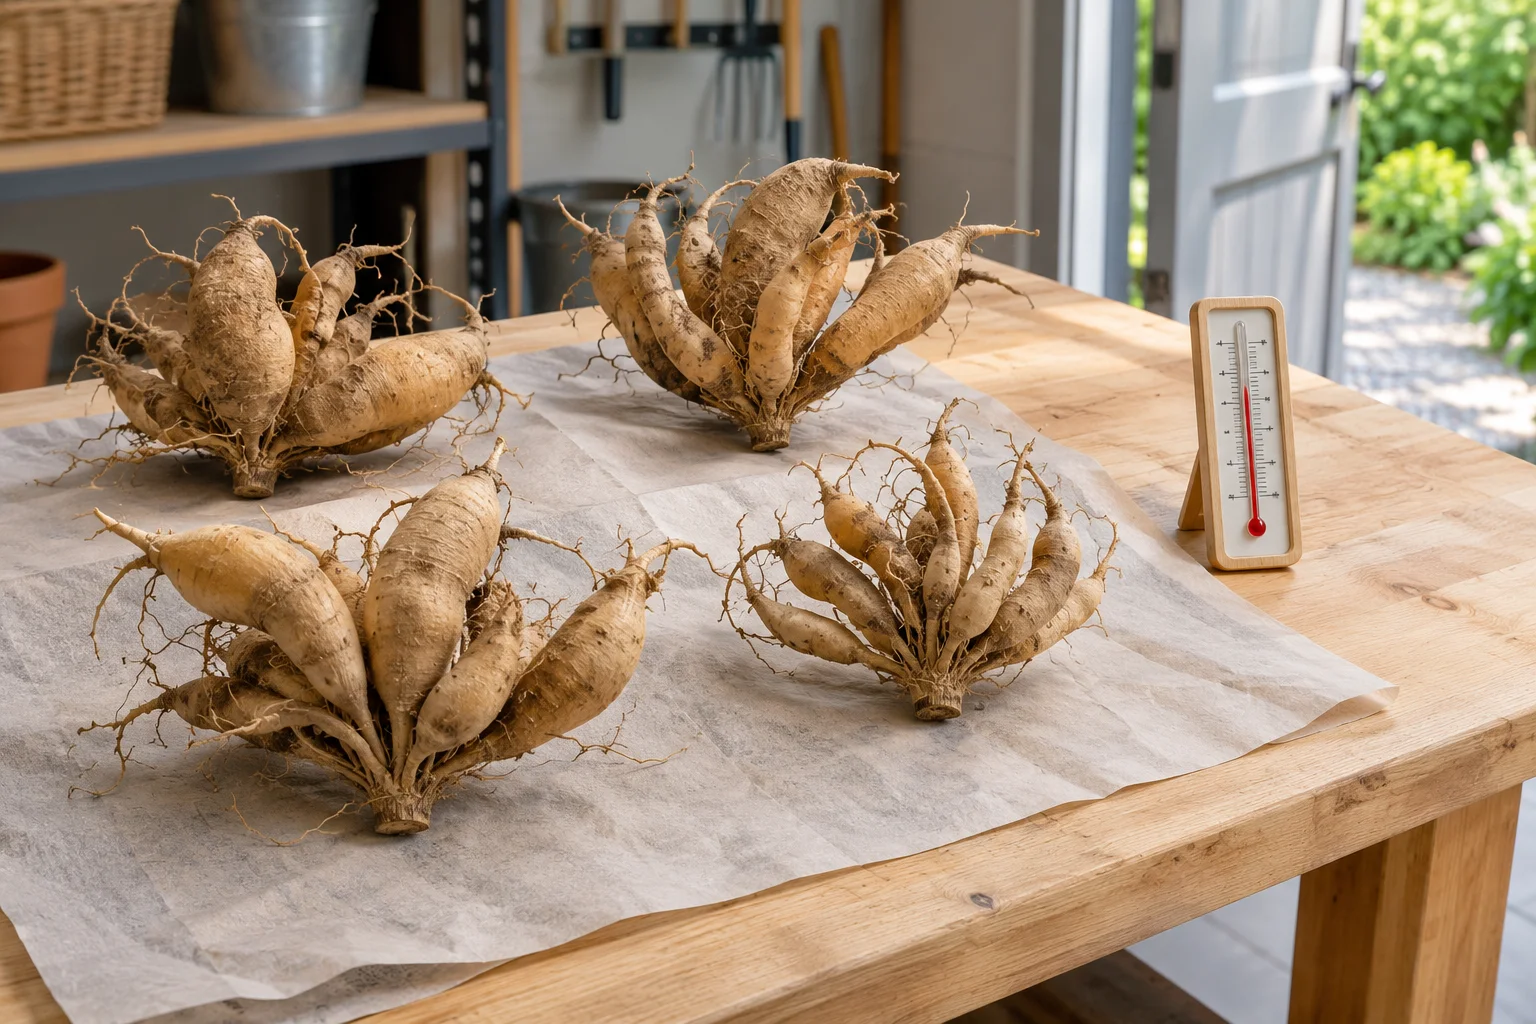
Set the clumps stem-side down in a ventilated spot out of direct sun, around 60 to 70°F (16 to 21°C), for about one to three days; small clumps may be ready sooner, while large wet ones take longer. You want the skin dry to the touch while the tuber still feels firm and heavy, like a good potato.
Keep the clumps on newspaper, a mesh tray or a wooden bench, where air can circulate and you can inspect them easily. Bring them into frost-free shelter before a cold night, and pack once the surface and any cut faces are dry; leaving them exposed too long can shrivel them.
Step 5: Decide Whether to Divide Now or in Spring
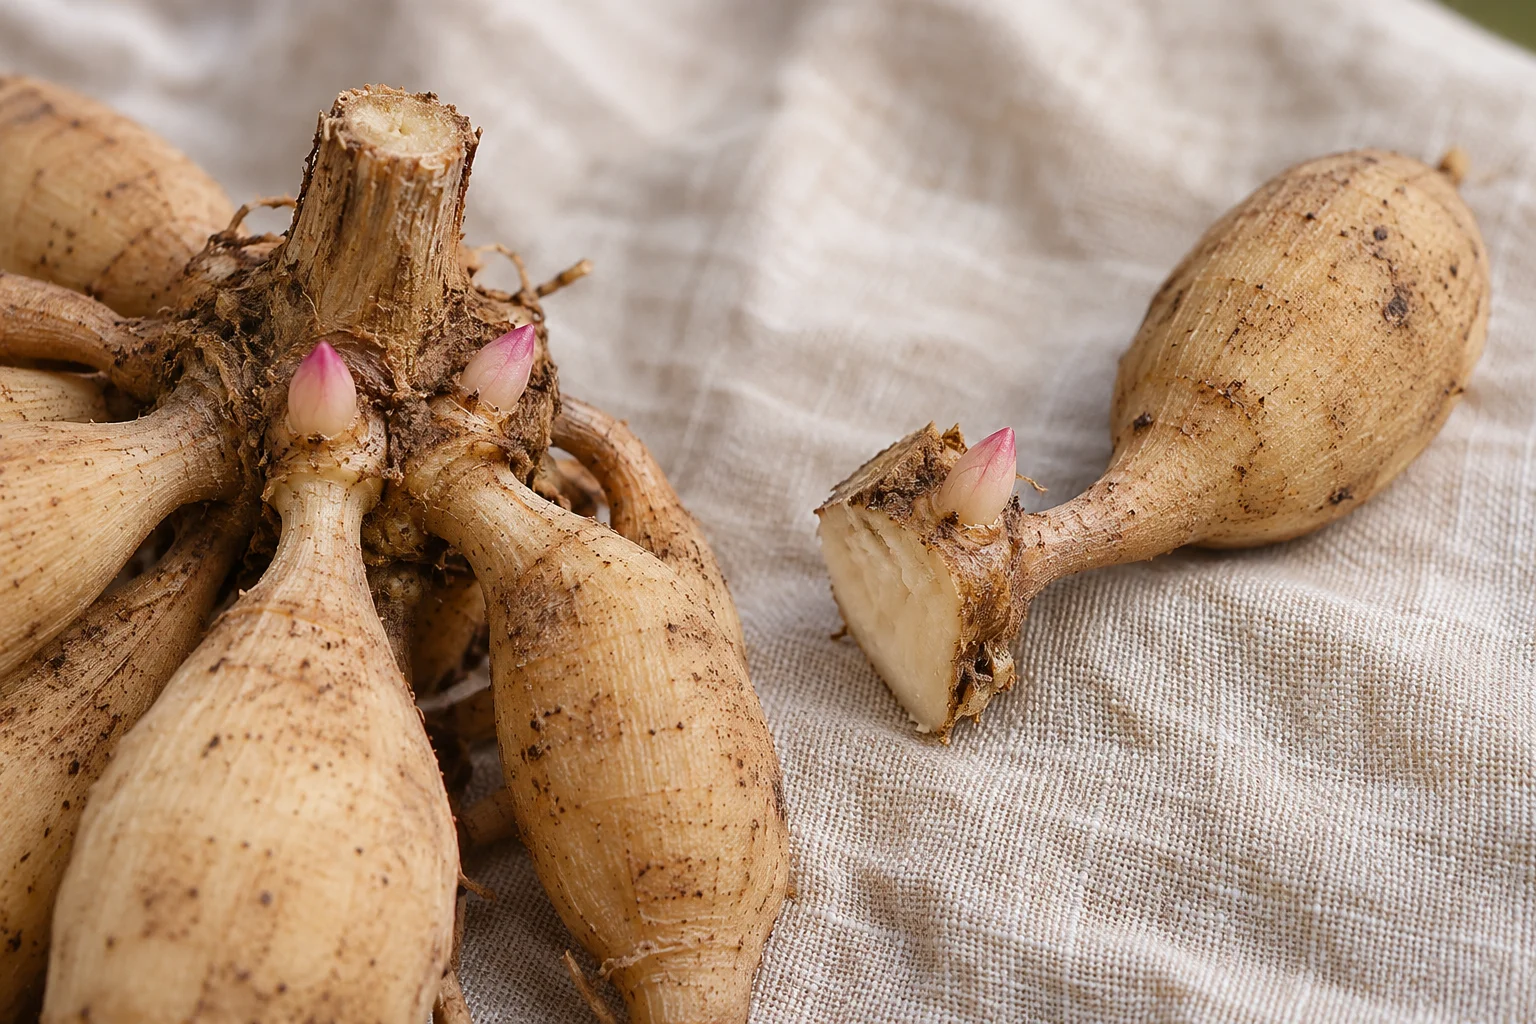
Each new plant needs a tuber attached to a piece of the crown that carries an eye: a small white or pinkish swollen dot where the neck meets the stem. Eyes are easiest to see in spring, when they begin to swell, but the tubers are firmer and easier to cut in fall, which is why commercial growers often divide before storage.
For a first winter, we’d store the clumps whole and divide in spring. Whole clumps shrivel more slowly, and you won’t throw away good tubers because you couldn’t find the eyes in fall; University of Wisconsin-Madison Extension gives the same advice because spring division means less spoilage in storage.
If you divide now because the eyes are obvious and space is tight, use a clean sharp knife and keep an intact neck and a piece of crown with at least one eye on each division. Remove rotten or badly damaged tubers, and let the cut faces dry before packing. Splitting a big clump into two or three large pieces, each with part of the crown, is a sensible middle path.
Step 6: Pack and Store at 40 to 50°F
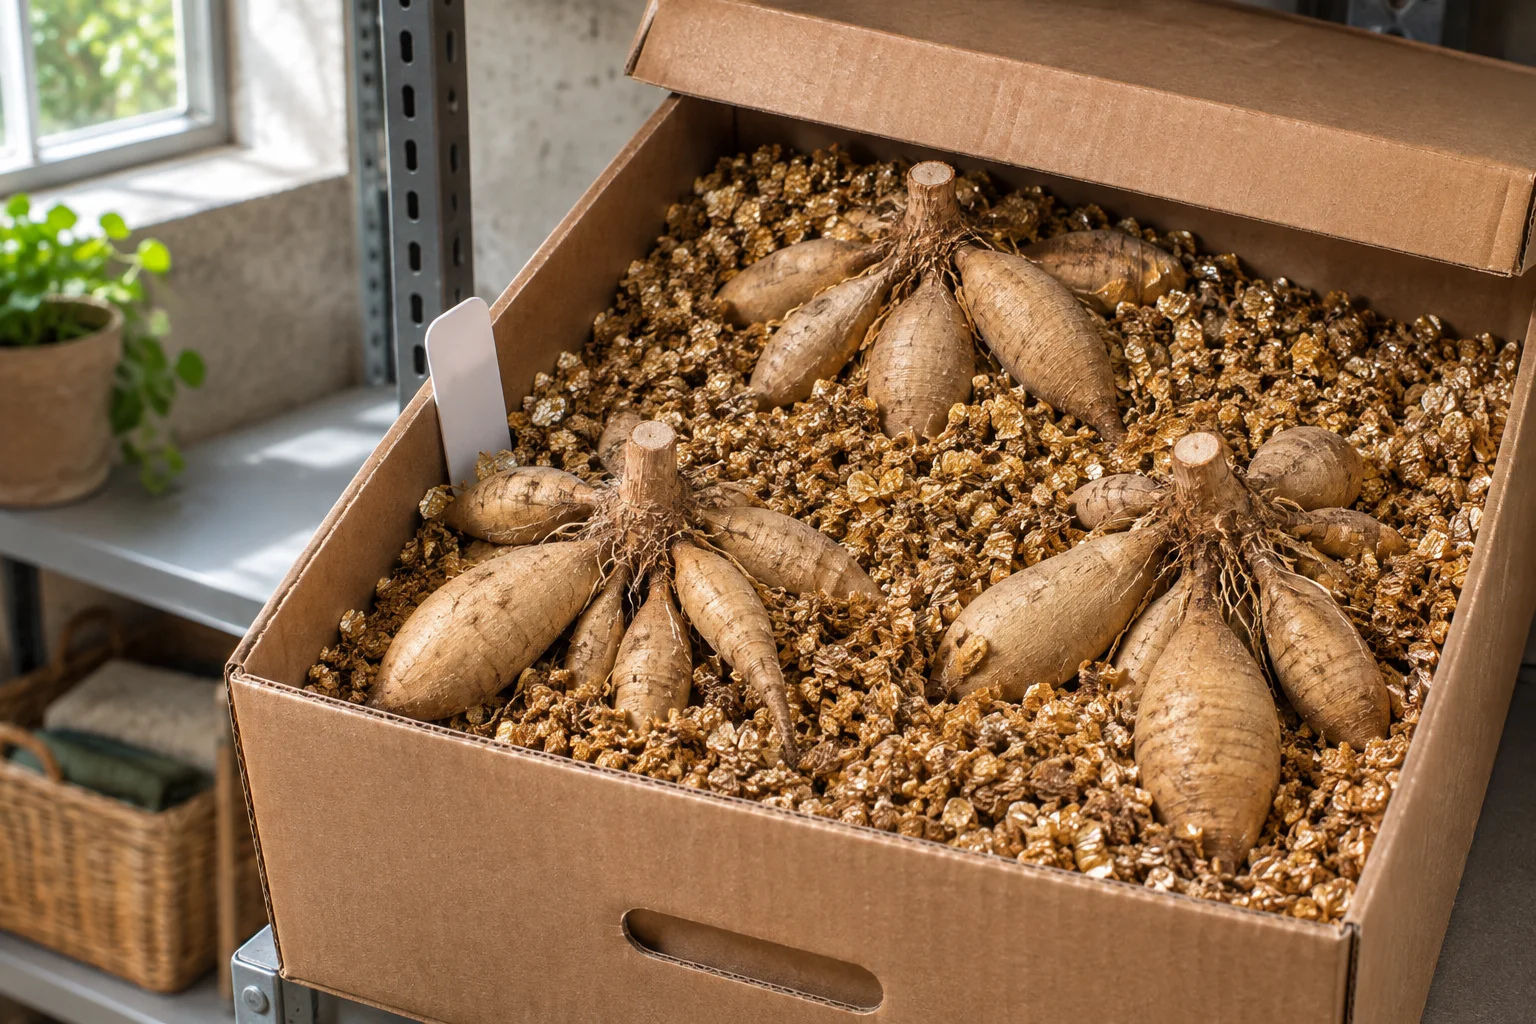
Think of the storage box as a slow leak in both directions: too dry and the tubers lose water to the air, too wet and fungus moves in. The medium buffers that exchange, which is why it should be layered 2 to 3 inches deep in a ventilated container, barely damp at most, and never sealed airtight.
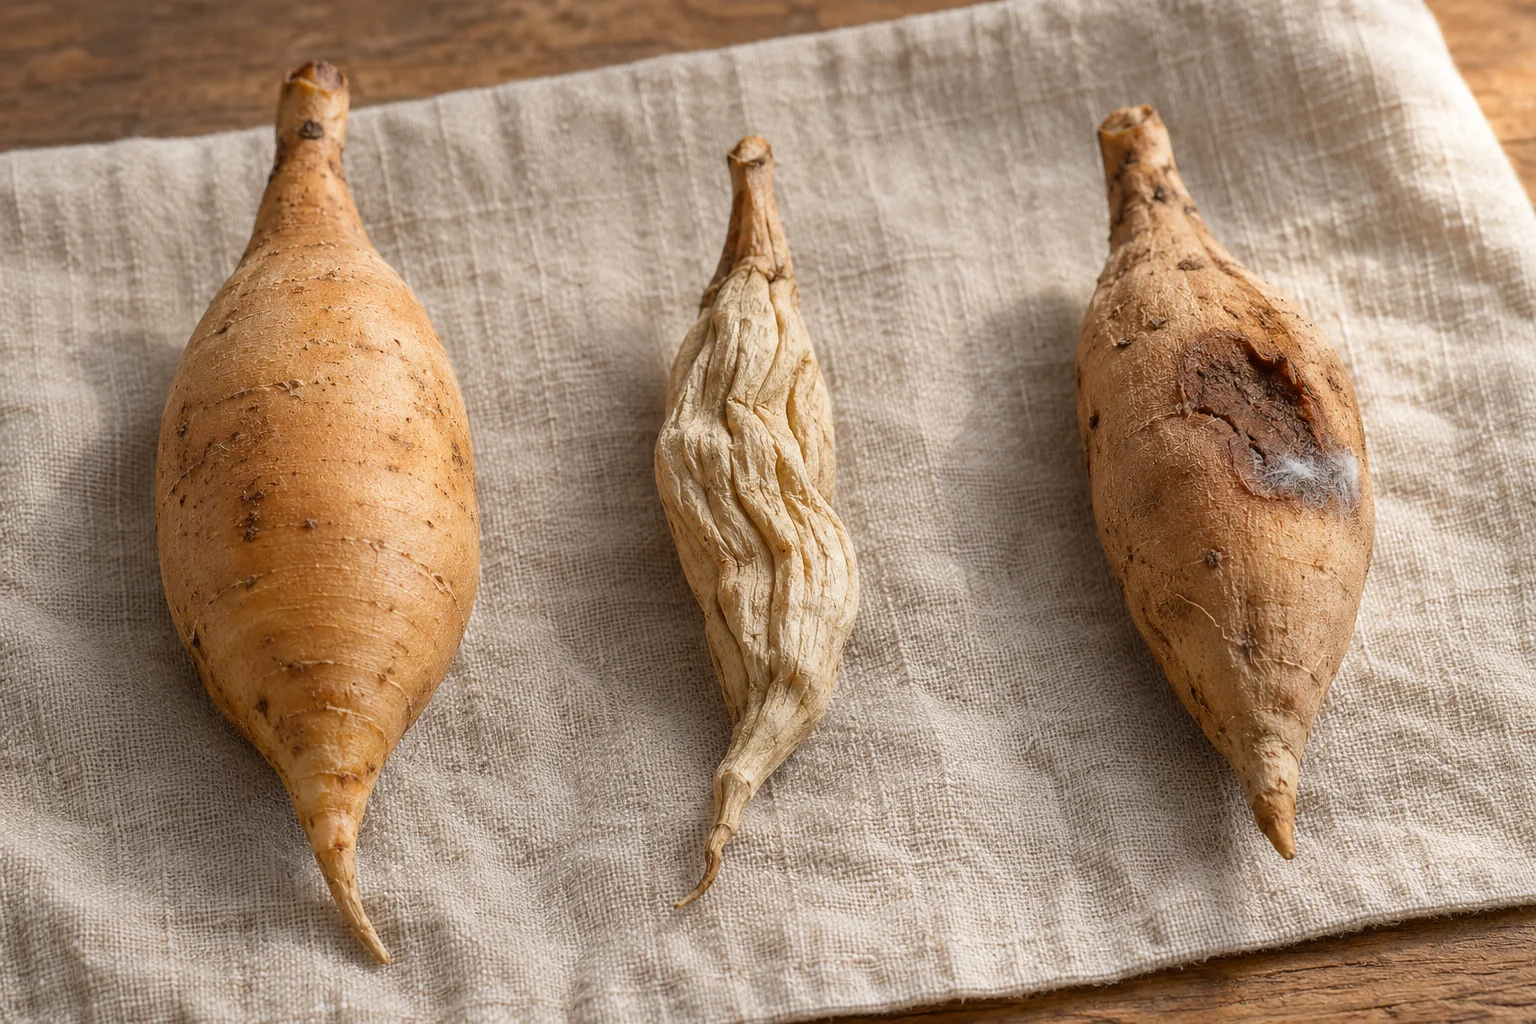
Spread the medium, lay the clumps so they don’t touch, cover, and repeat; keeping tubers apart reduces contact between healthy and rotting material, but does not replace regular checks. When in doubt, avoid adding extra water. A slightly shrivelled tuber may recover; a papery, hollow or thoroughly rotten one will not.
| Packing medium | Why growers use it | Watch out for |
|---|---|---|
| Coarse vermiculite | A common choice; holds a little moisture, lets air through | Fine grades pack down |
| Clean, untreated wood shavings | Cheap, light, sold at pet stores | Can dry tubers out; check more often |
| Peat moss | Buffers moisture well when barely damp | Bone-dry peat shrivels tubers; wet peat rots them |
| Sand | Holds steady moisture in a cold spot | Heavy; tubers may sprout earlier |
| Sawdust or coir | Lightweight alternatives that hold moisture around tubers | Moisture retention varies; avoid tightly packed, wet material |
Then the number that matters most: a dark place at 40 to 50°F (4 to 10°C). Aim for a steady temperature; around 40 to 45°F (4 to 7°C) gives a little more margin against early sprouting. Humidity and packing material interact, so judge moisture by the tubers and condensation rather than chasing one room-humidity number. Freezing can ruin tubers; much above 50°F they can sprout early and become more vulnerable to decay. Basements against an outside wall, root cellars and attached garages that stay above freezing are the usual spots, with the box on a shelf or bench.
In a heated apartment, measure the coolest available spot with a minimum/maximum thermometer before relying on it. A cupboard that stays warm is not equivalent to cool storage. If no suitable space is available, consider a frost-free cellar or garage elsewhere; meanwhile, check stored clumps every two to three weeks for drying and early shoots.
Step 7: Check Every Three to Four Weeks and Wake Them in Spring
Open the box every three to four weeks all winter; check sooner if you notice condensation, because a clump that wasn’t quite dry can start to rot. Plump, firm tubers mean leave everything alone. Wrinkled but still firm tubers mean lightly mist the medium and keep the container ventilated. Soft spots or fuzz mean isolate the clump and inspect it: remove rotten tubers, or trim a small damaged area back to firm tissue, let the cut dry and repack separately in fresh medium (the Troubleshooting section sorts out why).
In late winter the job flips. For an early start, about six weeks before you expect to move plants outdoors, bring the tubers into warmth, divide once the eyes are visible, and pot each eyed division in slightly moist potting mix in a spot above 60°F (16°C). Keep the crown near the surface and provide good light as shoots emerge. Harden off growing plants before transplanting after the last frost, keeping them at their pot depth. You can instead keep dormant tubers cool until planting time, then plant eye up in warm, well-drained soil at the depth recommended for your variety; large varieties commonly need 2 to 3 feet of space.
Winter Check Calendar
Dahlias follow your frost dates rather than the calendar, so shift this table earlier in the Upper Midwest and later along the Gulf Coast. The pattern holds: lifting and drying in fall, a quick check each month, and planting preparations in spring.
| When | What to do | What you’re looking for |
|---|---|---|
| Foliage blackened by frost, before soil freezes | Cut, wait only if conditions allow, lift, clean, dry, pack | Firm tubers with dry skins |
| 3 to 4 weeks later | First check | Condensation or soft spots |
| Midwinter, every 3 to 4 weeks | Quick check; lightly mist packing medium only if needed | Wrinkling from a too-dry medium |
| About 6 weeks before safe outdoor planting, if starting early | Warm clumps, divide once eyes are visible, pot up and provide light | Each division has a tuber, an intact neck and an eye on the crown |
| After last frost, soil warmed | Plant dormant tubers at the recommended depth, or transplant hardened-off plants at pot depth | Soil that drains rather than puddles |
Common Mistakes
These five habits can cost you tubers; the steps above explain how to avoid them.
- Storing them somewhere warm. A hall closet in a heated apartment can bring early sprouts and faster rot; verify a cool, frost-free spot with a thermometer (see Step 6).
- Clamping the lid. A sealed plastic tub turns the box into a terrarium.
- Packing them damp. Wet clumps or wet medium can start rot before the first check; wait until surfaces and cut faces are dry, without drying the tubers until they wrinkle.
- Skipping labels. Every clump looks the same by March.
- Leaving hollow stems open in the rain. Water sitting in the stem can rot the crown before you ever dig.
And one mistake of timing: putting off lifting because you are waiting for a particular date. A forecast of freezing soil or prolonged waterlogging matters more than the week on the calendar.
Troubleshooting
Tubers Look Like Raisins
Wrinkled, light, rubbery tubers have lost water to the air. The usual causes are a medium that was bone dry going in, shavings in a very dry room, or storage that is too warm; above 50°F you will often see small sprouts as well. Mist the medium, move the box somewhere cooler if you can, and look again in two weeks. Keep wrinkled tubers that still have a firm core, an intact neck and a sound crown; they may grow in spring. Discard those that are papery and hollow, and do not soak stored tubers in a bucket of water.
Soft Spots, Black Patches or Fuzz
These signs can indicate decay, often encouraged by clumps packed damp, poor ventilation, a wet basement corner or digging injuries. Condensation is a warning of excess moisture, but it does not identify the cause of every dark mark. Isolate the affected clump. For a small localized patch, cut back to firm, pale tissue, let the cut surface dry and repack separately in fresh medium. Discard extensively rotten tubers or a clump with a rotting crown, and disinfect the knife before using it again.
No Eyes Anywhere in Spring
Eyes on stored clumps can be almost invisible until they swell. Keep the clump whole or in large pieces with plenty of crown, set it in a warm bright room for a week or two, and watch for pink or white dots. Do not discard a firm clump just because it is slow to wake. A detached tuber with no crown tissue cannot grow, but an intact crown may simply need more time.
Clump Rotted After Replanting
A tuber that came through winter firm and then collapsed in May most often sat in cold, wet soil. Wait until frost danger has passed and the soil has warmed, plant where water drains freely, and water sparingly until shoots appear; dormant tubers need far less water than actively growing plants.
Tubers Sprout Before Spring
Early shoots often mean storage is running warm. If planting is still a long way off, move firm tubers to a cooler frost-free place. If spring planting is only a few weeks away and shoots are already growing, University of Maryland Extension recommends potting them up and providing light. Keep them protected from frost, water cautiously and harden them off before planting outdoors.
Frequently Asked Questions
Do dahlias come back every year?
Yes. Dahlias are tender perennials, so healthy tubers can grow again each spring. In mild areas, often USDA zones 8 to 10, they may stay in well-drained soil with winter protection. In colder areas, lift and store the tubers to keep the same plants, which is the whole point of the seven steps above. In zone 7 some winters are mild enough and some are not, so treat leaving them in as a gamble rather than a plan.
Can you leave dahlias in pots over winter?
Yes, if you move the pot into a cool, dark, dry, frost-free place. Ask Extension supports overwintering dahlias in their pots: stop watering as growth dies back, cut down the stems and keep the pot dry through dormancy. Aim for the same 40 to 50°F (4 to 10°C) storage range used for lifted tubers. If the compost stays wet or you want to inspect every tuber, tip the clump out and use Step 2. An exposed balcony pot needs protection even in a relatively mild region.
How long can dahlia tubers stay in the ground after the frost?
About a week after cutting is a useful guide when the soil is well drained and temperatures remain safe. That pause lets the skins toughen, but it is optional: dig sooner if prolonged cold, freezing soil or heavy rain threatens. There is no single November deadline that works for every climate.
What if a hard freeze got to the tubers before I dug them?
Lift them anyway and sort after drying. Frost-damaged foliage does not prove the buried tubers froze. Inspect the crown and necks: firm, undamaged tubers may still be worth keeping, while any that turn watery, soft or mushy should be discarded. Pack the survivors in their own box and check them after two weeks rather than four.
How often should dahlia clumps be divided?
There is no fixed interval: some growers divide each year, while many gardeners storing whole clumps do it every two or three years. A clump that is stored whole each winter grows wider every season, so divide once it becomes awkward to lift or box, or when the blooms get smaller and more crowded.
Is there anything to do in late summer so the tubers store better?
Yes: label varieties while you can still identify the flowers, avoid unnecessary late-season feeding, and leave healthy plants growing as long as the weather allows. The tubers keep maturing through those last weeks, and well-matured tubers store better than ones dug early. Light frost may damage flowers and foliage without harming buried tubers; freezing soil is the danger to watch for.
Do you have to wash dahlia tubers before storing them?
No. Washing makes inspection and division easier, while gently brushing off loose soil avoids adding water before storage. Cornell Cooperative Extension describes both approaches. Whichever you choose, handle the skins carefully, inspect for damage and let the surface dry before packing.
What Actually Matters
Learning how to overwinter dahlia tubers comes down to watching the weather and the tubers: lift before freezing reaches them, dry the surface without drying them out, and store cool at 40 to 50°F. One habit protects the rest: opening the box every month and acting on what you see.
If you only remember one decision, make it this: when you’re not sure about the eyes, store the clumps whole and divide in spring. That avoids unnecessary cuts before storage and makes it easier to see where to divide.
When frost blackens your plants, check the forecast, label the stems and plan your lifting day. While the pot that held your dahlias is empty, borrow one of these winter porch planter ideas with evergreens so the railing isn’t bare until the tubers come back out in spring.
Sources
- Iowa State University Extension — How do I over-winter dahlias?
- University of Wisconsin-Madison Extension — Storing Tender “Bulbs” for Winter
- University of New Hampshire Extension — When should I dig up dahlia tubers and how should I store them?
- NC State Extension Plant Toolbox — Dahlia
- ASPCA — Dahlia: pet toxicity
- American Dahlia Society — Digging, Dividing, and Storing Tubers
- WSU Extension Skagit County — Overwintering Dahlias
- WSU Extension Skagit County — Dahlias: To Dig or Not to Dig
- Cornell Cooperative Extension — Winter Storage for Dahlia Tubers
- Oregon State University Extension — Dahlias in Oregon (FS 95)
- Royal Horticultural Society — How to grow dahlias
- Iowa State University Extension — How do I sanitize my pruning shears?
- Ask Extension, El Paso County, Colorado — Wintering Dahlias: storing the whole pot
- University of Maryland Extension, via Ask Extension — Handling Dahlia Bulbs Over the Winter & Replanting.