
You have one corner of concrete, a railing, and more pots than floor space. The saucers already touch, a trailing stem is creeping toward the door track, and every new plant wants the same sunny square foot.
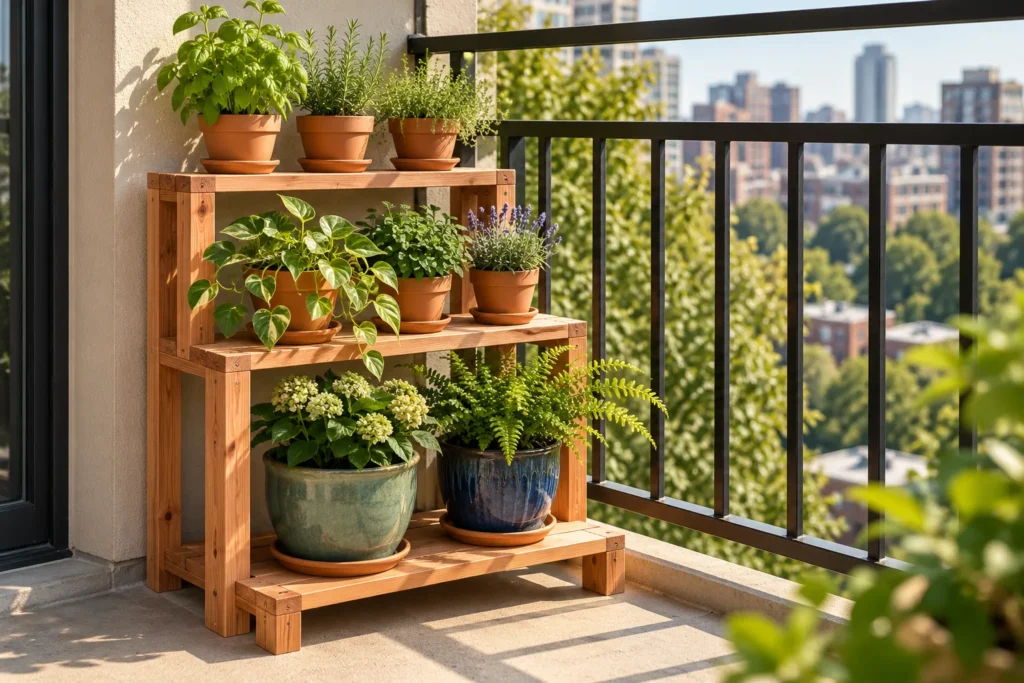
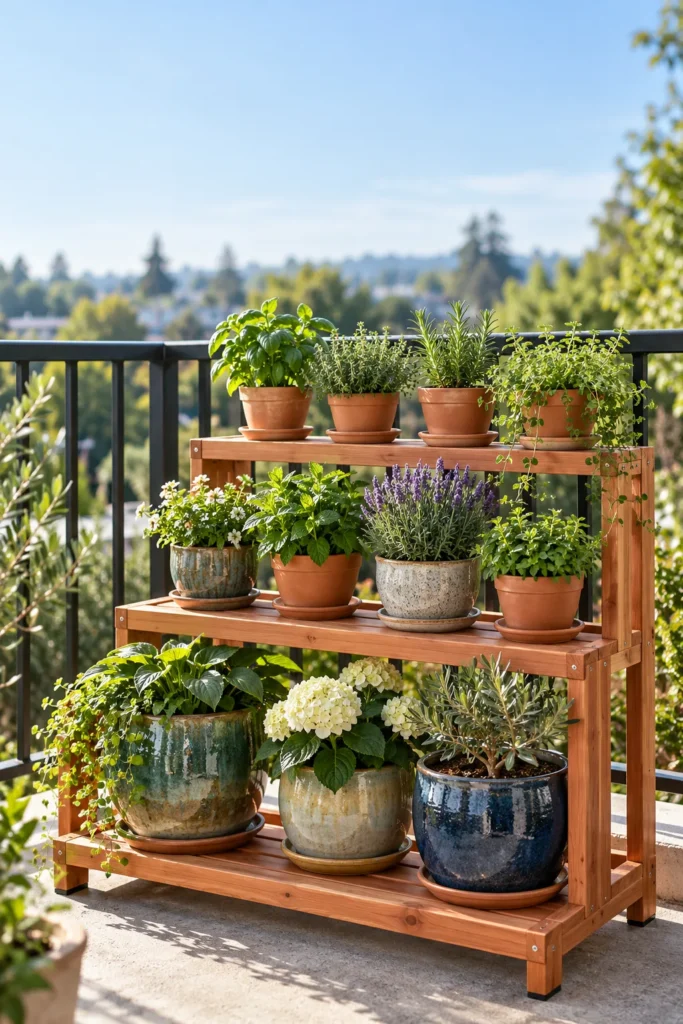
This tiered plant stand DIY for small patio spaces stacks three shelves into a footprint about two feet square, stands on its own without a single hole in the wall, and comes together from two kinds of boards. You get height instead of sprawl, and each tier can catch a different slice of light.
Below you’ll find a full cut list, the wood and screws worth buying, safe sawing and staining, and how to load the stand so it stays put in wind. Spring suits it well, since a dry, mild day is exactly what the finish needs.
Table of Contents
At a Glance
- Size: about 24 in wide, 23 in deep and 32 in tall, with shelf tops at 12, 22 and 32 in.
- Skill and time: beginner with a drill and a saw (or have the store make the long cuts). Plan a weekend so the finish can dry.
- Cost level: low-cost in pine, mid-range in cedar.
- Renter-friendly: freestanding, with no drilling into walls or railings; removable straps handle windy balconies.
- Holds: small herb, greens, succulent and flower pots. Big tomato tubs stay on the floor.
It suits a sunny patio or balcony where your lease allows planters. Hold off until you’ve checked your building’s rules on weight and drainage. For more ways to use that space, see our cozy small patio garden makeover ideas.
What You’ll Need
Two kinds of boards, one box of exterior screws and a drill cover most of this build. If you’d rather reuse wood than buy it, a pallet planter build is another route for a tight balcony.
Materials
- Four 8-ft 2×2 boards (actual size about 1½ x 1½ in) for posts, cleats and stretchers
- Two 8-ft 1×4 boards (actual size about ¾ x 3½ in) for shelves
- 2½ in exterior screws for frame joints and 1¼ in exterior screws for shelf boards
- Exterior stain or water-repellent finish, plus a brush
- Felt or rubber furniture feet if your floor is decking
- Optional: exterior wood glue and one extra 1×4 or 2×2 for a diagonal back brace
Tools and safety gear
- Drill with a small pilot bit and a driver bit
- Hand saw with a miter box, or a circular or miter saw
- Tape measure, pencil, speed square and one or two clamps
- Medium and fine sandpaper
- Safety glasses and a dust mask
Lumber sizes are nominal, and rough-sawn cedar can run thicker. Measure your actual boards and adjust the cleat and stretcher lengths if they differ.
| Wood | Rot resistance | Cost level | Best use |
|---|---|---|---|
| Cedar | Naturally resistant, in the heartwood | Mid-range | A stand you want to last with light upkeep |
| Untreated pine | Little natural resistance | Low-cost | Budget builds that get a full exterior finish |
| Pressure-treated pine | Resistant through treatment | Low-cost | Wet spots, with treated-lumber screws |
For a first stand, we’d choose cedar because it naturally resists rot and insects, and we’d ask for heartwood (the darker inner wood), since that’s where a tree’s decay resistance sits. It costs more than pine and splits more easily, which Step 3 handles.
Treated pine is a fair low-cost pick too. Your plants sit in pots and never touch the wood, and Oregon State Extension reports minimal plant uptake from modern treated lumber anyway. Two conditions apply: cut it with the precautions in Step 2, and use matching screws. If you grow to organic standards or simply prefer to skip treated wood, choose cedar or well-finished pine.
Screws matter more than most first builds assume. Modern copper-based treatments corrode ordinary steel faster than the old formulas did, so for treated pine buy stainless screws or ones labeled for treated lumber. For cedar or pine, any exterior-rated screw works.
Step-by-Step: Tiered Plant Stand DIY for Small Patio Spaces
Six steps take you from bare boards to a finished stand. Most of the time goes into cutting and letting the finish dry.
Step 1: Measure Your Patio and Check the Rules
Mark a 24 x 24 in square on the floor with tape, then open every door, slider and window nearby. In a small apartment, the hardest part is often fitting something new into the space without blocking a doorway or vent, and tape shows that before you’ve cut a board.
Next, read your lease and building rules for anything on planters, weight or water draining off the balcony. Pots full of damp soil are heavy, and Illinois Extension advises checking with a building architect before putting heavy pots on balconies or rooftops.
If the stand won’t fit, a stair-step group of pots on the floor gives a similar layered look; these front porch container ideas show how.
Step 2: Cut the Posts, Cleats, Stretchers and Shelves
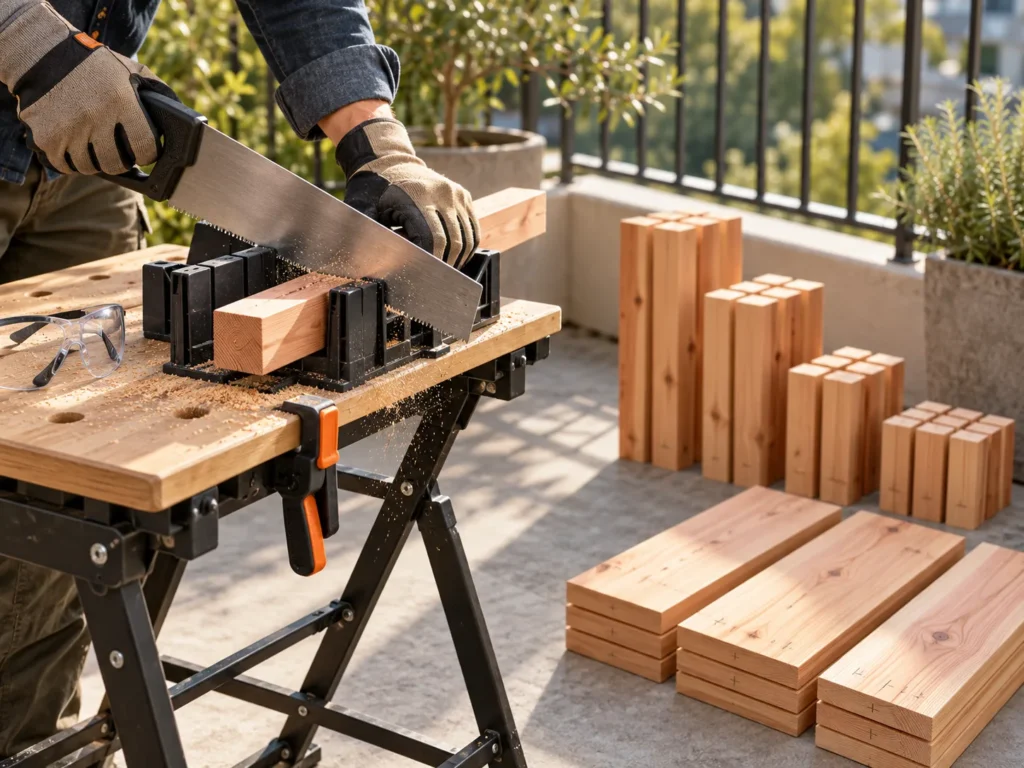
Cut every piece first and label it in pencil.
| Part | Board | Length (in) | Qty |
|---|---|---|---|
| Post 1 (front, tier 1) | 2×2 | 11¼ | 2 |
| Post 2 (tier 2) | 2×2 | 21¼ | 2 |
| Posts 3 and 4 (tier 3 and back) | 2×2 | 31¼ | 4 |
| Cleats | 2×2 | 8¾ | 6 |
| Stretchers | 2×2 | 21 | 3 |
| Shelf boards | 1×4 | 21 | 6 |
To get everything from four 2x2s: board A gives three 31¼ in posts; board B gives one 31¼, two 21¼ and one 11¼; board C gives one 11¼, all three stretchers and two cleats; board D gives the last four cleats. Each 1×4 yields three shelf boards.
Wear safety glasses and a dust mask for every cut. Wood dust can irritate skin and airways, and western red cedar (Thuja plicata) dust in particular is linked to asthma, so cut outdoors and sweep with a damp cloth. For treated pine, wash your hands after handling it and bag the offcuts for the trash, since the EPA warns never to burn preservative-treated wood at home.
Step 3: Build the Two Stepped Side Frames
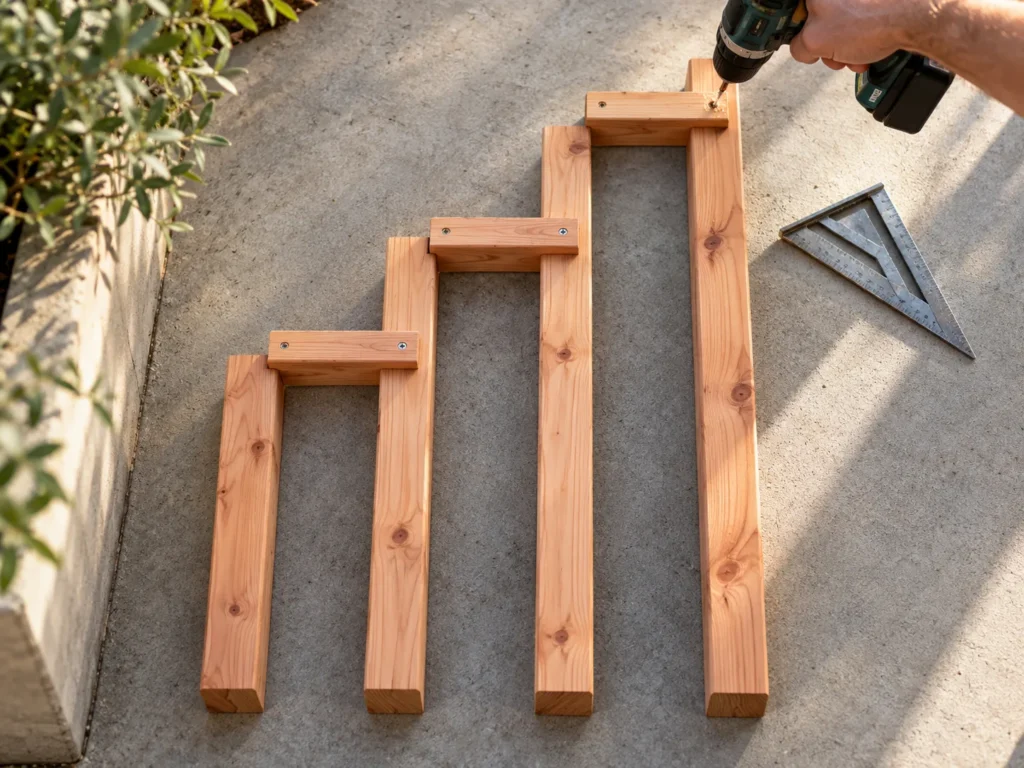
Each side frame is four posts standing in a row, front to back, joined by three short cleats. Lay one set flat on a clean floor in this order, measuring from the front edge of the frame:
- Post 1 (11¼ in) with its front face at 0 in.
- Post 2 (21¼ in) with its front face at 7¼ in.
- Post 3 (31¼ in) with its front face at 14½ in.
- Post 4 (31¼ in) with its front face at 21¾ in, making the frame 23¼ in deep.
Now add the cleats, which are what the shelves rest on. The tier 1 cleat spans posts 1 and 2 with its top flush with the top of post 1. The tier 2 cleat spans posts 2 and 3, flush with the top of post 2. The tier 3 cleat spans posts 3 and 4, flush with their tops.
Square each joint with the speed square, clamp, and predrill before driving two 2½ in screws through the cleat into each post. Cedar in particular splits without pilot holes, and a split at a cleat end weakens the shelf support. A dab of exterior glue adds stiffness but is optional.
Build the second frame as a mirror image, so both sets of cleats face inward once the stand is upright.
Step 4: Join the Sides with Stretchers
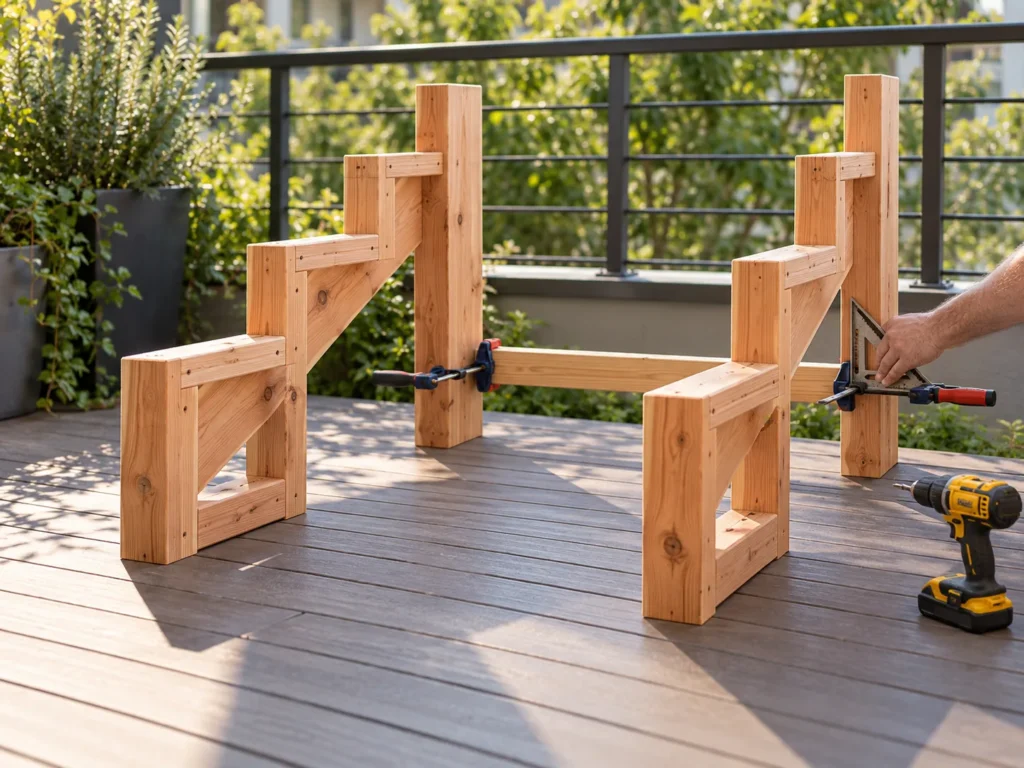
Stand both frames upright, cleats facing in, 21 in apart; a helper or two clamps make this far easier.
Fit the three 21 in stretchers between the frames: one between the two front posts, about 2 in above the floor; one between the two back posts at the same height; and one between the back posts just below the tier 3 cleats. Predrill through the outside of each post into the stretcher end and drive two 2½ in screws per joint.
Then check for racking. Measure both diagonals across the back; if they match, the stand is square. If it still sways once the screws are snug, add a diagonal brace across the back, screwed into post 4 at each end.
Step 5: Screw Down the Shelf Boards
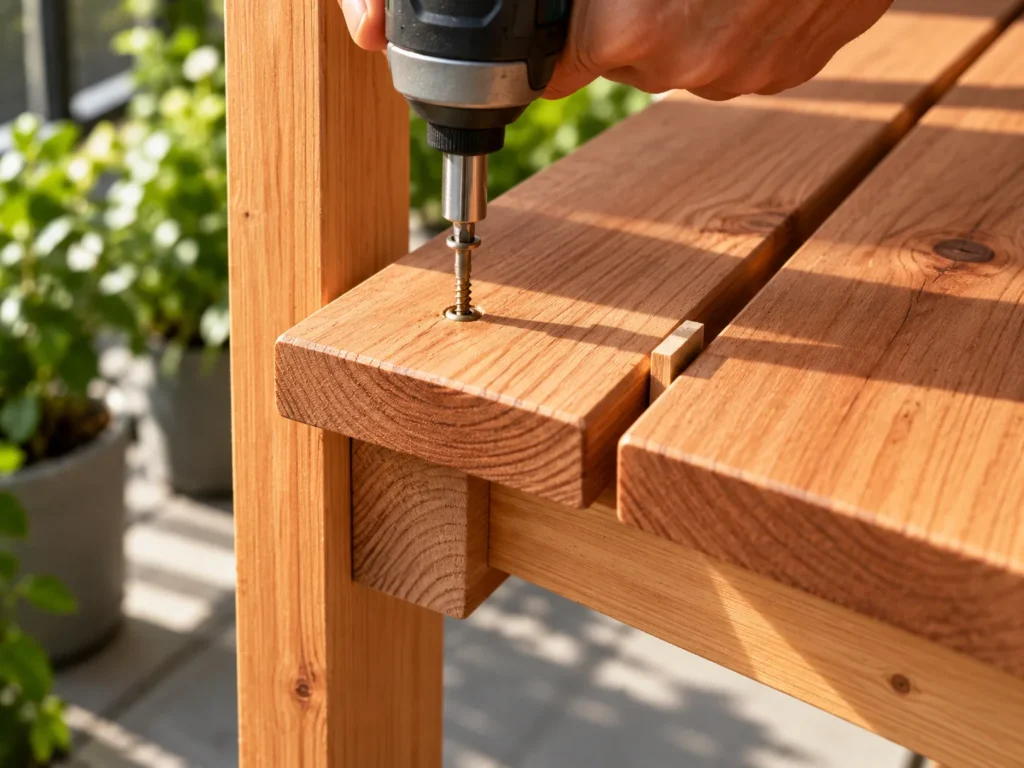
Lay two 1×4 boards on each tier, running side to side across the cleats, with a ¼ in gap between them. Two stacked paint stirrers or a scrap of ¼ in plywood make a quick spacer.
That gap is the stand’s drainage: water runs through instead of pooling on flat wood, so the shelves stay drier and pots don’t sit in standing water.
Predrill near each board end, since ends split easily, and drive two 1¼ in screws into each cleat. Each tier ends up about 7¼ in deep.
Step 6: Finish, Cure and Set It in Place
Sand off splinters and soften the shelf edges. Untreated pine needs a full exterior finish; cedar can weather to silver, though a finish slows graying and checking.
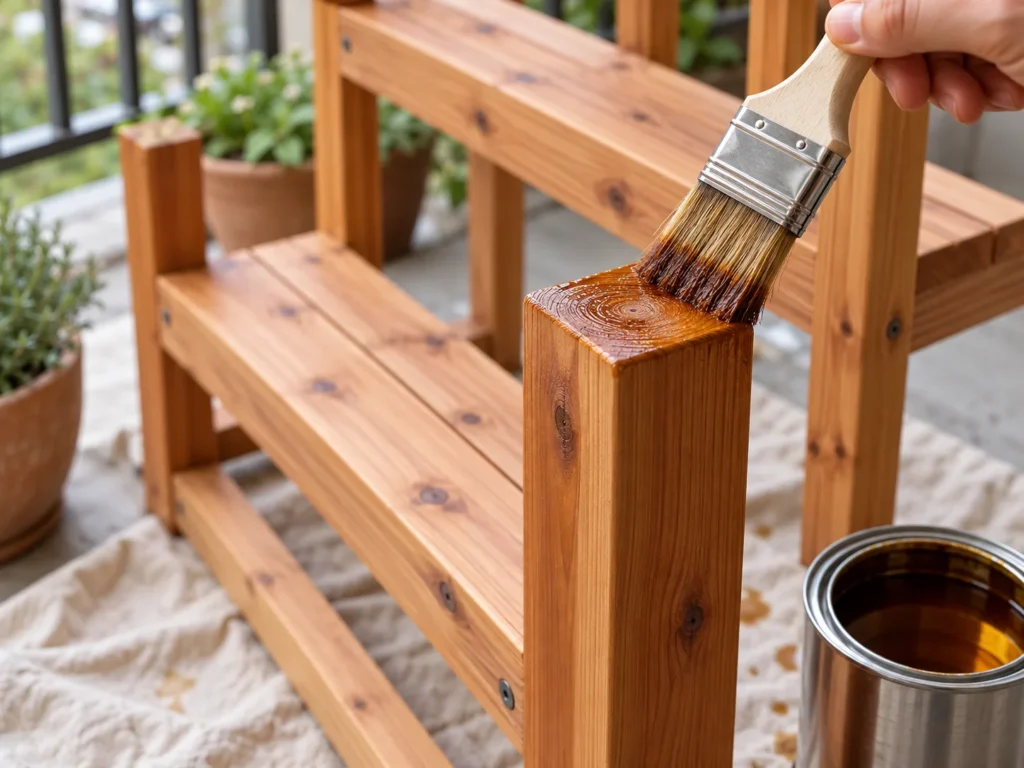
Pick a dry spring day for staining. For semitransparent or opaque stain, the GSA’s preservation guidance calls for applying it between 50 and 95°F, on a day when humidity is 85% or lower, out of rain and direct midday sun. A single coat lasts about 2 to 4 years, depending on exposure.
Brush the cut ends first and give them an extra pass. End grain soaks up water faster than any other surface, so it’s where rot and checking usually start. Then coat everything else and let it dry for the time on the label before loading any pots.
Handle used rags with care. Rags soaked in oil-based stain or linseed oil can heat up and ignite on their own, so lay them flat outdoors to dry, then store them in a metal can with a tight lid and follow the label’s disposal directions.
Last, stick felt or rubber feet under each post on decking, so the stand doesn’t scuff it or trap water, and carry it into position.
How to Use It
Load the stand heavy to light from the bottom up, then match each tier to the sun it actually gets.
Load It Bottom-Heavy
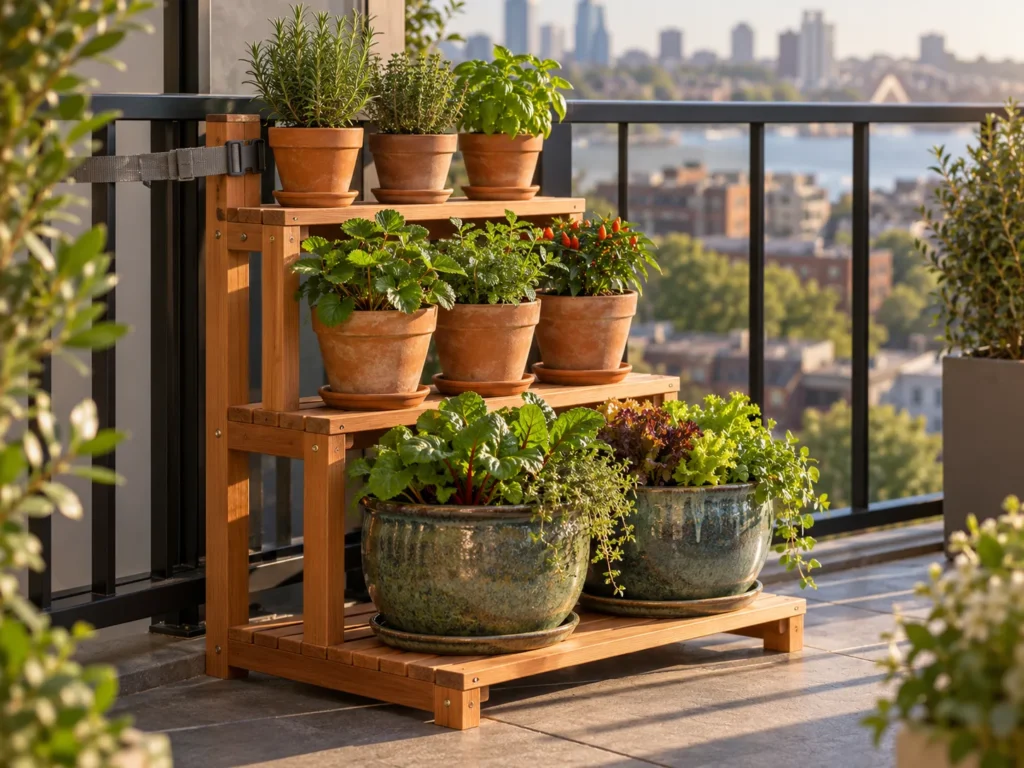
We’d keep the heaviest pots on the bottom tier, because small pots and tall plants are what make a stand top-heavy, and stability matters most on windy balconies. Put the biggest pots on tier 1, mid-size pots in the middle and the smallest, lightest ones on top.
What you fill the pots with affects both weight and drainage; this guide to choosing a potting mix covers the options.
Match Tiers to Sun
Count the hours of direct sun your corner gets before you plant. Most edibles want at least 6 hours of direct sun. Many leafy greens and herbs manage in light shade, with 4 to 6 hours of direct sun, and under 2 hours very little is productive.
The top tier usually catches the most light, so it suits sun-hungry herbs, while the shaded bottom tier fits greens. Check at morning, noon and late afternoon to see which tier the shadows reach first, especially beside a solid railing.
Water and Drainage
Check each pot with the finger test: push a finger in about two knuckles deep, and water only when it feels dry there. Clay and wooden containers dry faster than plastic, and small dark pots can heat up quickly in full sun.
Set a saucer under every pot and empty it after watering, so water doesn’t drip onto the floor or the neighbors below. Water slowly until a little drains into the saucer, then stop.
Pets, Kids and Wind
Sharing a small apartment with a cat and a dog, I assume anything at tail height will get bumped, so the lightest pots go on top and nothing dangles. Before you buy plants for a home with pets, look each one up in the ASPCA’s toxic and non-toxic plants list, and keep in mind that non-toxic doesn’t always mean safe to chew.
Climbing children pull on shelves, which is why tip-over guidance for indoor furniture stresses anchoring. On a windy balcony, we’d strap the stand’s back posts to the railing with removable hook-and-loop or cam straps. A heavier outer pot slipped over a lighter one on the bottom tier adds ballast without any drilling.
Troubleshooting
| What you see | Likely causes | How to tell | Fix |
|---|---|---|---|
| Stand sways side to side | Loose screws; uneven floor | Push a top corner: joints flex, or a foot lifts | Retighten and add a back brace (Step 4); shim or use adjustable feet |
| Rocks or tips in wind | Top-heavy load; tall plants up high; exposed spot | Does it settle once top pots move down? | Reload bottom-heavy; strap to the railing; add ballast |
| Dark streaks around screws | Non-exterior screws; iron touching the wood | Streaks start at screw heads | Swap in stainless or exterior-coated screws |
| Water soaks in, wood grays | Finish or repellent worn | Sprinkle water: soaks in, or beads | Clean, dry and recoat (Step 6) |
| Puddles or stains below | No saucers; overwatering | Floor wet under the stand after watering | Add saucers, empty them, water until it just drains |
| Top tier dries out, bottom plants stretch | More sun and wind up top; shade low | Finger test each tier; recount sun hours | Water the top more often; swap pots by light |
Variations
The same idea scales down, goes no-cut, or moves indoors for winter.
Two-Tier Mini for a Tiny Balcony
Drop post 4 and the third tier, cut post 3 to 21¼ in as the new back post, and the stand shrinks to about 24 x 16 x 22 in. You’ll use two cleats per side, four shelf boards, and set the back top stretcher just below the tier 2 cleats. Lower and smaller, it fits beside a narrow door.
No-Cut Ladder Shelf from an A-Frame Step Ladder
If you don’t want to cut anything, an A-frame step ladder makes a quick tiered display. Rest 1×6 or 1×8 boards across matching rungs on both sides, or simply set pots on the steps. Use it only on a level, stable floor, loaded bottom-heavy. For something that leans against a wall instead, see this no-drill vertical garden wall.
Block-and-Board Tiers
Concrete blocks with boards across them make tool-free tiers in minutes. Keep stacks to two block levels unless they’re mortared or otherwise supported, since taller dry stacks can shift. Blocks are heavy, so redo the weight check from Step 1 before carrying any upstairs.
Indoor Winter Shelf
Once frost threatens tender plants in your area (your USDA hardiness zone, found by ZIP code, is a useful starting point), the stand can come inside. Keep saucers under every pot and a waterproof mat or floor pads under the feet to protect floors. For arranging plants indoors, these ideas for indoor plant shelf styling carry over well.
Frequently Asked Questions
What size pots fit on each tier?
Pots with a base up to about 7 in across sit fully on a tier, because each shelf is about 7¼ in deep and 21 in long. That leaves room for two or three small pots with saucers per tier, and a rim can flare a little wider than the base. Big, leafy plants on a front tier can shade the pots behind them when the sun comes from the front, so check the light again after loading.
Can I make the stand wider for a longer patio?
Yes. A tiered plant stand DIY for small patio corners widens easily: lengthen the three stretchers and all six shelf boards by the same amount and build the side frames exactly as before, so the tiers keep their heights and depth. Longer shelves flex more under damp soil, so set the heaviest pots near the side frames, where the cleats carry them, and look for bowing after the first few waterings. Redo the floor and weight check from Step 1, too.
Can the stand stay outside all winter?
Usually, yes: a cedar stand, or a pine stand with a sound exterior finish, can stay out year-round. Before winter, empty and stack the saucers, brush snow off the shelves so water doesn’t sit on the boards, and leave the felt or rubber feet in place so the posts stay off wet decking. Bring tender plants indoors when frost threatens, as described in Variations.
What if my cat treats the stand as a climbing frame?
Build for it rather than hoping it won’t happen. Strap the back posts to the railing, keep the heaviest pots on the bottom tier and the lightest on top, and leave nothing dangling or swinging. A curious cat may also nibble leaves, so choose plants marked non-toxic to cats on the ASPCA list linked in How to Use It.
Can I build it without a power saw?
Yes. Every cut is a straight crosscut on a 2×2 or a 1×4, which a hand saw and a clamped miter box handle well; some lumber stores will also make cuts if you ask before buying. Mark every piece from the cut list before you start, and wear the safety glasses and dust mask from Step 2 for hand cuts as well.
What Actually Matters
A stand that lasts on a small patio comes down to three things: heavy pots low, water off the boards, and a quick check each spring.
If you do only one thing well, make it the loading. A bottom-heavy stand with a strap on a windy railing will forgive a slightly crooked cut; a top-heavy one won’t.
Each spring, sprinkle water on the shelves. If it beads, you’re set; if it soaks in, recoat as in Step 6. Snug any loose screws while you’re there. Then pick your next weekend build from more balcony garden projects.
Sources
- University of Georgia Extension – Raised Bed Materials – cedar rot and insect resistance, splitting without predrilling, pine’s low rot resistance, two-level block stacks
- USDA Forest Service, Forest Products Laboratory – Comparative Decay Resistance of Heartwood of Native Species – decay resistance in heartwood
- Oregon State University Extension – Raised bed lumber, pressure treated safe? – minimal plant uptake from treated lumber
- USDA Forest Service, Forest Products Laboratory – Corrosion Rates of Fasteners in Treated Wood – corrosion of fasteners in copper-treated wood, stainless performance
- US EPA – Chromated Arsenicals (CCA) – not burning preservative-treated wood at home
- OSHA – Health Hazards: Wood Dust – wood dust and western red cedar asthma risk
- Illinois Extension – Container Size – balcony weight check, top-heavy pots, anchoring in wind
- University of Kentucky – Container gardening can turn small spaces into great gardens – finger test, saucers, pot heating, railing straps, ballast
- Iowa State University Extension – Growing Edible Plants in Shady Areas – sun hours for edibles, greens and herbs
- US GSA – Applying a semi-transparent or opaque stain to wood – stain temperature and humidity range, single-coat life
- Purdue Extension – Finishing Exterior Plywood, Hardboard and Particleboard – sealing edges and ends, rust-resistant fasteners, water-bead test
- City of Piedmont Fire Department – Safe disposal of oily rags – self-igniting rags, drying and metal-can storage
- ASPCA – Poisonous Plants – toxic and non-toxic plant database for cats and dogs
- US CPSC – Anchor It – tip-over risk to children and why anchoring matters
- USDA ARS – Plant Hardiness Zone Map – zone lookup by ZIP code