
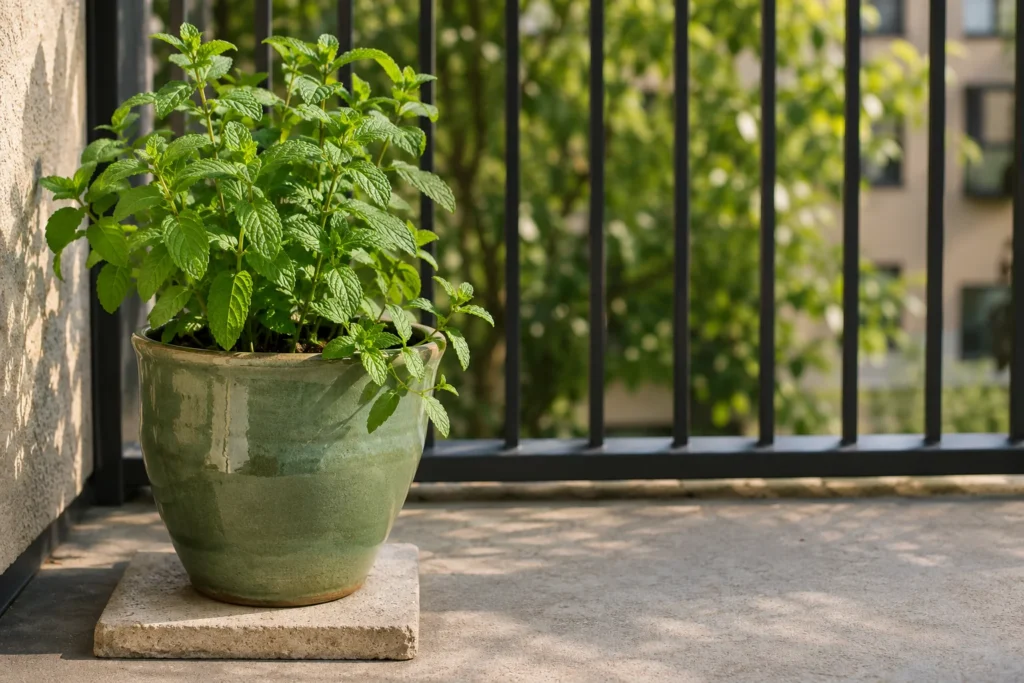
You bought one small spearmint for iced tea, set it on the balcony, and within a week a neighbour leaned over the railing to warn you it will swallow everything by next summer. The warning is fair. The fix is small enough to fit on a doormat.
Learning how to grow mint without it taking over comes down to one pot, one hard surface under it, and a harvesting habit that keeps the plant making leaves instead of runners. This guide covers the set-up step by step, what to do if you do have a bed, and a fall plan, since now is a good time to pot up, divide, or start a windowsill pot for winter alongside the herbs in our guide to growing herbs indoors year round.
Table of Contents
At a Glance
- Mint (Mentha spp.) spreads by rhizomes, horizontal underground stems, and by ordinary stems that root wherever they touch soil. Containment is physical, so the pot does the work.
- Stand the pot on a paver, patio or balcony floor, not on soil or mulch, so rhizomes can’t slip out through the drainage holes.
- Full sun or part shade, up to 1 to 2 inches of water a week in hot weather, and one feed in spring. More than that invites rust rather than more mint.
- Harvest hard: cut stems to about an inch above the soil two or three times a season and pinch off flower spikes.
- ASPCA lists mint as toxic to cats and dogs (vomiting and diarrhoea with large amounts), so keep the pot where a chewer can’t graze.
Best for anyone with a pot and a few hours of sun. Choose a sunken pot or buried barrier only if you have to plant in a bed, and expect to patrol its edges.
What You’ll Need
One mint plant, one pot with drainage holes and one hard place to stand it are the essentials. Everything else just makes the job easier.
Essentials:
- A named mint plant from a nursery (see the table below).
- A pot with drainage holes, 10 to 15 inches deep and at least 12 inches wide (reasons in Step 1).
- Good quality potting mix with some compost in it; garden soil compacts in pots.
- A paver, a tile or a plain saucer to set the pot on.
Optional:
- A second pot and a serrated knife, for dividing a crowded clump.
- A slow-release complete fertilizer such as 16-16-16, for one spring feed.
- Pruners or kitchen scissors.
- A bottomless pot or plastic landscape edging, only for planting in a bed (see If You Must Plant Mint in a Bed).
Mint comes in hundreds of varieties. These four are easy to find at US nurseries and cover most kitchen uses.
| Variety | Botanical name | Best use | Sun note |
|---|---|---|---|
| Spearmint | Mentha spicata | Tea, mojitos, lamb, mint sauce, “mint” in most recipes | Full sun to part shade; copes best in hot, dry spots |
| Peppermint | Mentha x piperita | Tea and sweets | Full sun to part shade; less happy in hot, dry spots than spearmint |
| Orange mint | Mentha x piperita var. citrata | Citrus-scented drinks and desserts | Full sun to part shade |
| Pineapple mint | Mentha suaveolens ‘Variegata’ | Garnish and fruit dishes | Part shade; variegated leaves can scorch in full sun |
Skip “mint” seed packets. Mints hybridise freely, so seed-grown plants are often not the flavour on the label.
Before You Start
Check your light, floor, pets and zone before the plant goes in; each changes a detail of the set-up.
Light first. Spearmint grows in full sun (6 or more hours) or partial shade (2 to 6 hours), and it does not do well in dry soil. On a hot south or west balcony, afternoon shade keeps the pot from wilting by three o’clock. On a north balcony it grows leggier, so you’ll harvest more often.
Floor second. Concrete, tile, decking and pavers all work. Bare soil, a mulched bed and gravel over soil do not, because a rhizome will find its way down. A balcony floor is ideal, and a saucer keeps drainage water off the neighbour below.
Pets third. ASPCA lists mint (Mentha sp.) as toxic to dogs, cats and horses, with vomiting and diarrhoea after large ingestions, because of its essential oils. A nibble is unlikely to cause trouble, but a cat that grazes should not have free access; put the pot on a railing shelf or behind other pots.
Zone last. Spearmint is hardy in the ground across USDA zones 4 to 9, and the common culinary mints survive winters near -20 F with their roots in garden soil. Roots in a pot are far more exposed, so in zones 4 to 6 tuck the pot against the building or wrap it before hard frost, as covered in our guide to winterizing potted plants on a balcony.
A quick check for fall: Grow if you have a pot, a hard floor and at least 2 hours of direct sun. Adjust if your spot is hot and dry (afternoon shade, one size larger) or shady (harvest more often). Skip planting it loose in a shared bed you can’t patrol; established mint in open ground is very hard to remove.
Step-by-Step: How to Grow Mint without It Taking Over
Seven steps in the order a first-time grower meets them: three to set up the pot, four habits that keep it productive and contained.
Step 1: Choose a Mint and a Pot That Is Deep Enough
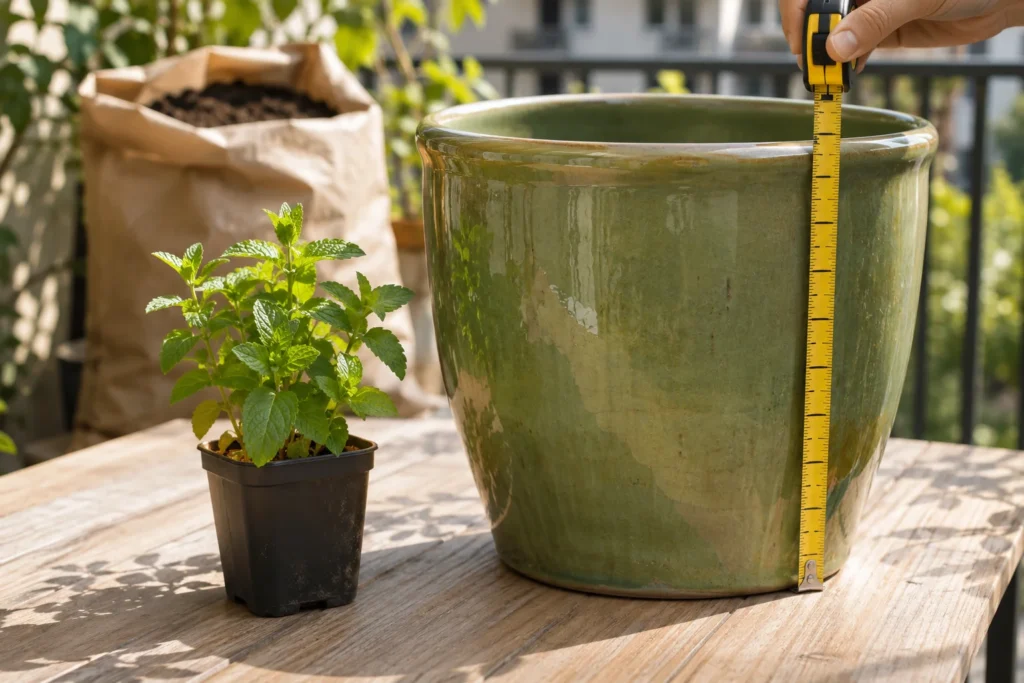
Pick the variety from the table above, then a pot 10 to 15 inches deep and at least 12 inches wide. The depth comes from extension advice on confining mint rhizomes, which recommends containers that extend 3 to 4 inches above and 10 to 15 inches below the soil when sunk in a bed; a freestanding pot of the same depth gives the roots the room they want. The width matches the 12 inches of space a single spearmint uses, since it grows roughly 1 to 2 feet high and wide in a pot.
Plastic and glazed stoneware hold moisture; bare terracotta dries out fast in wind, which means daily watering in July. If you love the terracotta look, line it with a plastic pot.
For a first pot we’d start with spearmint, because it handles heat better than peppermint and it is the mint most recipes mean.
Step 2: Plant It in Rich, Moist Potting Mix
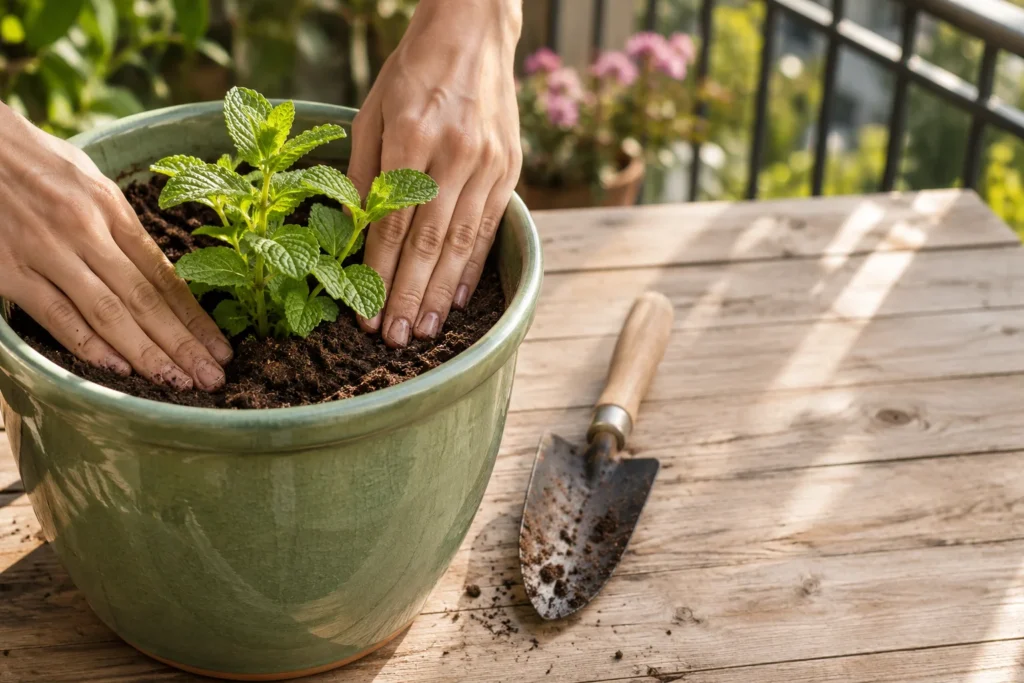
Fill the pot to about an inch below the rim, make a hole the size of the nursery pot, and set the plant so the top of its root ball sits just under the surface. Firm gently and water until it drains from the holes.
One plant per pot. Mint will crowd out basil or parsley in a shared planter within a season. It tolerates a pH of about 6.0 to 8.0, so ordinary potting mix needs no adjustment.
Step 3: Stand the Pot on a Hard Surface, Not on Soil
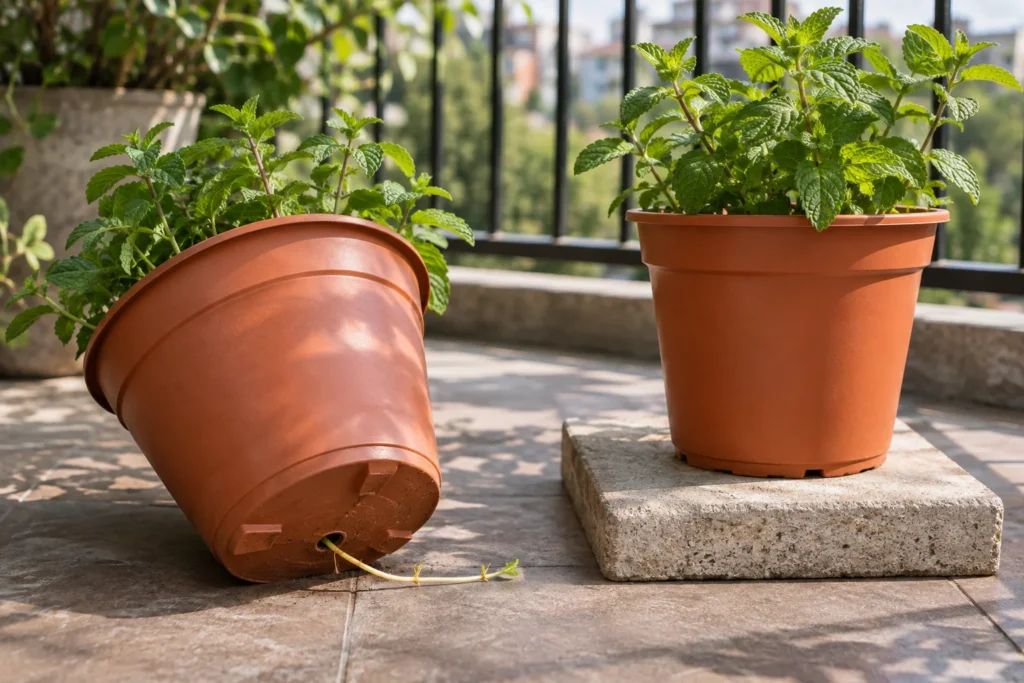
Put the finished pot on a paver, tile, patio slab or the balcony floor itself. A pot sitting on soil has an open door at the bottom: rhizomes can grow straight out through the drainage holes into the ground below. An impervious surface closes that door while still letting water drain.
In our view the floor under the pot is the real barrier, and the pot is just the shape of it. If the pot has to sit in a bed for looks, set it on a paver first and give it a quarter turn whenever you water, so any root tip that finds a hole breaks off before it anchors. On a balcony a saucer works as well; tip it out after watering, because mint dislikes standing water as much as dry soil.
Step 4: Water and Feed Lightly
Keep the mix moist, not soggy. In warm weather a pot of mint uses up to 1 to 2 inches of water a week, more on a windy upper-floor balcony, so check the top inch with a finger every couple of days and water the soil, keeping the leaves dry. Leaves that stay wet overnight invite rust, so water in the morning, or use a build like our self-watering container for a balcony, which keeps the mix even without splashing the foliage.
Feed once. Work about one teaspoon of 16-16-16 slow-release fertilizer into the top of the mix as growth starts in spring. That’s it for the year: over-watering and over-fertilizing promote rust and lower the oil in the leaves, so a hungry-looking mint is usually asking for sun or a harvest.
Step 5: Harvest Hard and Pinch the Flowers
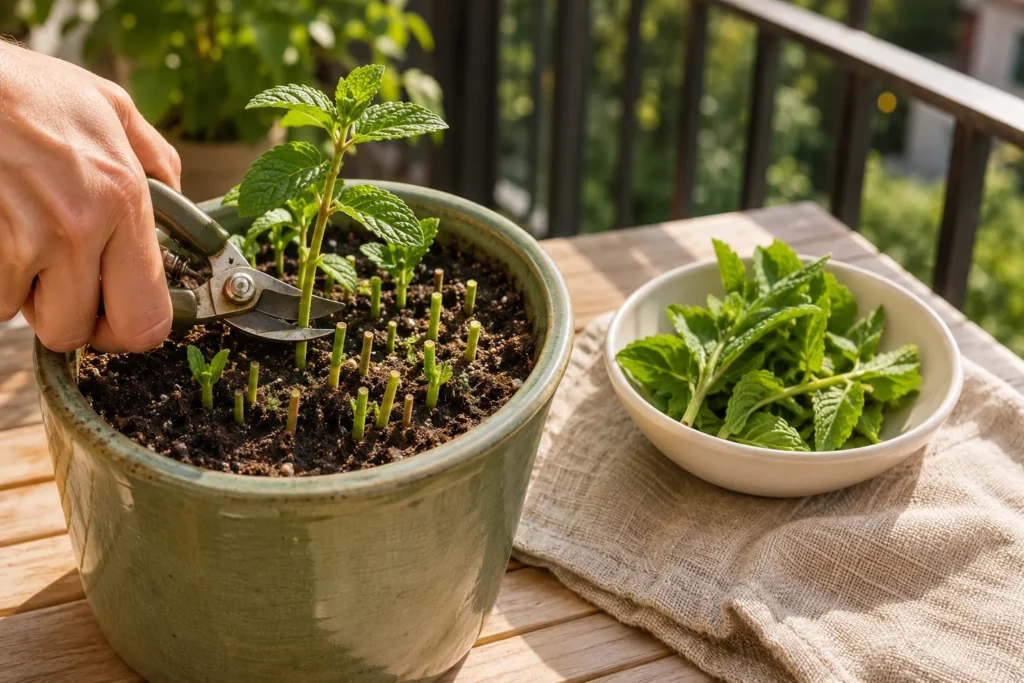
Start cutting once the plant is 3 to 4 inches tall, and keep cutting all season. For a big harvest, cut every stem to within an inch of the soil just before the plant blooms, two or three times a season, late morning on a dry day when the oils are strongest. For daily use, snip the top few inches just above a pair of leaves and the stem branches from there.
Flower spikes appear from midsummer into fall, and once a mint blooms its oil drops and the leaves lose flavour. Pinch spikes as they show, or shear the plant after bloom. It is very hard to over-prune a mint, and a plant cut often stays compact.
Step 6: Patrol the Edges Every Week
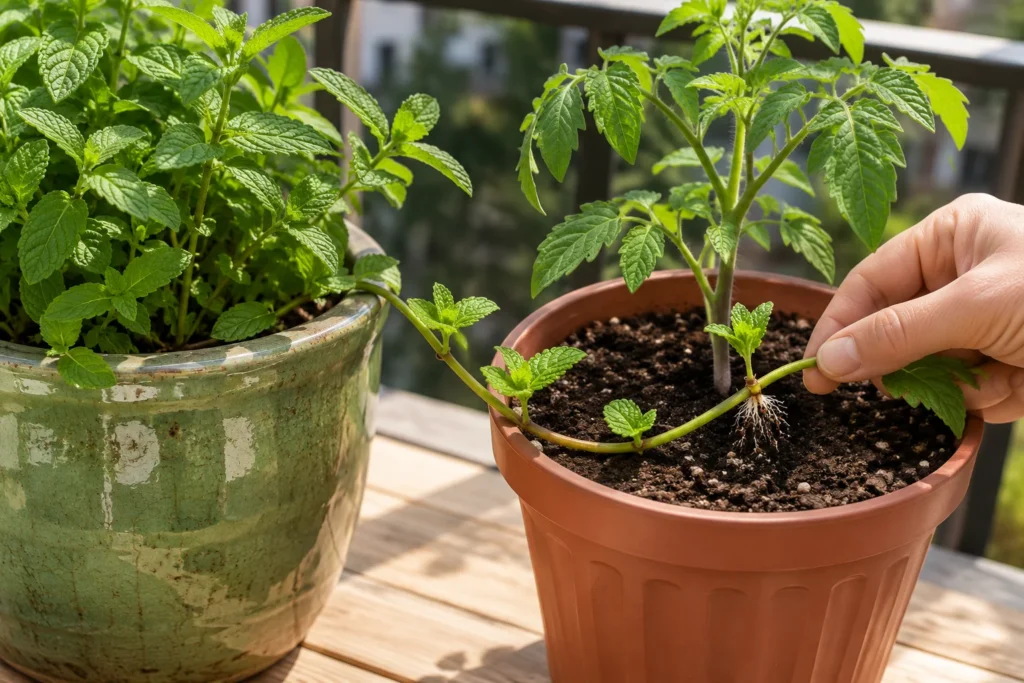
Once a week, lift any stem hanging over the rim and check where its tip is resting. Mint’s square stems root wherever they touch soil, so a stem that drapes into the pot next door will anchor there and start a second plant that no barrier stops. Trim trailing stems back to the rim, or tuck them into the clump.
In my balcony containers this is the escape route I actually see: a stem that quietly arched over the rim and rooted into the tomato pot beside it before I noticed. The fix was a two-second tug, but only because I caught it early.
While you’re there, glance at the floor around the base. A pale shoot beside the pot means a rhizome got out through a drainage hole; pull it with its roots and lift the pot onto a paver or saucer.
Step 7: Divide and Refresh the Pot Every Few Years
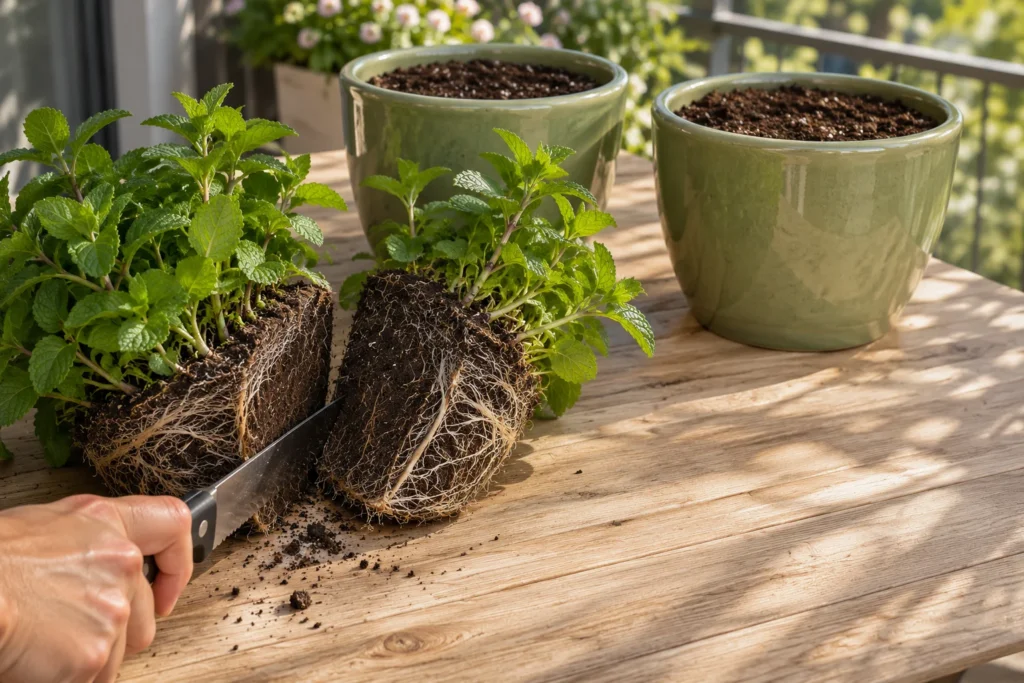
A pot of mint turns into a solid mat of roots within a few seasons, and growth and flavour fade. Divide it every 3 to 4 years, or sooner if water runs straight through and the centre looks bare, in spring before growth starts or in early fall. Tip the clump out, cut it into halves or quarters with a serrated knife, and repot one piece in fresh mix in the same pot. Before winter, cut all the stems to the ground to clear out overwintering pests and disease.
The first time I divided the mint in my courtyard pot it looked sulky for a while and then came back thicker than before, so don’t read the pause as a mistake. To multiply it without disturbing the roots, stand a cut stem in a glass of water; it roots in about two weeks, the same method as our guide to propagating houseplants from cuttings.
If You Must Plant Mint in a Bed
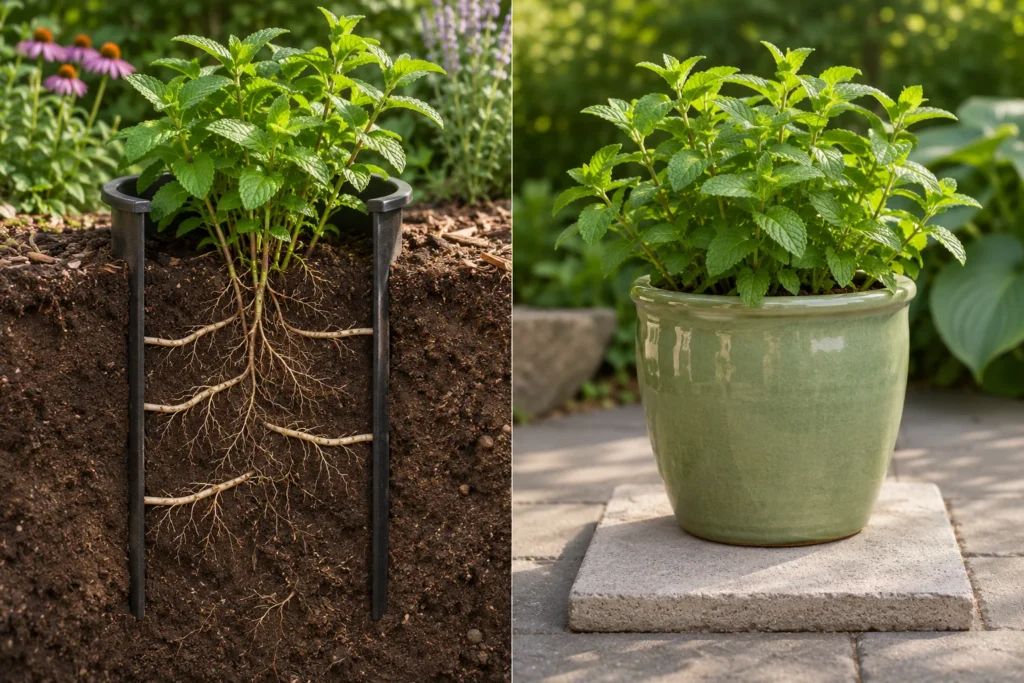
A pot on a paver is the reliable method; a sunken pot or buried barrier is the compromise for a bed you don’t want to give up, and it needs the same weekly patrol as Step 6.
The standard set-up is a bottomless container sunk into the bed with its rim 3 to 4 inches above the soil and 10 to 15 inches below it. The rim stops stems rooting over the edge; the depth is what rhizomes have to get under. In loose, sandy or deeply dug soil, go to 18 inches. Plastic landscape edging buried to the same depth does the same job around an existing clump, and a raised bed with solid sides gives mint its own territory.
We’d treat the sunken pot as a management tool rather than a guarantee: Illinois Extension notes the technique does not always prove successful and mints can move away from the container. Plant mint loose in open ground only where it can be mowed around or where you want a mint carpet.
| Method | Set-up | Reliability | Best for |
|---|---|---|---|
| Pot on a hard surface | 10 to 15 in deep pot on paver, patio or balcony floor | High, with a weekly stem check | Balconies, patios, renters |
| Sunken bottomless pot | Rim 3 to 4 in above soil, 10 to 15 in below (18 in loose soil) | Moderate; check edges | A mint spot inside a herb bed |
| Buried barrier | Plastic edging to the same depth | Moderate; same patrol | An existing in-ground clump |
| Raised bed with solid sides | Mint gets the whole bed | High inside the bed | A dedicated mint or tea bed |
Season Calendar for Potted Mint
Timing goes by plant stage and your frost dates, so shift each row earlier in warm zones and later in cold ones.
| Season | Do this | Why |
|---|---|---|
| Spring (growth resumes) | One feed of 16-16-16; divide if the pot is solid roots; first cut at 3 to 4 inches tall | A single feed sets up the season without inviting rust |
| Summer | Water as in Step 4; hard cut before each bloom; weekly stem patrol | Cutting before bloom keeps oil in the leaves and stems off the neighbours |
| Fall (now) | Last hard cut; divide if overdue; root a few stems in water for a windowsill pot; shelter the pot before hard frost in zones 4 to 6 | Early-fall divisions settle before dormancy; cuttings root in about two weeks |
| Winter | Cut old stems to the ground; keep the pot sheltered and barely moist | Clearing stems removes overwintering pests and disease |
Common Mistakes
These slips cause most “my mint escaped” stories.
- Setting the pot on soil or mulch “just for the summer”. Rhizomes don’t wait for permission; see Step 3.
- Planting mint in a shared herb planter. It will take the planter.
- Letting it flower all summer for the bees. The leaves lose flavour; pinch most spikes and leave one or two late ones for the pollinators.
- Expecting spearmint from a seed packet labelled “mint”. Buy a named plant.
- Tossing pulled runners into a bed or compost bin. Pieces of rhizome root easily. Bag them, or root them on purpose in a jar among our indoor herb garden kitchen window ideas.
Troubleshooting
Orange or reddish freckles on the undersides of leaves
Mint rust: small, slightly raised whitish spots that turn reddish orange or brown on the undersides, lower leaves first. Sun scorch is different: pale, papery patches on the upper surface, mostly on variegated types in full sun. For rust, cut off and bag the affected stems, stop extra feeding, and water the soil in the morning so leaves are dry by night. A pot that rusts badly every year is best replaced with a new plant in fresh mix.
Mint sprouting in the next pot or in the bed below
Either a stem rooted over the rim or a rhizome left through a drainage hole. Follow the shoot back: a draped stem gets cut and its rooted piece pulled; a shoot from under the pot means lifting the pot onto a paver and digging out every white piece of rhizome, then checking the spot again in two weeks.
Pale, stretched stems with small leaves
Too little light is the usual cause; mints go leggy in shade. Move the pot somewhere brighter and cut the stretched growth back to an inch. If the pot already gets 6 hours of sun, the clump is probably root-bound and due for dividing.
Wilting by mid-afternoon, perking up by evening
The pot is drying faster than you’re watering, common in a small or unglazed pot on a hot, windy balcony. Water deeply until it drains, add afternoon shade, and move to a plastic or glazed pot at the next repot. If the mix stays wet and the plant still wilts, empty the saucer; the roots may be standing in water.
Bitter, woody stems and weak flavour
The plant has bloomed or grown old without a hard cut. Shear it to an inch above the soil and use the fresh regrowth. If the pot is several years old and the regrowth is thin, it is time for Step 7.
Frequently Asked Questions
How many mint plants does one household need?
One or two. A single established plant in a 12-inch pot supplies fresh cuttings for daily use through the season, and each plant can be cut back hard two or three times a year. Add a second pot only if you dry or freeze mint in quantity, or want a second variety such as peppermint next to spearmint.
Can I root a bunch of mint from the grocery store?
Yes, as long as the stems are fresh and not slimy. Trim each stem to a few inches, strip the lower leaves, stand it in a glass of water on a bright windowsill and change the water every few days. Roots usually show in about two weeks, after which the stem goes into a small pot of moist mix and then into its own deep pot once it has filled that one.
Will potted mint survive winter outdoors?
In most of the country, yes, with help. The top growth dies back after hard frost and the plant regrows from its roots in spring. In the ground spearmint is hardy across zones 4 to 9; in a pot the roots have no soil insulation, so in zones 4 to 6 cut the stems to the ground, push the pot against the building or wrap it, and keep the mix barely moist. In zones 7 and up a sheltered corner is usually enough.
Does mint need a bigger pot every year?
No. A mint fills whatever pot it gets, so moving up a size each year just makes a heavier pot. Keep the same 10 to 15 inch deep pot and divide the clump every 3 to 4 years instead, repotting one quarter in fresh mix and giving the rest away. Water running straight through, a bare centre and thin regrowth are the signs that the pot is overdue (see Step 7).
My mint has already escaped into the bed. What now?
Dig it out now, before the rhizomes run further. Lift the whole patch with a fork, follow every white rhizome to its end and remove it, then check the spot again in two weeks and pull any new shoots with their roots. Established mint in open ground is very hard to remove, so plan on two or three rounds. Bag what you pull rather than composting it, and put the piece you want to keep into a pot on a paver as in If You Must Plant Mint in a Bed.
What Actually Matters
How to grow mint without it taking over comes down to this: its roots can’t reach soil and its stems can’t reach a neighbour. A deep pot on a hard floor handles the first; a weekly glance at the rim handles the second. Everything else is ordinary herb care.
If you change one thing today, lift your mint pot off the soil and onto a paver or saucer. It takes less time than making the tea.
This week, divide if your clump is overdue and stand a few cut stems in a jar of water for a windowsill pot through winter. Once that jar has roots, it fits right in with our mason jar herb garden ideas.
Sources
- Utah State University Extension – How to Grow Mint in Your Garden – container depths, water per week, spring fertilizer rate, rust causes, harvest heights and frequency, dividing season, winter cutback, hardiness, seed not true to type.
- NC State Extension Gardener Plant Toolbox – Mentha spicata (Spearmint) – zones, size and spacing, sun hours, pH, stems rooting on contact, rhizome spread, barriers and raised beds, bloom time.
- ASPCA Animal Poison Control – Toxic and Non-Toxic Plants: Mint – toxicity to dogs, cats and horses and the clinical signs.
- University of Illinois Extension – Herbs: Mint – dividing every 3 to 4 years, flower spikes, sunken containers not always successful.
- UC Agriculture and Natural Resources, Under the Solano Sun – Contain-Mint – pots on an impervious surface, drainage-hole escape, 18-inch barriers, afternoon shade in hot dry climates, spearmint versus peppermint in heat.
- Herb Society of America, South Texas Unit – Mint – variety names, leggy growth in shade, 10-inch landscape border, rust freckles, older stems bitter and woody.
- Mississippi State University Extension – Enjoy growing mint without any trouble – stem cuttings rooting in water in a couple of weeks.